Mexican Food Journal

  • Recipes
  • About
  • Contact
  • Subscribe
menu icon
go to homepage
  • Recipes
  • About
  • Contact
  • Subscribe
search icon
Homepage link
  • Recipes
  • About
  • Contact
  • Subscribe
×
Home

Cascabel Salsa

Salsas & Sauces

Chile Cascabel Salsa

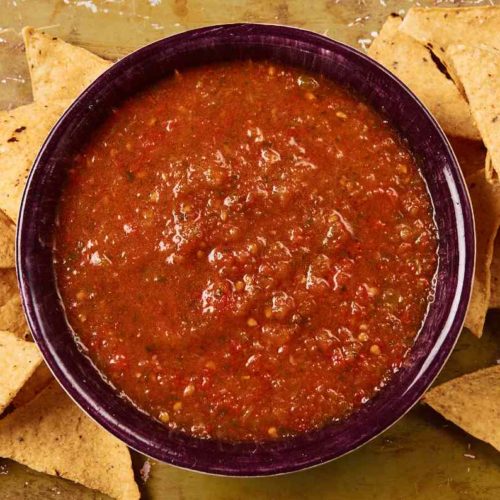
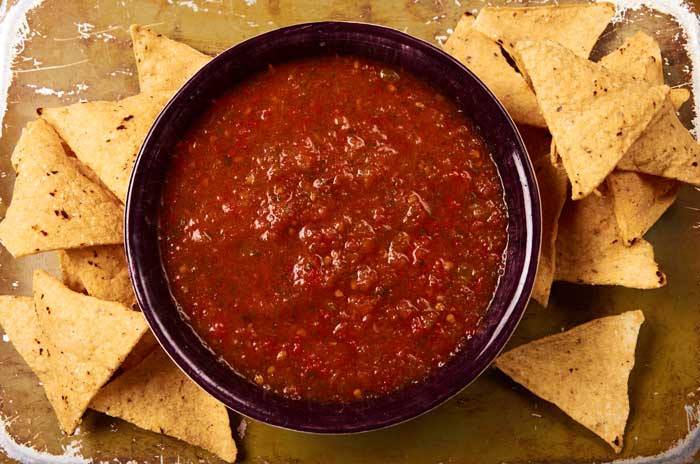
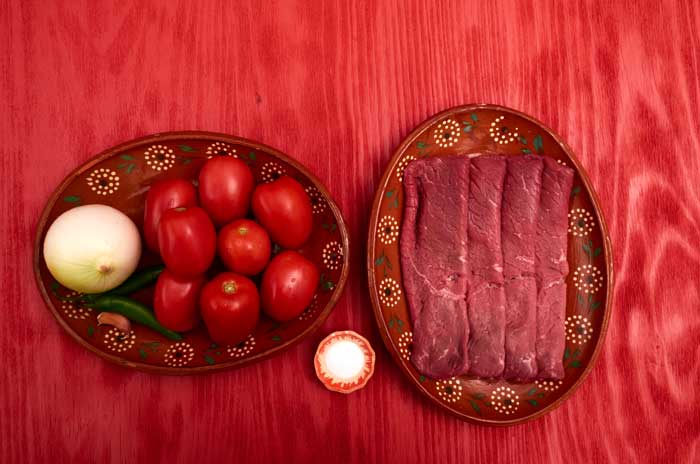
Salsa de Chile Cascabel

Enjoy this amazing chile cascabel salsa created by Mely Martinez from Mexico in My Kitchen, our favorite Mexican food blog. Mely was born and raised in Tampico, Tamaulipas in Northern Mexico where she learned to cook traditional dishes from a young age.

Now she shares her favorite recipes on her blog and her Facebook page. Be sure to visit. You won’t be disappointed.

Chile Cascabel Salsa

An Uncommon Salsa

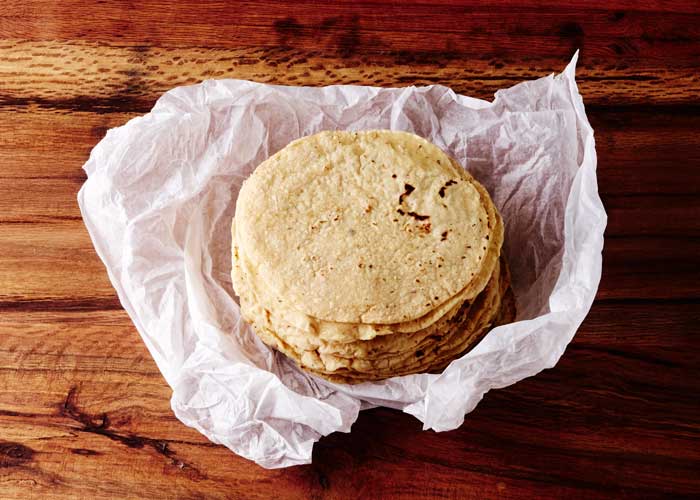
There are very few popular dishes or stews in Mexico that mention the Cascabel pepper as an ingredient. In fact, I have only seen it as a part of salsas cooked with tomato or tomatillo in Central Mexico, in those small street stands where a woman offers freshly made thick corn tortillas cooked on a small charcoal stove.

Ingredients Cascabel Salsa

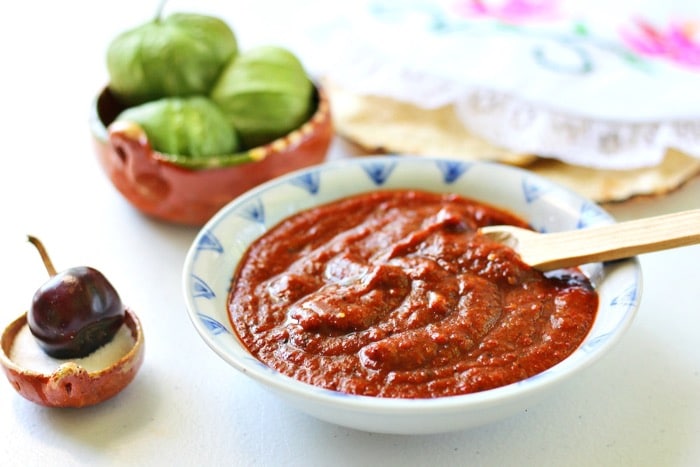
Those thick tortillas, made of either white or blue corn, are a really delicious treat when topped with this Cascabel salsa and fresh crumbled cheese. And that’s just the way I like to use the salsa in this recipe!

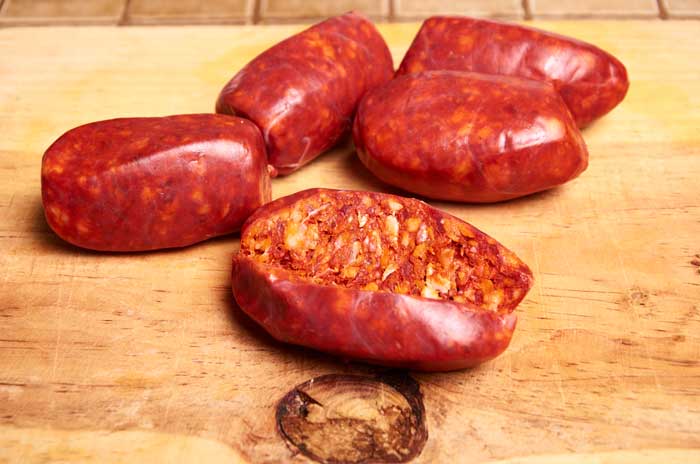
Cascabel Chiles, the “Rattle” Chiles

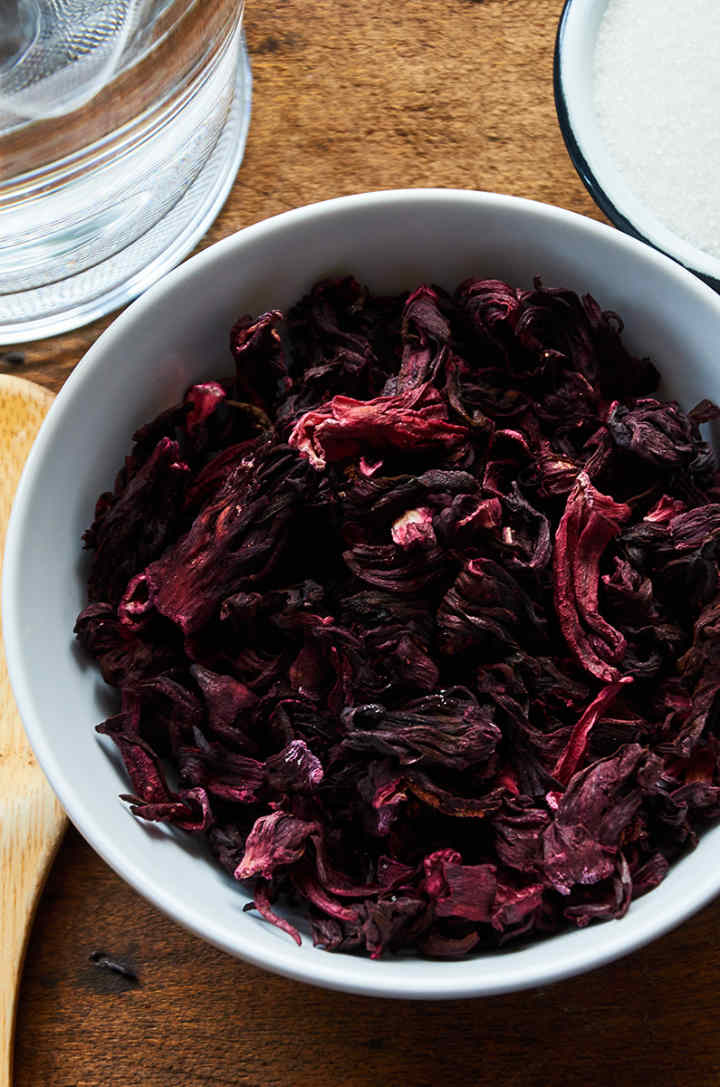
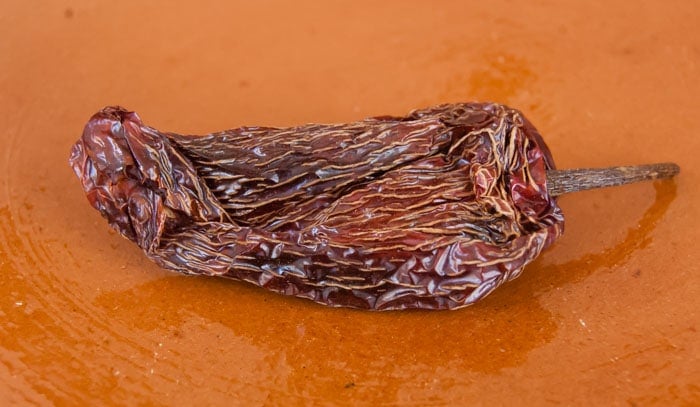
The Cascabel pepper has a dark brown-colored skin with a spherical shape, and is unique because of its particular taste and aroma. The peppers are not too spicy; I would say they are rather mild and sweet for my personal taste. The flavor, however, is incomparable. It has a rustic nutty taste after you roast it and soak it for some minutes, in order to soften them.

Cascabel means “rattle” in Spanish, and this spherical pepper rattles when you shake it because of its loose seeds inside (hence the name Cascabel). It’s Scoville rating is 1,300-2,000 SHU. Just to give you an idea, Ancho and Pasilla peppers are also around the same spiciness level.

Preparing the Chiles

Toasting Cascabel Peppers
Toast the chiles to develop flavor.
Soaking Cascabel Chiles
Reconstitute the chiles.
Reconstituted Cascabel Chiles
Perfectly reconstituted cascabel chiles.

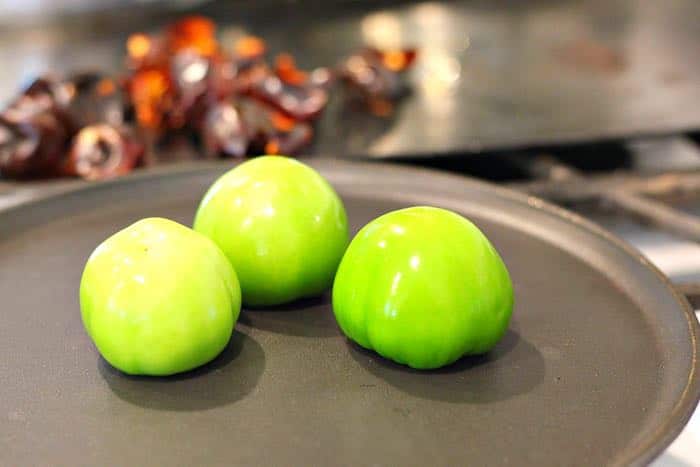
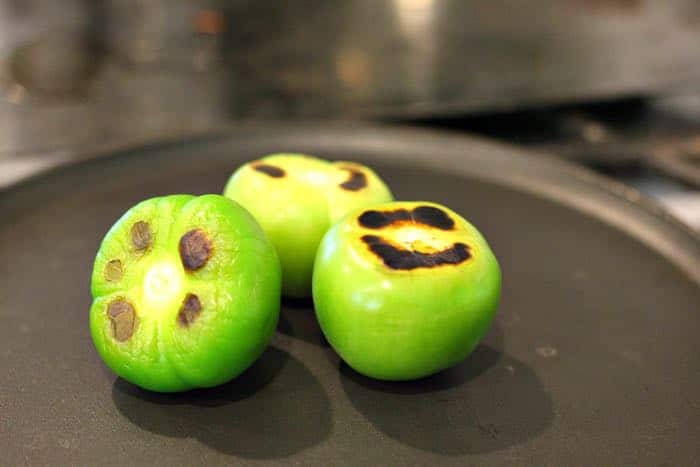
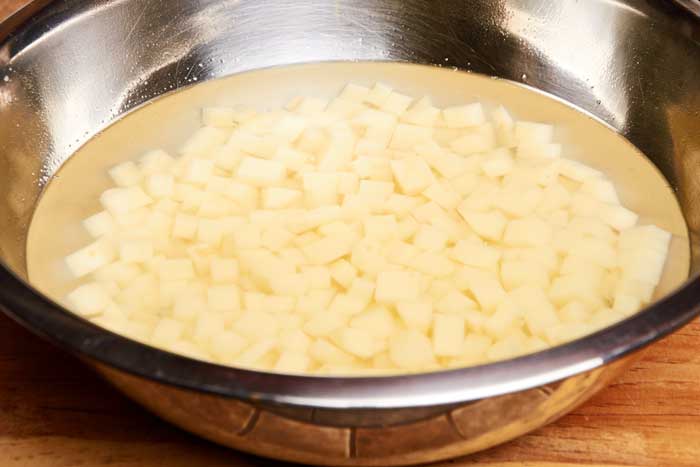
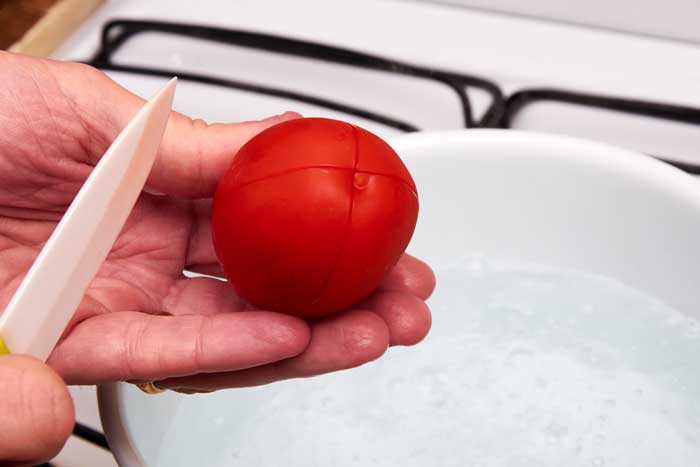
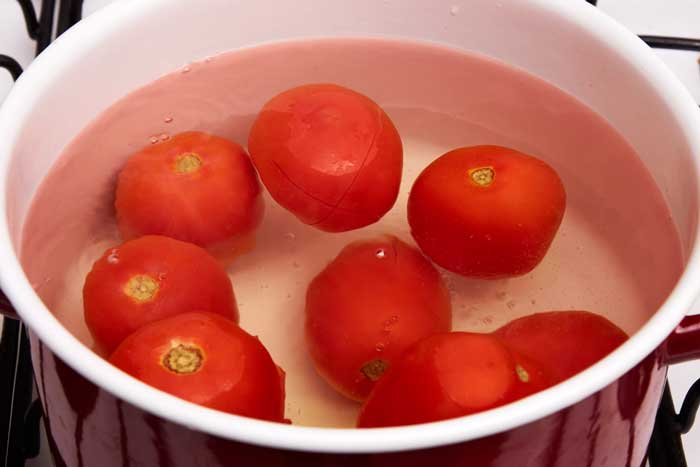
Preparing the Tomatillos
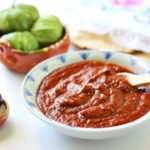
Tomatillos on Griddle
Roast the tomatillos on a griddle, or “comal.”
Griddle Roasting Tomatillos
Blacken the tomatillos all over.
Roasted Tomatillos
Perfectly roasted tomatillos ready to make salsa.
Chile Cascabel Salsa
Print Recipe
3.80 from 10 votes

Cascabel Salsa

Recipe for a smoky cascabel chile salsa typically served at street stands in Central Mexico, created by Mely Martinez from Mexico in My Kitchen, our favorite Mexican food blog.
Prep Time10 minutes mins
Cook Time20 minutes mins
Total Time30 minutes mins
Course: Salsa
Cuisine: Mexican
Keyword: chili peppers, dried peppers, Sauce
Servings: 4
Calories: 14kcal
Author: Mely Martinez

Ingredients

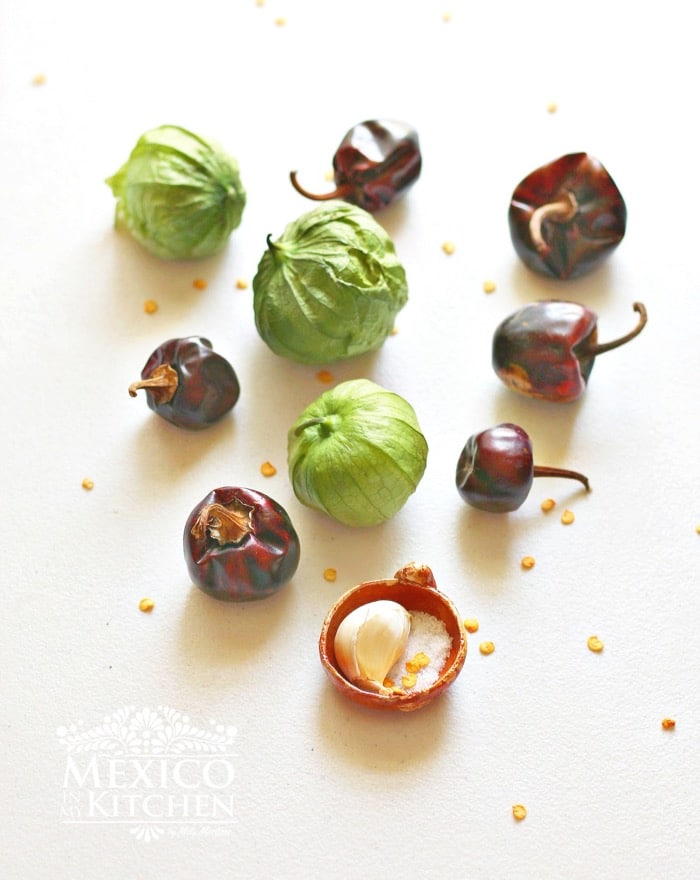
  • 5 ½ ounces tomatillo
  • 1 ounce cascabel peppers about 7 peppers
  • 1 garlic clove
  • salt and pepper to taste

Instructions

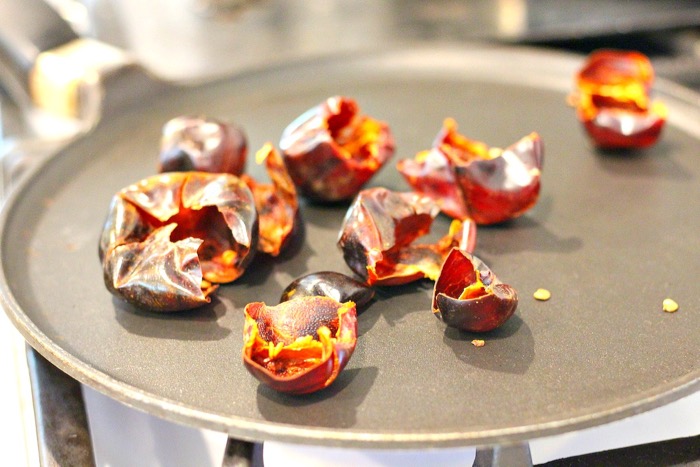
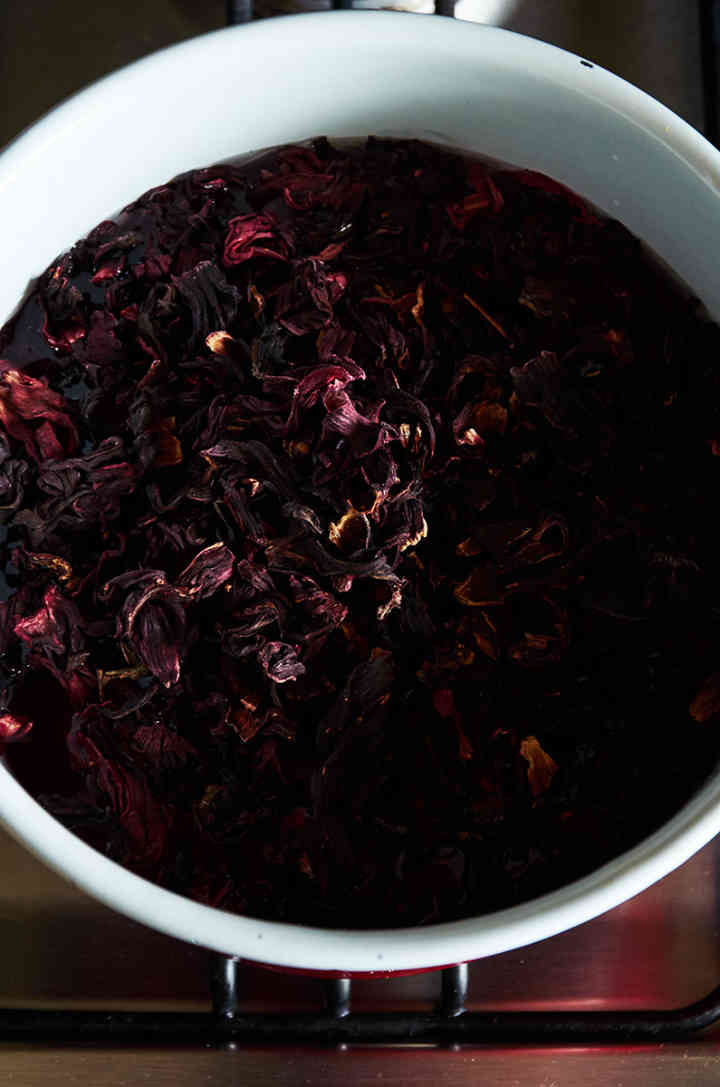
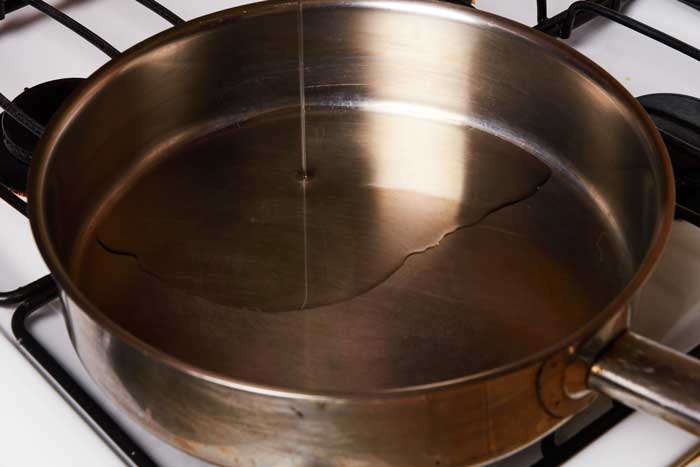
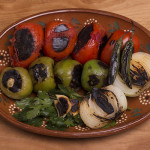
  • Break the peppers into pieces for a better roasting. Slightly roast the peppers on a medium hot griddle, turning the peppers to have an even roasting. Turn frequently to avoid burning the peppers. This step will take about 1-2 minutes.
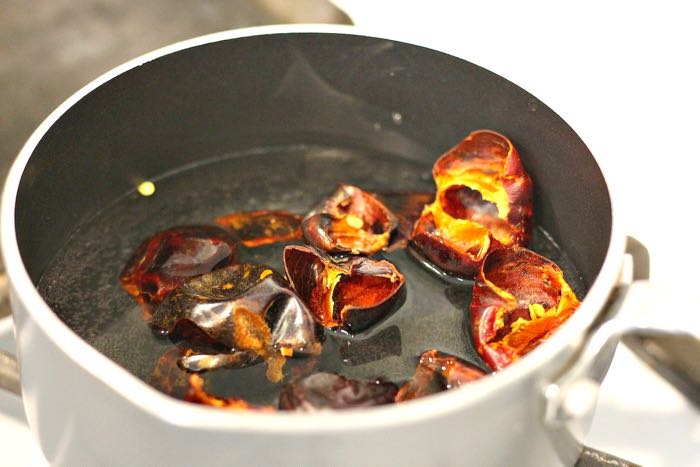
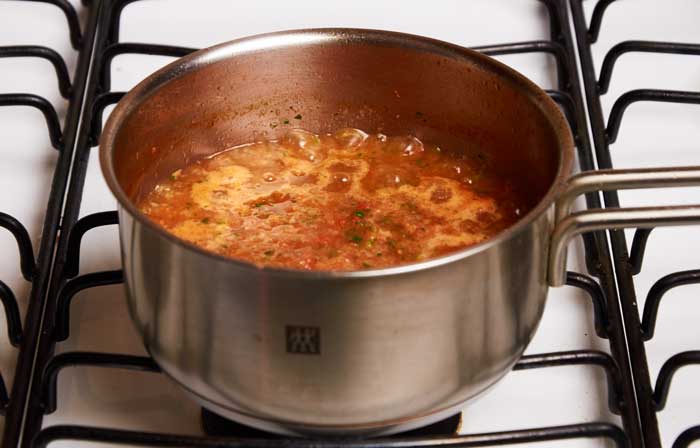
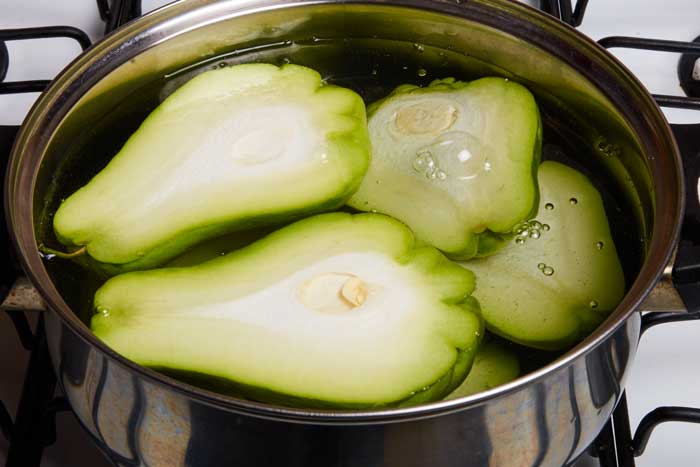
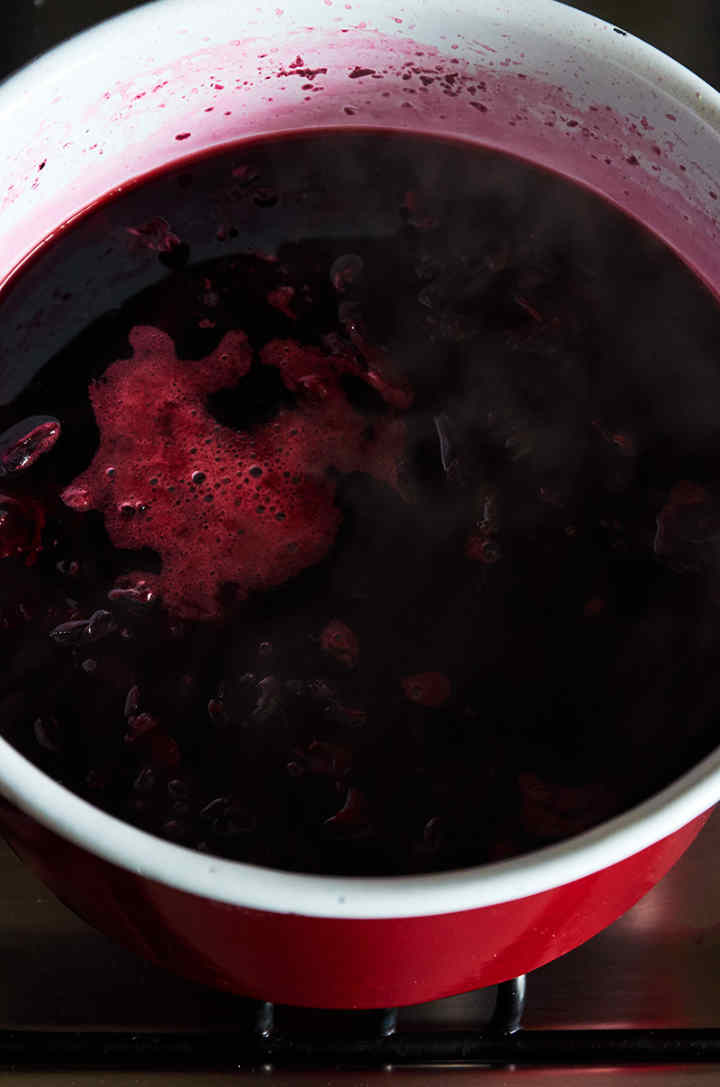
  • Once you roast the peppers, place them in a small saucepan with 2 cups of hot water to soak for about 15 minutes, or until they are soft.
  • Meanwhile, roast the tomatillos on the hot griddle, and once they are roasted, wrap them in an aluminum foil to keep warm while the peppers are soaking.
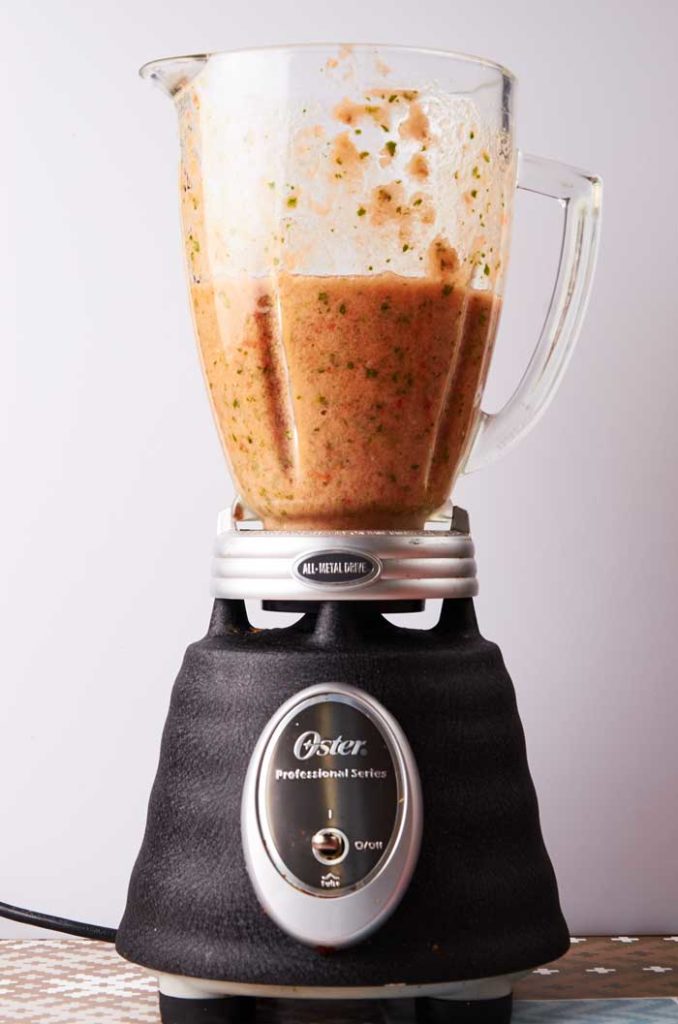
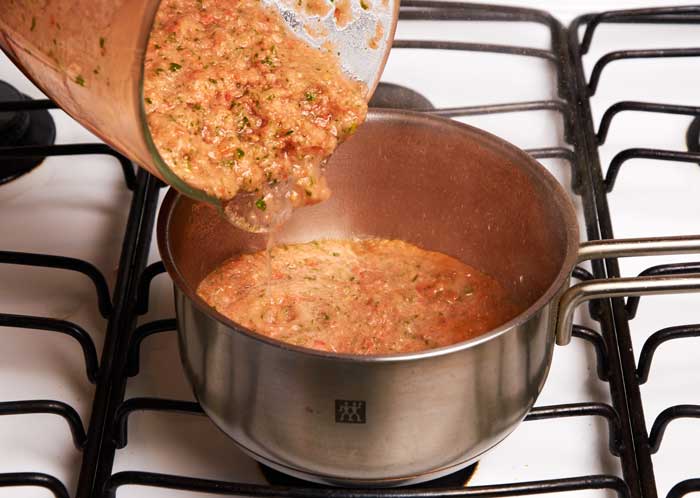
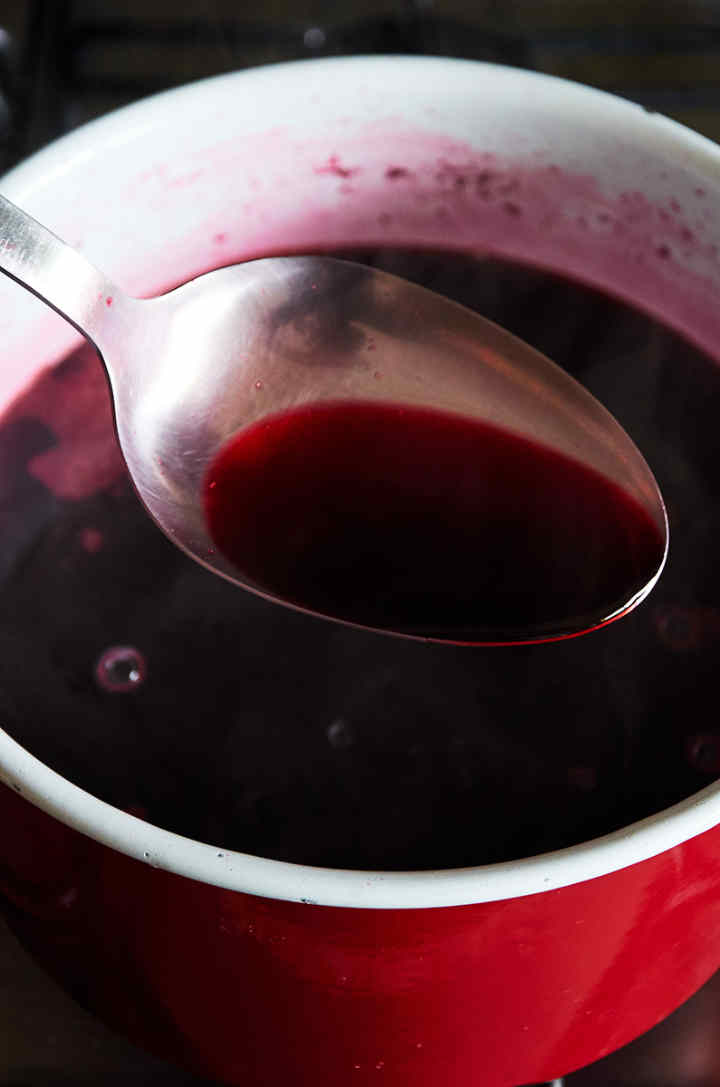
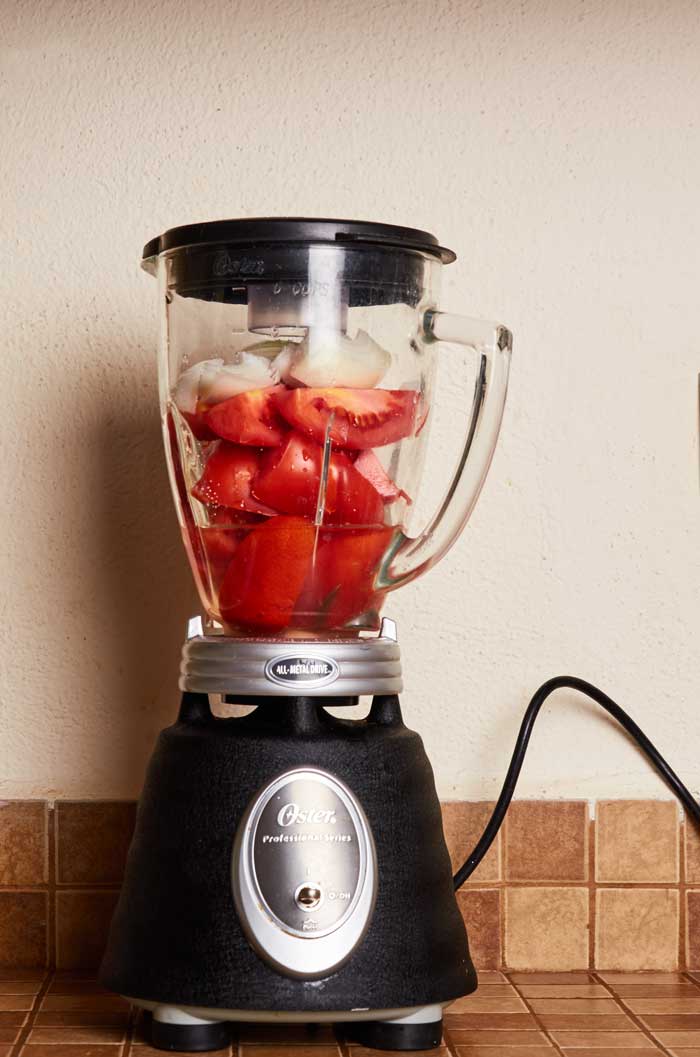
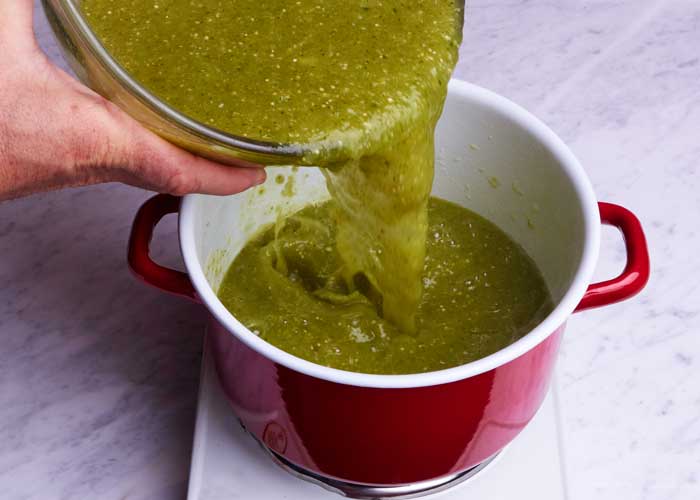
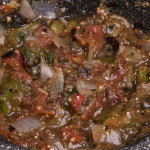
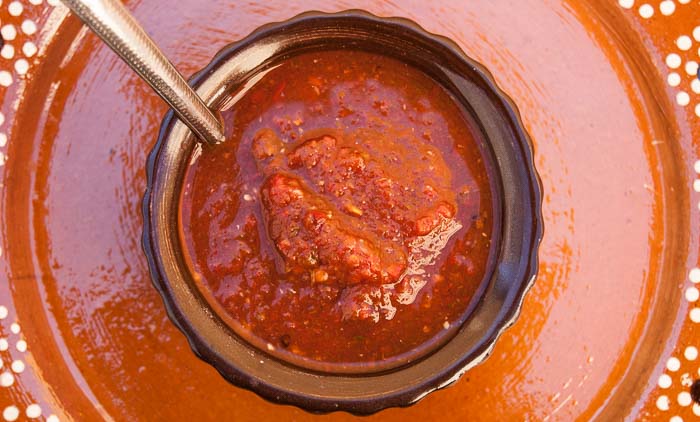
  • Place tomatillos, softened peppers, garlic clove, and ½ cup of water into your blender pitcher and process until you have a smooth sauce. If you like, you can also puree the sauce in a food processor to give the salsa a coarse texture. Season with salt and pepper.

Notes

Serve over meats, beans, eggs, and potato tacos.

Nutrition

Calories: 14kcal | Carbohydrates: 3g | Protein: 1g | Fat: 1g | Saturated Fat: 1g | Sodium: 239mg | Potassium: 104mg | Fiber: 1g | Sugar: 2g | Vitamin A: 45IU | Vitamin C: 4.8mg | Calcium: 3mg | Iron: 0.2mg

Mores Salsa Recipes

  • Salsa Verde
  • Red Enchilada Sauce
  • Restaurant Salsa
  • Guajillo Chile Salsa
  • Salsa Taquera

Quesadillas and Sincronizadas

Cheese Recipes

Sincronizadas with Guacamole

Mexican Style Quesadillas

Quesadillas are a staple in every Mexican home and fondas, the small mom-and-pop restaurants found throughout the country.

You might be surprised to find that quesadillas in Mexico aren’t the cheese-filled extravaganzas we are used to in the U.S.

A typical quesadilla is made with a corn tortilla and a small amount of cheese served with a good salsa and some guacamole on the side.

Authentic Mexican Quesadillas

Sincronizadas

Sincronizadas are ham and cheese quesadillas. The name translates as “synchronized.” Most often sincronizadas are prepared with flour tortillas but corn tortillas are on option.

The tortillas aren’t folded with cheese in the middle. The tortillas are stacked with the filling in the middle and then cut into half-moons or triangles.

Sincronizadas
Sincronizadas, ham, and cheese quesadillas.

Good Cheese Makes a Good Quesadilla

If you want a good quesadilla or sincronizada you have to use a good quality cheese. Oaxaca cheese, asadero cheese, manchego cheese, and Chihuahua cheese are all good options. In a pinch, you can use mozzarella. Quesadillas are never made with cheddar.

Ingredients to make quesadillas and sincronizadas.

Try Preparing With Different Cheeses

Each Mexican cheese gives your quesadillas a distinct flavor. Try a number of different cheeses until you find your favorite. My favorite is asadero.

How to Make a Mexican Quesadilla

You always want to make quesadillas on the griddle never in a microwave. Microwaving them makes the tortilla soggy. You want them to be golden brown with the cheese evenly melted.

Don’t overdo it with the cheese. The flavors of the cheese and tortilla should be nicely balanced. Quesadillas prepared with flour tortillas are more popular in Northern Mexico in the states of Sonora, Chihuahua, Nuevo Leon and Taumalipas.

Tortilla on Comal
Start by heating your tortilla until it is pliable.
Manchego Cheese on Tortilla
Add a small amount of grated cheese, about ½ ounce.
Cooking Quesadillas
Fold the tortilla over the cheese.
Quesadilla on the Comal
Cook until the tortilla is golden brown on both sides.

How to Make a Sincronizada

You will enjoy this ham and cheese variation on a quesadilla. It makes a heartier meal.

Flour Tortilla on Comal
Start by warming your tortilla until pliable.
Cheese on Flour Tortilla
Top with grated cheese, about 1 ounce.
Ham and Cheese on Tortilla
Add a few slices of ham.
Ham and Cheese on Flour Tortilla
Add a little more cheese, about 1 ounce.
Making a Sincronizada
Top with the second flour tortilla.
Sincronizada on the Comal
Cook until the tortilla is golden brown. It’s ready to serve.

Did you know that quesadillas are delicious when you prepare them on the grill?

  • Provecho!
Authentic Mexican Quesadillas
Print Recipe
3.75 from 4 votes

Quesadillas

How to make authentic Mexican quesadillas.
Prep Time5 minutes mins
Cook Time10 minutes mins
Total Time15 minutes mins
Course: Appetizer
Cuisine: Mexican
Keyword: cheese, cheese quesadillas, corn tortillas, flour tortillas
Servings: 16 quesadillas
Calories: 99kcal
Author: Douglas Cullen

Ingredients

  • 8 ounces of your favorite Mexican Cheese
  • 16 corn tortillas.

Instructions

  • Grate the cheese.
  • Warm each tortilla until pliable.
  • Add ½ ounce of cheese to each tortilla.
  • Fold in half.
  • Cook on each side until golden brown.
  • Serve with salsa and guacamole on the side.

Notes

  • You can also prepare with flour tortillas.
  • In Guanajuato, they serve quesadillas with slices of lime.

Nutrition

Calories: 99kcal | Carbohydrates: 12g | Protein: 5g | Fat: 4g | Saturated Fat: 2g | Cholesterol: 11mg | Sodium: 101mg | Potassium: 59mg | Fiber: 2g | Sugar: 1g | Vitamin A: 95IU | Calcium: 93mg | Iron: 0.4mg

More Quesadilla Recipes

  • Grilled Quesadillas
  • Huitlacoche Quesadillas

More Cheese Recipes

  • Asadero Cheese Tacos
  • Cheese Enchiladas with Mole
  • Strawberry Chipotle Cream Cheese Dip

Restaurant Style Salsa

Salsas & Sauces

Bowl of Mexican Restaurant Style Salsa

Salsa Roja or Salsa de Mesa or Salsa Mexicana

Simple, fresh, and easy to make. A winning Mexican restaurant style salsa prepared with plum tomatoes, onion, cilantro, and serrano peppers. Fresh tomatoes, not canned, star in this recipe.

Mexican Restaurant Salsa

In Mexico, it is known as salsa roja (red sauce)or salsa de mesa (table sauce). And just like in the U.S., it is served in every restaurant before your meal with tortilla chips.

Try With These Dishes

This salsa goes really well with quesadillas, carne asada, chorizo tacos, chicken fajitas, chicken taquitos, and nachos.

This is an easy Mexican salsa recipe that you will make again and again. Follow the simple steps to get great results every time.

Start with Fresh Ingredients. They Count

Homemade salsa starts with fresh ingredients. The fresher they are the better the results. Don’t use canned tomatoes. It gives the salsa a metallic taste.

You’ll notice that there aren’t any limes in the recipe. Whhhaaattt? Lime juice throws off the balance of flavors by overpowering the flavor of the tomatoes. But, if you prefer your salsa with lime try adding the juice from only one lime at a time until you get it perfect.

Ingredients

  • 1 pound plum (Roma) tomatoes
  • 1 half medium white onion
  • 2 serrano chiles or small jalapeños
  • 1 clove garlic (optional)
  • 8 sprigs fresh cilantro
  • 2 tablespoons cooking oil
  • 1 teaspoon salt
Restaurant Salsa Ingredients

Chop the Ingredients Before Blending

You need to chop the ingredients before adding them to the blender. Precise chopping isn’t important. You just need smaller pieces so that it is easier to blend without adding water.

Chopped Ingredients Restaurant Salsa

Don’t Add Water

Put all of the ingredients in your blender. Adding the tomatoes first makes it much easier to blend.

Do not add water unless it won’t blend and then only add 2 tablespoons of water at a time. Most of the time you won’t have to add any. Too much water makes the salsa runny.

You want a full-bodied slightly chunky tomato salsa.

Salsa Ingredients in Blender

Pulse to Get It Started

The easiest way to get it started it to pulse the blender 5 or 6 times until the blades start to catch. Then blend for about 30 to 45 seconds until it is fully blended but still has a coarse texture. The salsa sticks to tortilla chips better when it has a little texture.

Blended Salsa

Fry in Hot Oil

Once the salsa is blended, you are going to fry it in 2 tablespoons of hot cooking oil. To fry it you just pour it into the hot oil. This step is important to develop the flavor of the salsa and helps bind it. Don’t skip it.

Cooking Salsa

Simmer Until Perfect

Bring it to a boil and then reduce the heat to low. Simmer for 15 minutes until it has taken on a deep red color and has more body. Looks good, doesn’t it? The tomatoes need to be very ripe for the sauce to take on the deep red color in the photos.

Simmering Salsa Roja

There you have it, a delicious cooked salsa recipe!

Cool and Serve

Allow your restaurant salsa to cool and then serve with tortilla chips, tacos, or anything else you enjoy with salsa.

It is so easy to make you should always have some in your refrigerator. Let us know what you think!

Make it Your Go To Homemade Salsa Recipe. Provecho!

Mexican Restaurant Salsa and Chips
Print Recipe
3.69 from 505 votes

Restaurant Salsa Recipe

Authentic Mexican restaurant salsa prepared with fresh plum tomatoes, white onion, cilantro, and serrano peppers just like they make in Mexico. It's simple, fresh-tasting, and easy to make.
Prep Time10 minutes mins
Cook Time15 minutes mins
Total Time25 minutes mins
Course: Salsa
Cuisine: Mexican
Keyword: How to Make Restaurant Salsa, Restaurant Salsa, Restaurant Salsa Recipe
Servings: 4 servings
Calories: 60kcal
Author: Douglas Cullen

Ingredients

  • 1 pound plum Roma tomatoes
  • 1 half medium white onion
  • 2 serrano chiles or small jalapeños
  • 1 clove garlic optional
  • 8 sprigs cilantro fresh
  • 2 tbsp. cooking oil
  • 1 tsp. salt

Instructions

  • Remove the seeds and veins from the chiles (Leave them in if you want a hotter salsa)
  • Roughly chop the tomatoes, onion, chiles, and cilantro
  • Add the chopped vegetables to your blender (Do not add extra water unless needed and then add a couple of tablespoons at a time)
  • Add ½ teaspoon salt
  • Blend the salsa until it has a coarse texture
  • Preheat 2 tablespoons of oil in a pan
  • Pour the blended salsa in the hot oil
  • Bring to a boil and then reduce the heat to low
  • Simmer for 15 minutes
  • Adjust the salt

Notes

Only use 1 serrano chile if you prefer a milder salsa.
Add any or all of the following:
  • 1 clove of garlic
  • Juice from 1 lime
  • ¼ teaspoon cumin

Nutrition

Serving: 1/4 cup | Calories: 60kcal | Carbohydrates: 5g | Protein: 1g | Fat: 5g | Sodium: 338mg | Sugar: 3g

Tools

  • Cutting board
  • Kitchen knife
  • 4-quart pot
  • Kitchen spoon
  • Serving bowl

More Salsa Recipes

  • Easy Salsa Roja
  • Salsa Verde
  • Guajillo Salsa
  • Grilled Tomato Salsa
  • Enchilada Sauce

Best Mexican Food Blogs

Food Writers

Best Mexican Food Blogs

Fall in Love with the Food of Mexico

We want to share with you some of the best authentic Mexican food blogs which we think express the depth and diversity of Mexican cuisine. All are written by authors who fell in love with the food of Mexico. Some are written by professional chefs and some are written by people who through birth or circumstance have been immersed in Mexican culture and cuisine. All of the blogs have wonderful recipes and we have linked to some that we think you will enjoy.

Best Mexican Food Blogs

Here Are The Blogs

Mexico in My Kitchen

One of our favorite blogs is written by Mely Martinez original from Taumalipas and now residing in the U.S. Mely’s recipes bring back fond memories. Many come from Northern Mexico where I first learned to cook Mexican food. Try the Nuevo Leon style pork stew or the Mexican style beef tips for a taste of the North. Mely has been very generous with us sharing our recipes on her social media accounts. Much appreciated!

Chicano Eats

Chicano Eats has great recipes that are photographed beautifully and probably the best part are the stories that Esteban tells with each recipe. The stories are recollections of the food he grew up eating and the role that food plays in his life. He describes his blog as “un pedacito de mi cultura and traditions through food.” A must visit site! Try the tacos de flor de calabaza.

Pati Jinich

Mexican cookbook author and television host Pati Jinich has a truly beautiful blog. You may have seen her as the host of  Pati’s Mexican Table on PBS. She was born and raised in Mexico which installed a deep love and understanding of mexican Cuisine. Her recipes are accessible and use ingredients that are easy to find in the U.S. Try the huitlacoche and squash blossom crepes.

The Mija Chronicles

Leslie Téllez is a food writer and culinary guide who spent four years in mexico City. She runs the culinary tourism company Eat Mexico and recently published Eat Mexico: Recipes from Mexico City’s Streets, Markets & Fondas. Try the chiles rellenos with panela cheese and epazote.

Rick Bayless

Rick Bayless is one of the best known names in Mexican cuisine.He host the show Mexico, One Plate at a Time on PBS. He has written 9 cookbooks and owns the Frontera Grill and Topolobambo restaurants in Chicago. He is a recipient of the Mexican Order of the Aztec Eagle, the highest honor authorized by the Mexican government to foreigners for his lifelong work promoting Mexican Cuisine. He knows his Mexican food. Try the classic white pozole.

La Cocina de Leslie

A celebration of mexican culture and food written by Leslie Limón, a Southern California native transplanted to a small town near Guadalajara. She also blogs about life in Mexico. Try the molletes; they look amazing.

The Mexican Food Journal

We couldn’t leave ourselves off this list could we? Some of our favorites, guacamole in the molcajete, classic salsa verde and Mexican pork chops.

RollyBrook

A very personal blog written by Rolly Brook which will give you insight into small town Mexican living. Lots of photos of cooking with his adopted family in Lerdo, Durango. Take a look at the Spanish English food lexicon. It will come in handy.

Mexican Please

Patrick Calhoun recreates the flavors he experienced when he lived in Cozumel. many of his recipes are specific to the state of Quintana Roo.

If you know of any other authentic Mexican food blogs that you think we should list please let us know.

Fried Fish Sandwich

Fish & Seafood

Fish Sandwich with Sweet Potato Chips

Sandwich de Pescado Frito

Our Photographer Andrés used to have a cafe in the Bay Area and this fried fish sandwich was the biggest seller.

It isn’t a traditional Mexican recipe but the chipotle mayonnaise gives it some Mexican flavor. We wanted to share it with you because it is an outstanding sandwich.

Fish Sandwich with Sweet Potato Chips

If you choose a mild white fish, the sandwich has a great fish taste without tasting “fishy”. We used tilapia for this one.

Fried Fish Sandwich Ingredients

Preparing the Chipotle Mayonnaise

Start with one or two canned chipotle peppers.

Canned Chipotle Pepper

Finely Chop the peppers.

Finely Chopped Chipotle Pepper

Add one or two spoonfuls of the chopped chipotles to the mayonnaise and stir to incorporate.

Chipotle Peppers and Mayonnaise

Preparing the Fish

Season the fish fillet with salt and pepper on both sides.

Tilapia Fillet

Cook the fish in a well-oiled pan until nicely browned on both sides.

Frying Tilapia

Assembling The Sandwich

Start by pan toasting your bread. Toast both sides. Extra toasty is nice with this sandwich.

Pan Toasting Bread

Once the bread is toasted, spread the chipotle mayonnaise on one or both sides of the bread. Andrés prefers it with mayonnaise on only one side.

I love mayonnaise so it gets slathered on both sides. Since it’s his recipe, we prepared it his way.

Chipotle Mayonnaise on French Roll

After spreading the chipotle mayonnaise, place the fish on the bottom piece of your bread.

Fish Fillet on French Roll

Add the tomatoes.

Fish Fillet and Tomatoes on French Roll

Add two or 3 slices of avocado.

Fish Tomato Avocado

Add the bean sprouts.

Fish Tomato Avocado Sprouts

Top your sandwich.

Prepared Fried Fish Sandwich

Slice in half and serve with homemade sweet potato chips.

Fried Fish Sandwich

Making the Sweet Potato Chips

Remove the ends from the sweet potatoes and peel.

Peeling Sweet Potatoes

Slice the sweet potatoes as thinly as possible.

Slicing Sweet Potatoes

Put the sweet potatoes in boiling water and cook for two minutes. Drain the sweet potatoes very well.

Boiling Sweet Potatoes

In ½″ of preheated oil, fry the sweet potatoes until they have turned golden brown. Don’t overcrowd them in the pan.

You will have to cook them in 2 or 3 batches. Watch them carefully. They go from golden to burnt very quickly.

Frying Sweet Potatoes

When the chips are golden and crispy, drain them well on paper towels.

Fish Sandwich with Sweet Potato Chips
Print Recipe
5 from 1 vote

Fried Fish Sandwich

Fried fish sandwich flavor boosted with chipotle mayonnaise. Topped with tomato, avocado and bean sprouts. A favorite at our photographer's Bay Area Cafe. (Sandwich de pescado frito)
Prep Time10 minutes mins
Cook Time10 minutes mins
Total Time20 minutes mins
Course: Sandwich
Cuisine: Mexican / American
Keyword: Fish Sandwich, Fish Sandwich Recipe, Fried Fish Sandwich Recipe
Servings: 4
Calories: 402kcal
Author: Douglas Cullen

Ingredients

  • 4 french rolls
  • 4 fish fillets about 4 ounces each
  • 2 Roma tomatoes plum tomatoes
  • 1 large avocado
  • 1 small container of bean sprouts
  • 8 tbsps. mayonnaise
  • 2 tbsp. canned chipotle peppers
  • salt
  • pepper

Instructions

  • CHIPOTLE MAYONNAISE
  • Finely chop 1 or 2 canned chipotle peppers.
  • Add 1 or 2 spoonfuls of the chipotles to your mayonnaise and mix well. Taste and add more chipotle if desired.
  • PREPARING THE SANDWICH
  • Pan toast each roll.
  • Slice the tomatoes and avocados.
  • Salt and pepper the fish on both sides.
  • Fry the fish in a well-oiled pan preheated of medium heat until nicely browned on both sides.
  • Spread the chipotle mayonnaise on your bread.
  • Add the fish fillet to the bottom piece of the bread.
  • Top with tomato and avocado slices and the bean sprouts.
  • Cut the sandwich in half and serve with sweet potato chips.

Nutrition

Calories: 402kcal | Carbohydrates: 29g | Protein: 5g | Fat: 30g | Saturated Fat: 5g | Cholesterol: 12mg | Sodium: 525mg | Potassium: 366mg | Fiber: 6g | Sugar: 2g | Vitamin A: 725IU | Vitamin C: 9.2mg | Calcium: 48mg | Iron: 1.8mg
Fried Fish Sandwich with Sweet Potato Chips
Print Recipe
5 from 1 vote

Homemade Sweet Potato Chips

Recipe to make homemade sweet potato fries.
Prep Time5 minutes mins
Cook Time10 minutes mins
Total Time15 minutes mins
Course: Snack
Cuisine: Mexican
Keyword: chips, potato chips, sweet potato
Servings: 4
Calories: 105kcal
Author: Douglas Cullen

Ingredients

  • 2 large sweet potatoes
  • 1 cup cooking oil
  • Salt

Instructions

  • Cut off the ends of the sweet potatoes and peel.
  • Slice the sweet potatoes very quickly.
  • In a medium-sized pot bring 4 cups of water to a boil.
  • Add the slice sweet potatoes to the boiling water.
  • Cook for 2 minutes.
  • Drain the sweet potatoes well.
  • Preheat 1 cup of cooking oil over medium-hot heat.
  • Add 1 layer of sweet potatoes to the hot oil.
  • Cook until golden brown turning once.
  • Drain well on paper towels and sprinkle with salt.

Nutrition

Calories: 105kcal | Carbohydrates: 13g | Protein: 1g | Fat: 6g | Saturated Fat: 1g | Sodium: 36mg | Potassium: 219mg | Fiber: 2g | Sugar: 3g | Vitamin A: 9220IU | Vitamin C: 1.6mg | Calcium: 19mg | Iron: 0.4mg

More Mexican Fish & Seafood Recipes

  • Fish a la Veracruzana
  • Curried Shrimp and Rice
  • Fish Tacos
  • Shrimp Tacos
  • Shrimp Ceviche
  • Tuna Salad

Chayote and Zucchini Squash Salad

Salads

Chayote Zucchini Salad

Ensalada de Calabaza y Chayote

This Chayote and zucchini squash salad is a favorite of our photographer’s family. It regularly appears on their lunchtime table.

It is so simple to prepare with just a few ingredients. You may think it looks bland but don’t be fooled. Lime juice brings out the bright, full flavor of the vegetables.

Chayote Zucchini Salad
Chayote and Zucchini Squash Salad

You only need 3 ingredients to prepare the salad: chayote, zucchini squash (calabacitas or calabaza). When you are purchasing the chayote, choose the spineless variety for this dish.

Chayote Zucchini Salad Ingredients
Just a few ingredients: chayote, zucchini squash, and lime.

How to Prepare

Chayote Halved
Slice the chayotes in half.

Slice the chayotes in half lengthwise. Don’t peel them.

Chayote in Cooking Water
Put the chayotes in a pot and cover with 3 inches of water.

Put the chayote in a large pot and cover with 3 inches of cold water.

Chayote in Covered Pot
Cover and bring to a boil then reduce the heat. Cook for 5 minutes.

Cover the pot and bring to a boil. Reduce to a simmer and cook the chayotes for 5 minutes.

Sliced Zucchini
Cut the zucchini into spears.

While the chayote is cooking, remove the ends of the zucchini squash and slice into spears.

Chayote and Zucchini in Pot
Add the zucchini to the pot with the pot chayote.

Add the zucchini squash to the simmering chayote. Cover and cook for 5 more minutes until the vegetables are soft but not mushy. You want them to hold their shape when you serve them.

Zucchini Chayote in Covered Pot
Cover and cook for 5 minutes.

Remove the vegetables from the pan. When the chayotes are cool enough to handle, use a spoon to remove the hard pithy center. Discard the centers.

Remove Hard Center Chayote
Remove the tough centers from the chayotes.

Chop the chayote into 1″ pieces.

Chopped Chayote
Chop the chayote.

Arrange the vegetables on a serving plate sprinkle with lime juice and salt. Serve warm or at room temperature. Don’t serve this salad chilled. It makes the flavors taste flat.

Chayote and Zucchini Salad
Arrange vegetables on a serving plate.
Chayote Zucchini Salad
Print Recipe
5 from 1 vote

Chayote and Zucchini Squash Salad

Chayote and zucchini squash salad recipe – simple to prepare with just a few ingredients. Lime juice brings out the bright, full flavor of the vegetables. Serve as a side dish for the midday meal. or dinner. In Spanish, it is called, ensalada de calabaza y chayote.
Prep Time5 minutes mins
Cook Time15 minutes mins
Total Time20 minutes mins
Course: Salad
Cuisine: Mexican
Keyword: chayote, salad, vegan, vegetarian, zucchini
Servings: 6
Calories: 39kcal
Author: Douglas Cullen

Ingredients

  • 3 chayotes
  • 3 small zucchinis calabacitas
  • 3 limes
  • 1 tsp. salt

Instructions

  • Cut the chayotes in half lengthwise.
  • Put them in a large pot and cover with water.
  • Cover the pot and bring to a boil. Cook for 5 minutes.
  • Slice the zucchini into spears.
  • Add them to the pot with the chayote. Cover and cook for 5 more minutes.
  • Drain the vegetables.
  • Chop the chayote into 1" pieces.
  • Arrange the vegetables on a serving plate.
  • Sprinkle the vegetables with salt and the juice from the 3 limes.

Nutrition

Calories: 39kcal | Carbohydrates: 10g | Protein: 2g | Fat: 1g | Saturated Fat: 1g | Sodium: 397mg | Potassium: 372mg | Fiber: 3g | Sugar: 4g | Vitamin A: 215IU | Vitamin C: 32.3mg | Calcium: 38mg | Iron: 0.8mg

More Mexican Salads and Side Dishes

  • Beet Salad with Citrus Vinaigrette
  • Mexican Green Rice
  • Cactus Salad
  • Cucumber Salad
  • Spicy Tuna Salad
  • Spicy Pineapple Salad

Mexican Green Rice

Side Dishes

Mexican Green Rice on Plate

Arroz Verde Mexicano

Mexican Green Rice, also known as cilantro rice is the perfect side dish and not just for when you are serving Mexican food. Its bright but not overpowering flavor goes well with fish or chicken. We also have a great recipe for Mexican Red Rice too.

Mexican Green Rice
Mexican Green Rice also Known as Cilantro Rice

Morelos Rice

We prepared this dish with Morelos rice which is the only rice in Mexico with a Designation of Origin. To receive the designation it must come from the state of Morelos. (More about the Designation of Origen) It is considered to be the highest quality rice in Mexico.

At the supermarket, Morelos rice costs about 60% more. If you can’t find Morelos rice, this dish will turn out well with your favorite white rice.

Morelos Rice
Morelos Rice, the Highest Quality Mexican Rice

How to Prepare Mexican Green Rice (Cilantro Rice)

This recipe makes a large batch of rice, about 12 portions. We always like to make a big batch so that we have rice all week. You can cut the recipe in half if you don’t need so much.

Pureed Cilantro Onion Garlic
A few ingredients make surprisingly flavorful rice.

Start by getting all of your ingredients together.

Prepare the Cilantro Mixture

Add the cilantro, garlic, onion, and ½ cup of water to your blender. Use the freshest cilantro you can find.

It makes a big difference in taste. Before blending, discard any sprigs that are pale in color or have black spots.

Cilantro Onion Garlic in Blender
Ready to blend.

Blend the mixture for 1 minute until smooth.

Pureed Cilantro Onion Garlic
Looking good.

Cooking the Rice

Pour the rice into a pan that has 2 tablespoons of medium-hot preheated oil. This is an important step to build flavor and get the proper texture.

Adding Rice to Oil in Pan
The rice is coated in oil before cooking.

Stir the rice to coat with oil. Keep stirring for about 30 seconds until the rice just begins to turn golden and become fragrant. Don’t let the rice burn.

Browning Rice
Stir continually so that it doesn’t burn.

Pour the cilantro mixture into the rice.

Adding Cilantro Puree to Rice
Add the cilantro mixture.

Add 4 cups of water and the teaspoon of salt. Stir once and reduce the heat to low.

Mexican Green Rice Cooking
Add 4 cups of water and only stir one time.

The rice will absorb the liquid as it cooks. It takes about 30 minutes for the rice to fully cook.

If the rice has absorbed all of the liquid and it hasn’t quite finished cooking add ¼ of water at a time until the rice is cooked and all of the water has been absorbed.

Getting perfect rice is an art. It may take you a few times to get it just how you want it.

When the rice is cooked to your liking turn off the heat and fluff it with a fork. Let it rest 5 minutes and then serve.

Ready to Serve

Mexican Green Rice
A dish of perfect rice.

You will enjoy the results of this recipe.

Provecho!

Mexican Green Rice on Plate
Print Recipe
3.58 from 7 votes

Mexican Green Rice Recipe

Recipe for Mexican green rice, also known as cilantro rice, a perfect side dish and not just for Mexican food. Its bright but not overpowering flavor goes really well with fish or chicken.
Prep Time15 minutes mins
Cook Time35 minutes mins
Total Time50 minutes mins
Course: Side Dish
Cuisine: Mexican
Keyword: cilantro, green rice, Mexican, rice
Servings: 8 servings
Calories: 182kcal
Author: Douglas Cullen

Ingredients

  • 2 cups short grain rice preferably Morelos type
  • 1 bunch cilantro reserve a few sprigs for garnish
  • ½ medium white onion
  • cloves garlic
  • 1 tsp. salt
  • 4 to 5 cups of water

Instructions

  • CILANTRO MIXTURE
  • Add the cilantro, onion, garlic and ½ cup of water to your blender jar
  • Blend until smooth about 1 minute
  • RICE
  • Preheat 2 tablespoons of oil in a pot over medium heat
  • Pour the uncooked rice into the hot oil
  • Stir to coat the rice with oil and cook for about 30 seconds until the rice is just starting to brown and become fragrant
  • Add the pureed cilantro mixture to the rice
  • Add 4 cups of water to the rice
  • Add 1 teaspoon of salt
  • Stir once to evenly disperse the cilantro mixture
  • Reduce the heat to low (do not cover)
  • Cook the rice for about 20 minutes. It will completely absorb the liquid
  • If the rice isn't fully cooked after it has absorbed the liquid add ¼ cup of water as needed until the rice is fully cooked and the water has been absorbed
  • Once the rice is done cooking. Turn off the heat. Fluff the rice with a fork and let it rest for 5 minutes before serving
  • Garnish with a sprig of cilantro

Nutrition

Calories: 182kcal | Carbohydrates: 40g | Protein: 3g | Fat: 1g | Saturated Fat: 1g | Sodium: 306mg | Potassium: 48mg | Fiber: 2g | Sugar: 1g | Vitamin A: 15IU | Vitamin C: 0.5mg | Calcium: 12mg | Iron: 2.1mg

More Mexican Rice Recipes

  • Mexican Red Rice

More Mexican Side Dishes

  • Frijoles de la Olla
  • Refried Beans
  • Stewed Chayote in White Wine
  • Pickled Peppers

Potato and Chorizo Tacos

Tacos

Potato Chorizo Tacos

Tacos de Papa y Chorizo

Enjoy these taco stand style potato and chorizo tacos topped with salsa verde. They are salty, greasy and spicy, and that is a good thing, a very good thing. Big flavor! Yum! This is typical street food. In Mexico, food that is quick, tasty and served in bite-size portions is known as antojitos which means “little cravings” and you will crave them after trying them, garantizado. Wondering how to make chorizo tacos? We’ll show you.

Potato Chorizo Tacos
Potato and Chorizo Tacos Topped with Salsa Verde

How to Make

Gather Your Ingredients

Gather all of your ingredients first. The recipe requires waxy potatoes. Russet potatoes won’t work because they will fall apart during cooking.

ingredients potato chorizo tacos

Prep the Main Ingredients

Chorizo is the star of these tacos. Try different brands until you find your favorite. Each brand has a distinct flavor.

Mexican Chorizo
Split the chorizo open.

Before using the chorizo you have to remove the outer membrane. Split each chorizo open and then use your fingers to remove the membrane. Some chorizo pops out of the membrane really easily others take some effort to get out.

Removing Membrane from Chorizo
Use your fingers to remove the membrane from the chorizo.

Peel the potatoes. If you prefer you can leave the skins on for a more rustic filling.

Peeled Potatoes
Peel the potatoes.

Cut the potatoes into ¼″ squares.

Diced Potatoes
Cut the potato into ¼″ squares.

Soak the potatoes in water for a few minutes after cutting. Soaking them keeps them from turning brown while you are preparing the other ingredients and removes some of the starch from the potatoes which helps them cook without sticking.

Diced Potatoes in Water

Chop the onions. The onion should be cut into pieces about half the size of the potato pieces.

Diced Onion
Finely chop the onion.

Prepare the Filling

Frying Diced Potato

Start by adding the potatoes to 4 tablespoons of cooking oil pre-heated to medium hot. Stir the potatoes to coat evenly with the oil. The oil helps all of the great flavor from the chorizo stick.

Diced Potatoes Seasoned with Salt and Pepper

When you have coated the potatoes in oil season with the salt and pepper then cook for 3 minutes over medium-hot heat.

Add the onion and stir to incorporate.

Onions and Potatoes in Pan
Add the onions after frying the potatoes for 3 minutes.

Fry the onions and potatoes for an additional 5 minutes then add the chorizo. Stir to incorporate.

Onion Potato and Chorizo in Pan
After frying the onions and potatoes for 5 minutes add the chorizo.

Cook the mixture over medium heat for 10 minutes. After 10 minutes taste the potatoes to be sure they are fully cooked. If the aren’t, cook for another 2 to 3 minutes. During cooking the chorizo will break up and disperse evenly throughout the filling.

Cooking Potato Chorizo Taco Filling
Cook for 10 more minutes.

As the mixture cooks the chorizo renders its fat which flavors the potatoes. The filling is ready when the chorizo has fully rendered its fat and just starts to get crispy.

Filling for Potato Chorizo Tacos
Filling for Potato and Chorizo Tacos

Looks delicioso, doesn’t it?

Serving the Tacos

Prepare these tacos with the small taqueria size corn tortillas. Put 1 generous tablespoon of filling on each tortilla. Don’t overstuff the tortilla with filling. You want to be able to taste each one of the ingredients in every bite. The balance of flavors is important. Serve the tacos topped with chopped spring onions or chopped white onions and our favorite green tomato salsa verde. You can also serve them with our creamy avocado salsa.

Tacos Potato Chorizo
Potato and Chorizo Tacos with Salsa Verde

What to Drink With Your Tacos

An ice-cold Mexican beer, agua de jamaica, hibiscus iced tea, or agua de guayaba, a refreshing guava drink are all drinks that go well with these tacos.

Provecho!

Potato Chorizo Tacos
Print Recipe
3.08 from 13 votes

Recipe Potato and Chorizo Tacos

Easy chorizo and potato tacos topped with salsa verde just like at the taco stand. They are salty, greasy and spicy in the very best way. Big flavor! Yum!
Prep Time10 minutes mins
Cook Time20 minutes mins
Total Time30 minutes mins
Course: Tacos
Cuisine: Mexican
Keyword: breakfast tacos, chorizo, potato, tacos
Servings: 16 tacos
Calories: 119kcal
Author: Douglas Cullen

Ingredients

  • 1 pound waxy potatoes
  • ½ pound chorizo
  • ½ medium white onion
  • 1 bunch of spring onions
  • Salsa Verde
  • 1 teaspoon salt
  • ½ teaspoon black pepper
  • 16 corn tortillas taqueria size, the small tortillas

Instructions

  • TACO FILLING
  • Remove the outer membrane from the chorizo
  • Peel the potatoes
  • Chop the potatoes into ¼" pieces
  • Finely chop the onion
  • Heat 4 tablespoons of cooking oil in a frying pan over medium-high heat
  • Add the chopped potatoes to your pan and stir to coat the potatoes with oil
  • Add the salt and pepper and stir again
  • Cook the potatoes for 3 minutes then add the chopped white onion
  • Cook the onions and potatoes together for 5 minutes
  • Add the chorizo and stir to incorporate
  • Cook the potato, onion chorizo mixture for 10 minutes
  • (The filling is ready to eat when the chorizo has rendered all of its fat and is just starting to get crispy.)
  • Adjust the salt if needed
  • SERVING
  • Chop the spring onions
  • Warm the tortillas on a comal
  • Put 1 tablespoon of filling on each tortilla
  • Garnish with the chopped spring onions and a spoonful of salsa
  • Serve 4 tacos per person

Notes

Substitutions
  • We like salsa verde with these tacos but any salsa you enjoy will work.
  • You can substitute flour tortillas for the corn tortillas.
  • If you don't have spring onions, you can use white onion to garnish the tacos.

Nutrition

Calories: 119kcal | Carbohydrates: 17g | Protein: 4g | Fat: 4g | Saturated Fat: 1g | Cholesterol: 9mg | Sodium: 332mg | Potassium: 182mg | Fiber: 2g | Sugar: 1g | Vitamin A: 60IU | Vitamin C: 2.8mg | Calcium: 25mg | Iron: 0.8mg

More Taco Recipes

  • Chicken Taquitos with an Avocado Salsa
  • Fish Tacos with Pico de Gallo Salsa
  • Shredded Beef Tacos
  • Rib-Eye Tacos
  • Shrimp Tacos
  • Guisados for Tacos

Agua de Jamaica

Beverages

Hibiscus Iced Tea

Agua de Jamaica which translates as “hibiscus water” is a typical agua fresca to accompany the mid-day meal in Mexico. It is sweet, tart, delicious and really a refreshing drink all at the same time.

Glass of Agua de Jamaica (Mexican Hibiscus Iced Tea)

You prepare it by steeping hibiscus flowers, called flor de jamaica to produce a concentrate that you dilute with water and sweeten with sugar. Jamaica is a great alternative to soda. You can find hibiscus flowers at your local grocery store or order online. Mexgrocer is a good option. 

Sweet or Tart?

Mexicans tend to prefer their agua de jamaica very sweet. If you add the full ½ cup of sugar called for in the recipe to make a pitcher of jamaica it will be sweet like served in Mexico. We prefer it on the tart side. If you prefer it on the tart side only add ¼ cup of sugar per picture.

How to Make Agua de Jamaica Drink (Iced Hibiscus Tea)

It’s really quite simple to prepare. Follow these steps.

Flor de Jamaica (Dried Hibiscus Flowers) in Ceramic Bowl
Dried Hibiscus Flowers Called “Flor de Jamaica.”

Dried Hibiscus Flowers Called “Flor de Jamaica.”

  • Start with two cups of hibiscus flowers (jamaica). Fresh flowers produce the best tasting drink. If the flowers are pliable they are fresh. If they are hard and brittle they aren’t fresh and your jamaica won’t be as tasty.
Hibiscus Flowers Soaking in Water
Add Hibiscus Flowers to Cold Water.
  • Add the hibiscus flowers to 2 quarts of water. Be sure you add the flowers to cold water. This makes a difference.
Simmering Flor de Jamaica
Boil Then Reduce the Heat
  • Bring the water to a boil and as soon as it boils reduce the heat to low and simmer for 10 minutes.
  • After 10 minutes turn off the heat and allow the concentrate to cool.
Hibiscus Concentrate in Pot on Stove
Fully Extracted Hibiscus Tea Concentrate. Note the Deep Red Color
  • As the flowers steep they absorb water and will sink to the bottom of the pot. That’s how you will know that the concentrate is ready to use.
Straining Simmered Hibiscus Flowers (Flor de Jamaica)
Strain the Steeped Hibiscus Flowers
  • Pour the concentrate through a strainer to remove the flowers.
Hibiscus Tea (Jamaica Drink) Concentrate in Pitcher
To Store Pour Concentrate Into Pitcher

Pour the concentrate into a small pitcher or jar to store. You started the process with 2 quarts of water but after steeping the hibiscus you will only have 1 ½ quarts of concentrate. The flowers absorb quite a bit of water.

A glass pitcher or jar is preferable for storage. Plastic containers seem to give it an off-taste. Also, the concentrate tends to stain plastic.

Drink Preparation

  • To prepare the drink, pour ⅓ of the concentrate into a ½ gallon pitcher.
Jamaica Drink Concentrate Ready to Prepare
  • Add the sugar and water to fill the pitcher. Stir vigorously to dissolve the sugar.
Adding Sugar to Sweeten Jamaica Concentrate
Pitcher of Agua de Jamaica Drink
  • Serve over ice or well chilled.
Agua de Jamaica Chilled in Tall Glass

Salud!

Mexican Jamaica Drink (Hibiscus Iced Tea) in Tall Glass
Print Recipe
3.84 from 147 votes

Agua de Jamaica Recipe

Mexico's well-known jamaica drink, Agua de Jamaica or "hibiscus water." A perfect drink to serve with the mid-day comida. The flavor is sweet and tart at the same time and very refreshing.
Prep Time2 minutes mins
Cook Time15 minutes mins
Total Time17 minutes mins
Course: Beverage
Cuisine: Mexican
Keyword: agua fresca, hibiscus, iced tea, jamaica
Servings: 12 glasses
Calories: 129kcal
Author: Douglas Cullen

Ingredients

  • 2 cups dried hibiscus flowers
  • 2 quarts water
  • ½ cup sugar per pitcher of jamaica

Instructions

  • HIBISCUS CONCENTRATE
  • Put 2 quarts of water in a pot
  • Add 2 cups of dried hibiscus flowers to the water
  • Bring to a boil
  • As soon as the water boils reduce the heat to low and simmer for 10 minutes
  • After 10 minutes turn off the heat and allow the hibiscus concentrate to cool
  • PITCHER OF JAMAICA
  • Put ⅓ of the concentrate in a half-gallon pitcher and add the sugar
  • Fill the pitcher with cool water and stir vigorously to dissolve the water
  • Serve chilled or over ice

Notes

Optional
  • Add I cinnamon stick to the water when steeping.
Alternative Sweeteners
  • Instead of sugar, you can sweeten your drink with piloncillo or agave syrup.
Storing
  • The concentrate will keep for 5 days in the refrigerator.
  • Store in a sealed container so that it doesn’t take on flavors for other foods in the fridge.

Nutrition

Serving: 11ozs. | Calories: 129kcal | Carbohydrates: 33g | Sodium: 5mg | Sugar: 33g

More Mexican Drinks (Aguas Frescas)

  • Agua de Guayaba – Guayaba Drink
  • Agua de Tamarindo – Tamarind Water
  • Agua de Piña – Pineapple Water
  • Agua de Chia – Chia Water
  • Agua de Pepino – Cucumber Water
  • Horchata

Chiles Rellenos de Puerco

Chiles, Pork

Chile Relleno in Salsa Roja

Pork Stuffed Poblano Chiles

Chiles Rellenos are one of the best known and loved Mexican foods. Chile relleno translates as “stuffed chile.” If you have never had them, they are Poblano chiles that are stuffed with pork, beef or cheese and then are battered and fried and served covered in salsa roja. Heaven on a plate. Don’t you agree?

Chile Relleno in Salsa Roja

Visual Recipe for Authentic Chiles Rellenos

Follow the visual guide to prepare authentic chiles rellenos. The full printable recipe is at the end of the guide. Let’s get cooking!

How to Make Chiles Rellenos

Don’t be intimidated by this recipe. It does take some effort to prepare, which is well worth it, but anyone can do it. If you follow the guide carefully you will have prepared some amazing traditional chiles rellenos.

Ingredients to Make Chiles Rellenos
All the ingredients for pork filled chiles rellenos.

To make chiles rellenos start by gathering all of your ingredients. The recipe has many ingredients and it is good to collect them all to ensure that you haven’t forgotten any. You don’t want to get halfway through preparation and then have to make a run to the supermarket. This reminder comes from hard-earned experience. :)

Ingredients:

  • 6 large Poblano chiles
  • 2 pounds pork loin roast
  • 1 cup pork broth
  • 2 lbs Roma tomatoes
  • 2 white onions
  • 4 garlic cloves
  • 3 large eggs
  • ¼ cup chopped raisins
  • ¼ cup coarsely chopped walnuts
  • ½ cup chopped parsley
  • ½ cup flour
  • 1 teaspoon ground cinnamon
  • ¼ teaspoon ground clove
  • 2 tablespoons apple cider vinegar
  • 4 cups cooking oil

First, Prepare the Poblano Chiles

The recipe calls for Poblano chiles which must be cleaned before using. If you are not sure how to clean chiles, see our guide to roasting and peeling Poblano chiles.

Fresh Poblano Chiles

Fresh Poblano Chiles

Poblanos are flavorful and only mildly hot and hold up well to stuffing. They are the traditional chile for making chiles rellenos.

How to Make the Pork Filling

Cooked Pork Filling Chiles Rellenos
Pork filling for chiles rellenos.

The pork filling for this recipe is adapted from a recipe in Diana Kennedy’s cookbook, The Art of Mexican Cooking.

If this cookbook is not in your collection consider buying it. It’s a great resource for anyone who loves Mexican cooking. I was lucky enough to have Diana sign my copy at a book signing in San Miguel de Allende.

Prepare the Pork for the Filling

Loin roast is a good cut for this dish. Clean any tough membrane from the pork and then cut into 1″ to 1 ½″ cubes.

Cubed Pork
Cut the pork into cubes.

You cube the pork so it cooks evenly. 1″ to 1 ½″ cubes are fine. You don’t have to be too precise because you will shred and chop the meat after it is cooked.

Boiling Cubed Pork
Put the pork in a pot with ¼ of a white onion and just cover with water.

Put the pork into a pot with ¼ of a white onion and just cover with water. Bring the water to a boil and then reduce the heat to a simmer and cook for 35 minutes. Skim any scum that rises to the top.

Pork Broth in Stock Pot
Remove the pork and simmer the broth to reduce it.

Once the pork is cooked remove it from the pot and simmer the broth until it has reduced to about 1 cup of liquid. Reducing the broth concentrates the pork flavor. It will take about 10 minutes to reduce.

Cooked Pork for Filling
The fully cooked pork.

You are ready to prep the filling.

Shredded Pork in Bowl
Shred the pork with your fingers.

With your fingers break apart the pork into smaller pieces.

Finely Chopped Pork
Then chop the pork finely.

Use a knife to chop the pork into fine pieces. Try to cut meat into evenly sized pieces.

Prepare the Salsa

You will make two batches of this salsa to make the chiles rellenos. One batch is used to prepare the pork filling and the other batch is used when you serve the chiles rellenos.

Blend Salsa Ingredients
Put the ingredients in the blender jar with about ¼ water.

Put the salsa roja ingredients into your blender. Add about ¼ cup of water which is just enough to help the salsa fully blend without making it watery.

Blended Tomato Salsa
Blend mixture for 1 minute.

Blend the salsa for about 1 minute. It should still have a bit of texture but it shouldn’t be chunky. Don’t be put off by the pale pink color of the salsa. It takes on a beautiful red color when fully cooked.

Oil in Pan
Add 2 tablespoons cooking oil to pan and heat to medium-hot.
Frying Tomato Salsa
Slowly pour the blended salsa into the hot oil.

Frying the salsa in hot oil helps develop a rich flavor. To fry it, slowly pour it into the hot oil. Be careful because it tends to spatter.

Reduced Tomato Salsa
Simmer for 10 minutes until the salsa has thickened and darkened in color.

Simmer the salsa roja for about 10 minutes until it has thickened. As promised the salsa has turned a beautiful deep red color and the flavor has intensified.

Prepare Filling

Adding Pork to Salsa
Add the shredded chopped pork to 1 batch of the salsa roja
Add Other Ingredients to Pork
Add the rest of the ingredients.

Then add the rest of the filling ingredients including 1 cup of pork broth and 2 tablespoons of apple cider vinegar.

Mixing Ingredients Chiles Rellenos Filling
Stir well to incorporate all of the ingredients
Pork Filling Chiles Rellenos
It’s starting to look delicious.

Cook the filling over low heat for about 20 minutes until most, but not all of the liquid has evaporated. You want the filling to remain moist but it shouldn’t be dripping liquid when you fill the chiles.

Stuff and Close the Chiles

Stuff each chile with the pork filling. Do not overstuff the chiles because you won’t be able to close them with a toothpick and the filling will spill out. More isn’t always better. You want to maintain a balance between all of the ingredients.

Stuffing a Chile Relleno
Stuff each chile with pork filling
Closing a Chile Relleno with Toothpick
Use a toothpick to close the Poblano chile.
Stuffed Chile Poblano Closed with Toothpick
Properly closed chile. The stuffing won’t fall out of this one.

Prepare the Batter

Traditional chiles rellenos are battered in a light egg batter. Follow these steps to make a perfect batter.

Separating Egg Whites
Separate the egg whites.

Carefully separate the egg whites. If you get some yolk in the whites before they are whipped the batter won’t expand and become fluffy.

Separated Egg Yolks
Separate the yolks.

Try not to break the yolks because you add them one at a time to the whipped whites.

Adding Egg Whites to Bowl
Pour the egg whites into a mixing bowl.

Start by pouring the egg whites into a large mixing bowl.

Whip Egg Whites
Use an electric hand mixer to whip the egg whites.

Whip the egg whites with an electric hand mixer set on high.

Whipping Egg Whites
Whip until the egg whites are fluffy and coat the back of a spoon.

It takes a few minutes of whipping for the egg whites to expand and become fluffy. When the egg whites have expanded greatly and the mixture starts to form peaks when you remove the beaters it is ready for the next step.

Adding Yolks to Egg Whites
Add the yolks one at a time to the whipped egg whites.

Gently slide the yolks into the whipped egg whites one at a time. Add one and when it is fully incorporated add the next one until they are all incorporated.

Whipping Chile Relleno Batter
Whip until the yolks are incorporated and the batter is light and fluffy.

When the batter is smooth light and fluffy and coats the back of a wooden spoon without dripping it is ready to use. If it separates while you are in the process of battering and frying the chiles just whip it with your electric mixer for a few seconds to incorporate again.

Batter the Chiles

Once the chiles are stuffed, it’s time to batter them in the egg batter.

Flouring a Chile Relleno
Flour all sides of the chile.

Dust all sides of the chile with flour which helps the egg batter stick to the chile.

Battering a Chile Relleno
Dip the floured chile in the egg batter to cover both sides.

Very gently dip the floured chile into the egg batter. Be sure to cover all of the chile in batter.

Placing Chile Relleno in Hot Oil
Fry the chiles one or two at a time.

Very gently slide one of the stuffed chiles into your frying pan. Be very careful to not knock the batter off the chile.

Flipping a Chile Relleno
Gently turn the chile to cook the other side.

When the bottom part of the chile has turned a golden color, use two spatulas to carefully turn the chile over. Be very careful to not knock the batter off the chile.

Frying Chile Relleno
Looking good!

This chile is ready to be removed from the oil. The coating has turned a beautiful golden brown.

Chiles Rellenos
Place the chiles on a plate with paper towels to drain excess oil.

Drain the chiles on a plate covered with paper towels for a couple of minutes to remove excess oil.

Serve the Chiles Rellenos

Now comes the best part, serving and eating the chiles rellenos. To serve, spoon some salsa roja onto a plate place the chile in the middle of the salsa and then spoon a bit more salsa over the chile. It is ready to serve. Chiles rellenos are served warm not piping hot.

Chile Relleno in Salsa Roja
A perfectly prepared chile relleno.

Doesn’t it look great?

Provecho!

Chile Relleno in Salsa Roja
Print Recipe
3.39 from 21 votes

Recipe Chiles Rellenos

Recipe for authentic chiles rellenos, Poblano chiles stuffed with a savory pork filling. Chiles Rellenos are one of the best known and loved Mexican foods. Give this recipe a try. You won't be disappointed.
Prep Time1 hour hr
Cook Time1 hour hr
Total Time2 hours hrs
Course: Pork
Cuisine: Mexican
Keyword: Poblano peppers, pork, salsa roja, stuffed peppers
Servings: 6 chiles rellenos
Calories: 525kcal
Author: Douglas Cullen

Ingredients

  • 6 large Poblano chiles
  • 2 pounds pork loin roast
  • 1 cup pork broth made during preparation of the dish
  • 2 lbs Roma tomatoes
  • 2 white onions
  • 4 garlic cloves
  • 3 large eggs
  • ¼ cup chopped raisins
  • ¼ cup coarsely chopped walnuts
  • ½ cup chopped parsley
  • ½ cup flour
  • 1 teaspoon ground cinnamon
  • ¼ teaspoon ground clove
  • 2 tablespoons apple cider vinegar
  • 4 cups cooking oil

Instructions

  • PREP THE POBLANO CHILES
  • Follow these instructions to prep the Poblano chiles for use in the recipe
  • PREPARE THE PORK
  • Cut the pork into 1" to 1 ½" cubes
  • Put the pork in a large pot
  • Add ¼ of a white onion
  • Add just enough water to the pot to cover the pork
  • Bring the pork to a boil and reduce to a simmer and cook for 35 minutes
  • When the pork is cooked remove from the water and reserve
  • Continue simmering the pork broth until it has reduced down to 1 to 1 ¼ cups of liquid, about 10 more minutes
  • PREPARE THE SALSA ROJA
  • (
    Prepare 2 batches of this salsa
    )
  • Add 1 pound of roughly chopped tomatoes, ½ of a white onion, 2 cloves of garlic, ½ teaspoon of salt and ¼ cup of water to your blender.
  • Blend for 1 minute until smooth.
  • Heat 2 tablespoons of oil in a pan
  • Slowly pour the blended mixture into your pan with the hot oil
  • Simmer for about 10 minutes to cook and thicken it
  • PREPARE THE FILLING

In a pan, to 1 batch of salsa, add the following ingredients:

  • All of the chopped pork
  • -½ finely chopped onion
  • -½ cup chopped parsley
  • -¼ cup coarsely chopped walnuts
  • -¼ chopped raisins
  • -¼ teaspoon ground cinnamon
  • -¼ teaspoon ground clove
  • -2 tablespoons apple cider vinegar
  • -1 cup pork broth
  • Stir to mix all ingredients
  • Cook over low heat stirring occasionally for approximately 20 minutes until moist of the moisture has evaporated from the filling
  • PREPARE THE BATTER
  • Separate the whites and yolks from 3 eggs
  • Put the egg whites in a large mixing bowl
  • Whip the egg whites with an electric beater until the egg whites are fluffy and can coat the back of a spoon
  • Add 1 egg yolk to the whipped egg whites and whip until incorporated
  • Add another egg yolk and whip until incorporated
  • Add the 3rd egg yolk and whip until incorporated
  • The batter is ready when it is light, smooth and fluffy
  • BATTERING THE CHILES
  • Sprinkle flour on all sides of each stuffed chile
  • With a spatula very gently dip each stuffed chile into the batter. Be sure that the batter coats all sides of the chile
  • FRYING THE CHILES
  • Preheat 4 cups oil to medium-hot in a frying pan
  • Gently lower the battered chiles into the hot oil
  • Fry the chiles 1 or 2 at a time. Don't overcrowd them
  • When the bottom of the chile has turned golden brown turn the chile with 2 spatulas
  • Place the fried chiles on a plate covered in paper towels to remove excess oil
  • SERVING THE CHILES RELLENOS
  • To serve, spoon some salsa onto a plate, place the chile relleno in the middle of the salsa and then spoon a little more salsa over the chile.

Notes

  • If your egg batter starts to separate while you are battering chiles, a few seconds whipping with the electric beater will incorporate it again.
  • Depending on the size of your chiles, you will probably have some pork filling leftover which makes a great taco.

Nutrition

Calories: 525kcal | Carbohydrates: 30g | Protein: 42g | Fat: 27g | Saturated Fat: 4g | Cholesterol: 177mg | Sodium: 267mg | Potassium: 1366mg | Fiber: 6g | Sugar: 9g | Vitamin A: 2240IU | Vitamin C: 129.4mg | Calcium: 78mg | Iron: 3.3mg

Other Recipes with Poblano Chiles

  • Rajas con Queso
  • Chiles en Nogada

More Pork Recipes

  • Pork Ribs in Salsa Roja
  • Pork Chops in Salsa Verde
  • Red Pork Pozole
  • Pork Leg Torta

How to Roll a Corn Tortilla

Tortillas

Rolled Corn Tortilla

Roll Like a Pro

In Mexico everyone seems to be born with the ability to perfectly roll a corn tortilla. Try it, but be warned. It’s more difficult than it looks. Follow the steps in the photos and see how you do.

Rolled Corn Tortilla
Perfectly Rolled Corn Tortilla

“A Salt Taco”

A hot, fresh corn tortilla sprinkled with salt and then rolled into a tight tube is a common snack. There’s even a name for it which is taquito de sal, in English a “little salt taco.” Try this. You will be surprised by how delicious it is.

How to Roll

A tortilla must be warm to roll it. Tortillas fresh from the tortillería are best. If your tortillas are cold warm them in a pan or on a griddle or heat them for about 20 seconds in the microwave. If your tortilla cracks it is because the tortilla is too cold or it is stale. Flour tortillas don’t work well for rolling.

Fresh Corn Tortillas
Start with warm fresh corn tortillas. This is the key to a great roll.
Corn Tortilla in Hand
Place the tortilla over your palm and fingertips.
Rolling a Corn Tortilla
With your fingertips lift the back edge of the tortilla.
Hand Rolling a Corn Tortilla
In one motion push your hand forward to roll the tortilla.

That all there is to it. How did you do?

If you have never tried to roll a tortilla, I can almost guarantee that you won’t do it all that well on your first few attempts. After that, you will be a pro. Like any skill it takes practice.

Provecho!

More Tortilla Recipes

  • How to Use a Tortilla Press
  • Whole Wheat tortillas
  • Chicken Tortilla Soup

Carrot and Zucchini Soup

Soups

Mexican Style Carrot and Zucchini Soup

Sopa de Calabacita y Zanahoria

This carrot and zucchini soup has it all. First, it’s delicious, always the most important consideration. Second, it’s healthy. And third, it’s incredibly easy to prepare.

Just follow the visual recipe. The full printable recipe is at the end of the post.

Mexican Style Carrot and Zucchini Soup

There is nothing like a hot bowl of soup on a cold day. This soup is a great light lunch or starter for the comida, the large meal of the day served around 2:00pm. It’s a good choice is you are looking for a vegetarian option.

How to Make

Start by collecting your ingredients:

  • 2 medium zucchinis
  • 2 large carrots
  • 1 cup of tomato puré
  • 1 teaspoon of salt
  • ½ teaspoon of black pepper.
Ingredients for Carrot Zucchini Soup
All of the soup ingredients.

Next, shared the carrots and zucchini. A box grater does the job in a few seconds.

Shredded Carrot and Zucchini
The first step is to shred the carrots and zucchini.

Heat a soup pot over medium heat then add 2 tablespoons of cooking oil.

Adding cooking oil to the pan.
Add 2 tablespoons of cooking oil to a medium-hot pot.

Add the shredded vegetables to the pot and sauté for 2 minutes. Don’t brown the vegetables.

Adding Carrots and Zucchini to the Pan
Add shredded vegetables to your pot and sauté for 2 minutes.

Add the tomato puré after you have sautéed the vegetables. Add the black pepper too.

Adding Tomato Puré
Add the tomato puré to the pot.

Mix in the tomato puré.

Stir the tomato puré into the vegetables.

Add 1 quart of water and bring to a boil. The water should cover the vegetables by about ½″. If it doesn’t add just enough water until it does.

Simmer the Soup
Add 1 quart of water and bring to a boil then simmer for 10 minutes.
Cooking Carrot Zucchini Soup
Cook for 10 minutes until the vegetables have softened and the broth has reduced a bit.

Ready to eat. :)

Bowl of Carrot Zucchini Soup
A delicious carrot and zucchini soup.

Serve with a nice piece of hearty bread or with warm corn tortillas.

Provecho!

Let us know what you think of this recipe.

Mexican Style Carrot and Zucchini Soup
Print Recipe
3.25 from 8 votes

Carrot and Zucchini Soup Recipe

Delicious Mexican style carrot and zucchini soup that only takes a few minutes to prepare.
Prep Time10 minutes mins
Cook Time12 minutes mins
Total Time22 minutes mins
Course: Soup
Cuisine: Mexican
Keyword: carrot, Easy, soup
Servings: 4 bowls
Calories: 117kcal
Author: Douglas Cullen

Ingredients

  • 2 medium zucchinis
  • 2 large carrots
  • 1 cup tomato puré
  • 1 quart water
  • 2 tbsp. cooking oil
  • 1 teaspoon salt
  • ½ tsp. black pepper

Instructions

  • Peel the carrots.
  • Shred the carrots and the zucchini.
  • Heat your pot over medium heat.
  • Add the 2 tablespoons of cooking oil.
  • Add the shredded vegetables to your pot.
  • Sauté the vegetables for 2 minutes.
  • Add the tomato puré and black pepper. Stir to mix with the vegetables.
  • Add 1 quart of water, bring to a boil and then reduce to a simmer.
  • Simmer the soup for 10 minutes until the carrots and zucchini are just cooked through and the broth has slightly reduced.
  • Serve with bread or corn tortillas.

Notes

Variation
  • Mince ½ of a serrano chile and add to the vegetables when you sauté them to add some spice to the soup.
Storage
  • The soup will keep well for two days in the refrigerator if you have any leftover which is unlikely.
 

Nutrition

Calories: 117kcal | Carbohydrates: 12g | Protein: 3g | Fat: 8g | Saturated Fat: 1g | Sodium: 640mg | Potassium: 641mg | Fiber: 3g | Sugar: 7g | Vitamin A: 5625IU | Vitamin C: 26.3mg | Calcium: 45mg | Iron: 1.6mg

More Mexican Soup Recipes

  • Chunky Potato Soup
  • Black Bean Soup
  • Mexican Onion Soup
  • Tortilla Soup
  • Lentil Soup

Pork Chops in Salsa Verde

Pork, Salsas & Sauces

pork chops in salsa verde

Chuletas de Puerco en Salsa Verde

Pork chops and salsa verde is a great combination. This is home-cooking at its best. It’s a super easy dish to prepare especially if you already have some salsa prepared. You can put it together in about 40 minutes.

In Spanish, chuleta means “chop” and puerco means “pork.” Therefore, chuletas de puerco en salsa verde. Makes sense, right?

pork chops in salsa verde
Pork Chops in Salsa Verde

How to Make

Thinly Sliced Pork Chops are Key

To make this dish authentic, you want to use very thinly sliced pork chops. Thicker cuts of meat aren’t commonly used in Mexico. You will probably have to ask your butcher to cut them extra thin for you. Your best bet for finding typical Mexican cuts of meat is in a carnicería, a Mexican butcher shop. There is a good chance there is one in your area. Carnicerías are a great resource for recipes and authentic cooking techniques. If you are friendly and ask a few questions you will go home with a lot of great new ideas.

Step # 1 – Prepare the Salsa

The first thing you need to do is prepare a batch of salsa verde. This is a great recipe which works with many dishes. The salsa takes about 30 minutes to prepare. While it is cooking you can get work on the rest of the dish. Note: You can substitute bottled salsa verde for homemade. The results are still delicious and preparation time is super fast.

Adding the Salsa Verde to the Pot
Start by preparing a batch of salsa verde.

Step #2 – Brown the Porkchops

Pork chops
Use very thinly sliced pork chops.

Trim most, but not all, of the fat off the chops. You want to leave a little fat because that remains will enrich the sauce.

Adding oil to hot pan
Add about 2 tablespoons oil to your hot pan.

[/caption]

Preheat your pan until very hot. Add about 2 tablespoons of your favorite cooking oil.

pork chop browning in pan

Place the pork chop in a hot pan to brown.[/caption]

Only brown, 1 or 2 pork chops at a time. Be careful, there is a good chance that the oil will spatter when you are browning them.

Pork chop in pan
Brown both sides.

Make sure that they are nicely browned on each side.

Browned pork chops
Set aside the browned pork chops.

Set all of the browned pork chops aside until you are ready to cook them in the salsa.

Step #3 – Cook the Pork Chops

salsa verde in the pan
Add the salsa verde to the pan.

Add half of your salsa verde to the pan in which you browned the meat. The fat from the meat and the browned bits in the pan will incorporate into the salsa and enrich it.

Adding the salsa verde to the pork chops
Add the Pork Chops and Salsa Verde

Add the pork chops to the pan and cover with the other half of the salsa verde.

Pork chops simmering salsa verde

Turn the heat to low and simmer for about 15 minutes. You want the sauce to reduce until it is no longer runny. You want it to stick to the meat when you serve it.

Pork chops and salsa verde in serving dish
Ready to serve. Yum!

Your pork chops in salsa verde are ready to be served. Notice how the sauce thickened after simmer for 15 minutes.

Provecho!

pork chops in salsa verde
Print Recipe
4.05 from 20 votes

Pork Chops in Salsa Verde

Recipe for Mexican pork chops in salsa verde, chuletas de puerco en salsa verde. A quick, easy, and delicious weeknight meal.
Prep Time10 minutes mins
Cook Time30 minutes mins
Total Time40 minutes mins
Course: Pork
Cuisine: Mexican
Keyword: How to Make Mexican Pork Chops, How to Make Pork Chops in Salsa Verde, Pork Chops in Salsa Verde Recipe
Servings: 4
Calories: 267kcal
Author: Douglas Cullen

Ingredients

  • 8 very thinly sliced pork chops about 2 pounds
  • 2 cups salsa verde see recipe
  • 2 tablespoons cooking oil
  • salt as necessary

Instructions

  • Trim most of the fat off the chops
  • Heat a frying pan very hot
  • Add 2 tablespoons of cooking oil
  • Brown the pork chops on both sides
  • Set the browned pork chops aside
  • Once you have browned all of the meat add ½ of the salsa verde to your frying pan
  • Add all of the pork chops to the pan
  • Pour the remaining salsa over the pork chops
  • Turn the heat to low and simmer for about 15 minutes until the salsa has noticeably reduced

Notes

Serving
Serve 2 pork chops per person with white rice on the side.
Be careful when browning the meat. The oil tends to spatter and you want to avoid getting burned.
Substitutions
You can substitute bottled salsa verde for homemade and you will still get great results.

Nutrition

Serving: 2pork chops | Calories: 267kcal | Carbohydrates: 11g | Protein: 35g | Fat: 14g | Sodium: 648mg | Sugar: 3g

More Mexican Pork Recipes

  • Traditional Pork Filled Chile Relleno
  • Red Pork Pozole
  • Pork Ribs in Salsa Roja
  • Pork Leg Torta

Bistec a la Mexicana

Beef

Bistec a la Mexicana

Mexican Style Beef

This dish is called bistec a la Mexicana which is a beef dish prepared with a spicy tomato and chile sauce.

A la Mexicana means Mexican style and any dish that has a la Mexicana in the name, like this one, will always be prepared with tomatoes, onions and serrano chile.

You will find variations of this dish served throughout Mexico. Bistec ( BEE-stake) means thinly cut beef filets. Did you know that bistec is the phonetic pronunciation of beefsteak?

Bistec a la Mexicana

How to Make

Ingredients:

To prepare this dish you need thinly sliced beef, tomatoes, onion, serrano chiles, garlic, and salt. You should be able to easily find the ingredients at any market so you no excuses for trying this excellent beef recipe. :)

Ingredients for Bistec a la Mexicana
Ingredients you need to make bistec a la Mexicana.

Here’s what the ingredients look like when they have been prepped and are ready to cook.

Prepped Ingredients for Bistec a la Mexicana
Prepped ingredients.

Preparation – Start With the Sauce

Peeling and seeding the tomatoes is probably the most tedious part of preparing this dish but are important steps. This ensures a smooth sauce. If you really want to, you can omit peeling and seeding if you wish.

The dish will still taste great the main difference is that the final dish will be more rustic with more texture in the sauce. We say “texture” although some might say “gritty.”

How to Peel and Seed Tomatoes

Scoring Tomatoes
Score the tomatoes.

Score the tomatoes in a cross shape on the top of the tomato.

Tomatoes in Boiling Water
Put the tomatoes in boiling water.

Put the scored tomatoes into a pan of boiling water.

Tomatoes in Boiling Water
Boil the tomatoes until the skin starts to separate.

Boil for a couple of minutes until the skin starts to separate.

Tomatoes Cooling in Water
Plunge the tomatoes in ice-cold water.

Plunge the tomatoes in ice-cold water.

Peeling Tomatoes
Peel the tomatoes.

Peel the tomatoes with a paring knife. The skins will come off very easily.

Cutting Tomatoes in Half
Cut the tomatoes in half.

Cut the peeled tomatoes in half.

Removing Seeds from Tomatoes
Remove the seeds.

Use a small spoon to scoop out the seeds and pulp.

Ready to Blend

Once the tomatoes are peeled and seeded you are ready to make the sauce. Add the tomatoes, seeded serrano chiles, clove of garlic, and 1 cup of water and blend for about a minute until the mixture is smooth.

Add the ingredients for the sauce to the blender.

Place all the ingredients for the sauce into the blender.

Blended Sauce
The blended sauce.

This is what the blended sauce will look like. Notice the color before cooking. It will darken beautifully as it cooks.

Next Step – Cooking the Dish

Cut the beef and the onions into ½″ by 2″ strips.

Beef Cut in Strips
Cut the beef into ½″ by 2″ strips.
Roughly Chopped Onions
Chop the onions into ½″ by 2″ strips.

Chop the onions into ½″ by 2″ strips.

Adding Oil to the Pan
Add oil to the preheated pan.

Add oil to the preheated pan at medium-high heat.

Adding Onions to the Pan
Add the chopped onions to the pan.

Add the chopped onions to the pan.

Browning Onions
Cook until the onions just start to brown.

Cook until the onions just start to brown.

Adding the Meat to the Pan
Add the meat to the pan.

Add the meat to the pan.

Beef in Pan
The beef will start to release its juice.

The beef will start to release its juice.

Cooking Beef
Cook until most of the juice has evaporated.

Cook until most of the juice has evaporated.

Adding Onions
Add the cooked onions to the beef.

Add the cooked onions to the beef.

Beef and Onions
Stir the onions into the beef.

Stir the onions into the beef.

Adding Tomato Sauce
Add the tomato sauce.

Add the tomato sauce.

Simmering Bistec a la Mexicana
Simmer to reduce the sauce.

Simmer to reduce the sauce.

Cooking Bistec a la Mexicana
Cook until the sauce has reduced and thickened.

Cook until the sauce has reduced and thickened.

Bistec a la Mexicana with Refried Beans
The final dish.

The final dish. Looks good, doesn’t it?

Serving

Serve your bistec a la Mexicana with a big stack of warm corn tortillas and refried beans on the side.

Garnish the beans with a sprinkle of queso fresco or queso cotija and 3 tortilla chips.

Provecho!

Bistec a la Mexicana
Print Recipe
3.58 from 14 votes

Recipe for Bistec a la Mexicana

Recipe for "bistec a la Mexicana," a Mexican beef dish prepared with a spicy tomato and chile sauce. Variations of this dish are served throughout Mexico.
Prep Time30 minutes mins
Cook Time30 minutes mins
Total Time1 hour hr
Course: Beef
Cuisine: Mexican
Keyword: beef, bistec, guisado, spicy
Servings: 4 servings
Calories: 557kcal
Author: Douglas Cullen

Ingredients

  • 1 lb. thinly sliced beef bistec
  • 1 lb. Roma tomatoes plum tomatoes
  • 1 medium white onion
  • 2 serrano chiles
  • 1 clove of garlic
  • 1 tsp. salt
  • 1 cup of water
  • 1 oz. of “queso fresco” a crumbly white cheese for sprinkling on the beans
  • 12 tortilla chips to garnish the beans
  • 12 corn tortillas

Instructions

  • Rinse all of the ingredients except the beef in water
  • THE SAUCE
  • Remove the seeds from the serrano chiles
  • Peel the garlic clove
  • Place a large pot of water to boil
  • While the water is coming to a boil, score the tomatoes
  • When the water has boiled add all of the tomatoes
  • Cook the tomatoes until the skins start to separate, about 1 minute
  • Plunge the tomatoes into ice-cold water. This helps the skins peel away and stops the tomatoes from cooking more
  • Peel the tomatoes when they are cool to the touch
  • Slice the tomatoes in half
  • Remove the seeds from the tomatoes
  • Add the tomatoes, serrano chiles, garlic clove and water to your blender jar
  • Blend until smooth, about 1 minute
  • COOKING THE DISH
  • Slice the beef into ½" by 2" strips
  • Slice the onions into ½" by 2" strips
  • Preheat a large frying pan to medium-hot
  • Add 2 tablespoons of cooking oil to the pan
  • Add the onions to the pan
  • Cook the onions until they are just starting to brown, about 6 to 7 minutes
  • Remove the onions from the pan
  • Add 1 more tablespoon of cooking oil to the pan
  • Add the beef
  • Cook the beef, until it has released its juice and most of the juice has evaporated, about 6 to 7 minutes
  • Return the onions to the pan and stir to incorporate with the beef
  • Pour the blended sauce into the pan
  • Reduce the heat and simmer until the sauce has reduced and little liquid is left, about 15 minutes

Notes

Substitutions
  • You can substitute jalapeño chiles for the serrano chiles. Jalapeños are milder.
  • You can also omit 1 of the serrano chiles if you prefer a less spicy dish.
  • The recipe calls for corn tortillas but you can serve it with flour tortillas too.
Storage
  • It will keep for 3 days in the refrigerator. This dish freezes well.
  • Make a double batch and freeze half so that you can enjoy it at a later date with no extra prep time.

Nutrition

Calories: 557kcal | Carbohydrates: 48g | Protein: 27g | Fat: 29g | Saturated Fat: 10g | Cholesterol: 85mg | Sodium: 794mg | Potassium: 798mg | Fiber: 7g | Sugar: 5g | Vitamin A: 1030IU | Vitamin C: 19.1mg | Calcium: 157mg | Iron: 3.7mg

More “a la Mexicana” Recipes

  • Huevo a la Mexicana

More Mexican Beef Recipes

  • Carne Asada Recipe
  • Picadillo
  • Rib-Eye Tacos
  • Arrachera Steak Tacos
  • Sirloin Cap Roast (Picaña)
  • Pan-Fried Meat Balls

Agua de Guayaba

Beverages

Pitcher of Agua de Guayaba

Refreshing Guava Drink

Any drink made with fresh fruit and blended with water is known as an agua fresca or agua de fruta in Mexico.

The literal translation of agua fresca is “fresh water” and the translation of agua de fruta is “fruit water.”

The name of this drink is agua de guayaba which translates as “guava water.” It is delicious, refreshing and couldn’t be easier to make.

Agua de Guayaba
Refreshing Agua de Guayaba

You Just Might Avoid a Cold

In Mexico, drinking agua de guayaba is recommended as a way to avoid a cold due to the high levels of vitamin C and other nutrients in the guavas. We drink it because it tastes great but if you are interested you can read the nutrition data for guavas.

Guavas - Guayabas
Guavas and sugar, the only ingredients besides water.

How to Make

The Ingredients

Water, guavas, and sugar are the only ingredients. You can add a splash of lime juice which adds a nice tanginess to the drink. The recipe calls for a ½ cup of sugar although we add only about ¼ cup of sugar because we prefer a slightly tarter taste.

Slicing Guavas
Slice the guavas in half to blend.

The Whole Fruit

When you prepare agua de guayaba, you use the whole fruit. You don’t peel them or seed them. The drink will have a slightly gritty texture.

If you don’t care for the texture you can always strain the drink. It will still taste great but you will lose some of the delicious fruit pulp which is high in fiber.

Blending Guavas
Add the guavas to your blender.

Blend Thoroughly

Blend the fruit for at least a minute to get it as smooth as possible. Strain if you prefer. We prefer the drink a bit on the pulpy side. Pour the mixture into a ½ gallon pitcher, add water and stir.

Blended Guavas
Blend until you get a smooth mixture.

Provecho!

Pitcher of Agua de Guayaba
Print Recipe
5 from 6 votes

Agua de Guayaba

Recipe for agua de guayaba, a fresh fruit drink prepared with guavas typically served with the afternoon meal or "comida."
Prep Time10 minutes mins
Total Time10 minutes mins
Course: Beverage
Cuisine: Mexican
Keyword: agua fresca, drink, guava, guayaba
Servings: 6 glasses
Calories: 122kcal
Author: Douglas Cullen

Ingredients

  • 6 or 7 guavas
  • ½ cup sugar
  • 6 cups of water

Instructions

  • Rinse the guavas in freshwater.
  • Cut the guavas in half.
  • Place the cut guavas in your blender jar.
  • Add half the sugar.
  • Fill the blender jar with water.
  • Blend until smooth, about 1 minute.
  • Pour the mixture into a half-gallon pitcher.
  • Add about 2 cups of water to fill the pitcher.
  • Stir.
  • Taste and add the rest of the sugar to if necessary before serving.

Notes

  • The juice from 1 lime adds a nice tang to the drink.
  • Served lightly chilled or over ice.
  • The drink will separate in the refrigerator just give it a good stir before serving.

Nutrition

Calories: 122kcal | Carbohydrates: 29g | Protein: 2g | Fat: 1g | Saturated Fat: 1g | Sodium: 14mg | Potassium: 354mg | Fiber: 5g | Sugar: 24g | Vitamin A: 530IU | Vitamin C: 194mg | Calcium: 23mg | Iron: 0.2mg

More Mexican Drinks (Aguas Frescas)

  • Agua de Jamaica – Hibiscus Iced Tea
  • Horchata
  • Watermelon Water
  • Cucumber Water
  • Tamarind Water
  • Chia Water

Potato Soup

Soups

Mexican Potato Soup

Sopa de Papa

Try this hearty Mexican potato soup with a rich tomato broth. Serve it as the starter for the comida, the big meal of the day served around 2:00 pm or as a light dinner. 

The photos are a step-by-step guide. The full recipe is at the end of the post. Accompany the soup with a slice of rustic bread or a few warm corn tortillas. Provecho!

Mexican Potato Soup
Mexican Potato Soup

How to Make

You probably already have everything in your pantry to make this recipe.

Ingredients:

  • 3 white or red potatoes
  • 2 tomatoes
  • ¼ white onion
  • ½ tsp. salt
  • 1 tsp chicken bouillon
  • 1 tbsp cooking oil
  • 6 cups of water
Ingredients Mexican Potato Soup
Ingredients

First, peel the potatoes.

Peeling Potatoes
Peel the Potatoes First

Chop the Potatoes Into ½″ wide by 2″ Inch long Sticks

Chopped Potatoes
Chop the Potatoes Into ½″ wide by 2″ Inch long Sticks

Add the salt.

Salting Potatoes
Add Salt

Add the bouillon.

Adding Chicken Bouillion to Soup
Add Bouillon

Blend the tomatoes until smooth.

Blended Tomatoes
Blend the Tomatoes

Strain the blended tomatoes directly into the pot with the potatoes.

Straining Tomatoes
Strain the Blended Tomatoes Into the Pot

Cover the potatoes with 1″ of water, cover, then simmer for 30 minutes.

Potato Soup Simmering
Add Water to Cover Potatoes, Simmer for 30 Minutes
Mexican Potato Soup
Print Recipe
4.25 from 32 votes

Mexican Potato Soup Recipe

Hearty Mexican potato soup with a rich tomato broth. Serve it as the starter for the comida, the big meal of the day served around 2:00 pm or as a light dinner.
Prep Time15 minutes mins
Cook Time35 minutes mins
Total Time50 minutes mins
Course: Soup
Cuisine: Mexican
Keyword: Easy, Mexican, potato, soup
Servings: 4 bowls
Calories: 119kcal
Author: Douglas Cullen

Ingredients

  • 3 white or red potatoes
  • 2 to tomatoes beefsteak or plum
  • ¼ white onion
  • ½ tsp. salt
  • 1 tsp. chicken bouillon
  • 1 tbsp. cooking oil
  • 6 cups of water

Instructions

  • Peel the potatoes.
  • Cut the potatoes into ½" inch by 2" inch strips.
  • Cut the onion in ¼" inch wide strips.
  • Blend the tomatoes with a few ounces of water.
  • Heat the cooking oil in your pot to medium.
  • Saute the onions in the oil until translucent, about 5 to 6 minutes.
  • Add the potatoes to the pot.
  • Add ½ tsp. salt.
  • Add 1 teaspoon bouillon.
  • Strain the tomatoes into the pot.
  • Add water to cover potatoes with 1" of water, about 6 cups of water.
  • Simmer for 30 minutes or until the potatoes are fully cooked.

Notes

  • Serve the soup with a slice of hearty bread or warm corn tortillas. Be sure to prepare the soup with waxy potatoes, white or red. Russet potatoes will lose their shape during cooking.
  • You can substitute chicken stock for the bouillon. You can also substitute vegetable stock for the bouillon to make this soup vegetarian.
  • This soup will keep in the refrigerator for 3 days.

Nutrition

Calories: 119kcal | Carbohydrates: 19g | Protein: 4g | Fat: 4g | Saturated Fat: 1g | Sodium: 621mg | Potassium: 682mg | Fiber: 4g | Sugar: 2g | Vitamin A: 510IU | Vitamin C: 23.4mg | Calcium: 56mg | Iron: 4.3mg

More Mexican Soup Recipes

  • Mexican Onion Soup
  • Black Bean Soup Garnished with Avocado
  • Cream of Tomato
  • Carrot and Zucchini Soup
  • Sopa de Fideo
  • Chicken Tortilla Soup


    Chop any ingredients that you plan on preparing in the molcajete. It makes processing easier and gives your food a more uniform texture. The finer you chop the ingredients before adding them the smoother your food will be.

    Start adding the ingredients in small batches. Don’t dump all of the ingredients in at once. Using the “mano” press and then twist the food to break it down. Add more until all ingredients are fully incorporated and blended to the desired texture.

    If it feels awkward at first, you will get the hang of it after a few uses. Don’t worry.

    How to Choose

    Molcajetes come in many sizes or shapes. The smaller sizes are used to make portions for one or two people and the larger ones to make family-sized portions.

    Molcajetes have personalities. If you can, try a few out. Hold the “mano” in your hand and practice grinding with it. Do the same in another and then another until you find one that feels most comfortable. There is no right or wrong when choosing. Choose the one that feels most comfortable to you and the size is appropriate for the amount of food you want to make with it.

    Readying Your Molcajete for Its First Use

    Most new molcajetes need to be “cured” before you use them. Curing doesn’t mean oiling it and heating it the oven like you would with a cast-iron skillet. Curing means smoothing out the interior and removing and grit.

    To cure a new molcajete, add a few tablespoons of rock salt or dry white rice. Use your pestle or “mano” to grind it thoroughly. As you grind, the salt or rice will turn gray and you will notice some grit. Discard the ground mixture and then add a few more tablespoons of salt or rice and grind again. When the salt or rice no longer turns gray when you grind it the molcajete is now “cured.” Rinse the molcajete and “mano” under running water and it is ready to use.

    How to Clean

    Molcajetes are easy to clean. Just scrape out any remaining food and then rinse it under hot running water. Use a kitchen brush to remove any food that is stuck. Add a couple of drops of dish soap and then scrub some more with your kitchen brush. Rinse again thoroughly with hot water to ensure no soap residue remains. Pat dry with a kitchen towel and allow it to dry completely before putting it away.

    A molcajete will last nearly forever. If you clean it regularly and don’t drop it on a hard surface you will be able to pass it on to the next generation. And, they should be able to pass it on to the next.

    Buy a Molcajete

    You can get a great molcajete from our friends at HERNÁN. They are hand-carved in Mexico from 100% volcanic stone. Your molcajete can also be used to serve pre-prepared salsas and dips. Sure to be a conversation starter around any party table.

    Try This Molcajete Recipe

    Rustic Salsa Made in a Molcajete
    Print Recipe
    4.44 from 16 votes

    Salsa Molcajeteada

    "Salsa Molcajeteada" a handmade roast tomato and tomatillo Mexican salsa prepared in a traditional stone molcajete.
    Prep Time10 minutes mins
    Cook Time10 minutes mins
    Total Time20 minutes mins
    Course: Salsa
    Cuisine: Mexican
    Keyword: molcajete, salsa, serrano peppers, tomato
    Servings: 3 cups
    Calories: 48kcal
    Author: Douglas Cullen

    Ingredients

    • 4 Roma tomatoes
    • 4 to tomatillos or green tomatoes
    • 1 medium white onion quartered
    • 2 serrano chiles
    • 2 cloves of garlic
    • 3 tablespoons finely chopped cilantro
    • 1 teaspoon salt or to taste

    Instructions

    • Char all the vegetables except the cilantro well.
    • Coarsely chop the onions, tomatoes, tomatillos, and serrano chiles.
    • Add the garlic to the molcajete and grind to a paste.
    • Add the onion and grind until it starts to break apart.
    • Add the cilantro.
    • Add the Roma tomatoes and tomatillos and grind until desired consistency is reached.
    • Salt to taste.

    Notes

    Where to Get a Molcajete
    You can get a molcajete through HERNÁN, specialists in authentic Mexican foods and cookware.
    Substitutions
    • You can substitute jalapeños for the serrano chiles. You can make the salsa with just Roma tomatoes or just tomatillos.
    Preparation
    • If you prefer a less chunky salsa, chop the ingredients finer before grinding them in the molcajete.
    • Really charring the ingredients adds lots of flavor to the salsa.
    • You do not need to remove the seeds and veins from the chiles.
    • Be sure to add enough salt to the salsa so that all of the flavors really pop. The salsa should be a little bit salty when you taste it on its own. When you add it to your food it won’t taste as salty.
    • You can also make this salsa in the blender. It will still taste great.
    Storage
    • It keeps well in the refrigerator for up to 3 days.
     
    What the Name Means
    The name “salsa molcajeteada” means salsa made in a molcajete.

    Nutrition

    Calories: 48kcal | Carbohydrates: 10g | Protein: 2g | Fat: 1g | Saturated Fat: 1g | Sodium: 782mg | Potassium: 383mg | Fiber: 3g | Sugar: 6g | Vitamin A: 805IU | Vitamin C: 21.8mg | Calcium: 20mg | Iron: 0.6mg

    Molcajete Recipes

    • Another great salsa recipe you can prepare in molcajete is our Classic Mexican Salsa.
    • How to Make Guacamole in the Molcajete.

Chile Rayado

Chiles

Chile Rayado from La Misión, Hidalgo, Mexico (1 of 1)

The Striped Chile

Chile rayado means “striped chile” due to the naturally occurring light-colored ridges. It is a member of the jalapeño family although it is much hotter than a typical jalapeño. The town of La Misión in the state of Hidalgo is the sole region where chiles rayados are grown.

Chile Rayado de La Misión, Hidalgo
Chile Rayado an Heirloom Variety from La Misión, Hidalgo

It is an heirloom chile variety that is artisanally produced. When the chiles are harvested, they are dried and then smoked over a wood fire for three days which gives them their unique flavor. Think of the flavor as a very intense dried chipotle.

Chile Rayado Salsa
Chile Rayado Salsa
Chile Rayado Salsa
Print Recipe
4.34 from 3 votes

Chile Rayado Salsa Recipe

Chile Rayado Salsa
Prep Time10 minutes mins
Cook Time20 minutes mins
Total Time30 minutes mins
Course: Salsa
Cuisine: Mexican
Keyword: dried peppers, salsa
Servings: 2 cups
Calories: 56kcal
Author: Douglas Cullen

Ingredients

  • 4 Roma tomatoes quartered plum
  • 2 rayado chiles
  • ¼ small white onion
  • 2 cloves of garlic
  • 4 sprigs of cilantro
  • ¼ cup water
  • salt to taste

Instructions

  • Toast the chiles in a hot pan for 10 seconds a side.
  • Remove the seeds and stems from the chiles.
  • Add all of the ingredients to the blender jar.
  • Add ¼ cup water.
  • Blend until just smooth. Do not over blend.
  • Add the mixture to a saucepan.
  • Bring to a boil, reduce heat and simmer for 20 minutes.
  • Salt to taste.

Notes

Substitutions
You can substitute dried chipotle chiles but you must reconstitute them in hot water. To reconstitute the chiles, soak them in a small sauce with just enough water to cover for 5 minutes. Use ¼ cup of the soaking liquid when you blend the salsa.
  • Equipment Needed
    Cutting board
    Knife
    Kitchen spoon
    Large saucepan
    Blender

Nutrition

Calories: 56kcal | Carbohydrates: 12g | Protein: 2g | Fat: 1g | Saturated Fat: 1g | Sodium: 17mg | Potassium: 335mg | Fiber: 4g | Sugar: 7g | Vitamin A: 1305IU | Vitamin C: 20mg | Calcium: 18mg | Iron: 0.3mg

More Salsa Recipes

  • Salsa Mexicana
  • Guajillo Salsa
  • Salsa Verde
  • Habanero Salsa
  • Restaurant Salsa

How to Clean Cactus Fruit

Cooking Techniques

Red prickly Pear Cactus Fruit

Prickly pear cactus fruit, called tuna in Spanish, can be eaten out of the hand or used to prepare agua de tuna, a cactus fruit flavored fruit drink. The fruit is eaten throughout Mexico.

Simple and Quick to Clean and Prep

With a paring knife cut off both ends of the fruit. Score the skin vertically to a depth of about ⅛ of an inch. Use your fingers to peel away the skin to expose the edible fruit. That’s it! The fruit is ready to use in your recipes. The seeds, although quite hard, are edible if you are eating it out of hand. You strain the seeds out if you are going to use the pulp to make agua de tuna.

Red prickly Pear Cactus Fruit
Red Prickly Pear Cactus Fruit
Prickly Pear Cactus Fruit
Step 1: Remove Both Ends of the Fruit
Cleaning Prickly Pear Cactus Fruit
Step 2: Score the Skin and Peel With Your Fingers to Expose the Fruit

Cactus Recipes

  • Cactus Salad
  • Cactus Fruit Pico de Gallo
  • Cactus Fruit Agua Fresca

More Cooking Techniques

  • How to Use a Molcajete
  • How to Use a Tortilla Press
  • How to Use Mole Paste
  • How to Peel Jicama
  • How to Clean Poblano Chiles
  • « Previous Page
  • 1
  • …
  • 3
  • 4
  • 5
  • 6
  • Next Page »

I'm Douglas

I spent 25 years living across Mexico, from Durango and Monterrey to Puerto Vallarta and San Miguel de Allende. Since 2014, we have published nearly 200 of our own Mexican recipes and we have collaborated with professional chefs, established food bloggers, and writers to bring you even more. 

About me

Most Popular Mexican Recipes

  • Classic Salsa Verde
  • Bowl of Mexican Restaurant Style Salsa
    Restaurant Style Salsa
  • Bowl of Traditional Mexican Sopa de Fideo
    Traditional Sopa de Fideo
  • Bowl of Authentic Red Pozole
    Red Pork Pozole
  • Bowl of Chicken Tinga
    Chicken Tinga
  • Agua de Jamaica
  • Tres Leches Cake with Berries
    Tres Leches Cake
  • Beet Salad Citrus Balsamic Vinaigrette Recipe
    Beet Salad with Feta Cheese and Citrus Balsamic Viniagrette
  • Cheese Enchiladas with Red Enchilada Sauce
    Red Enchilada Sauce
  • Authentic Mole Poblano
    Mole Poblano

Footer

↑ back to top

About

  • Privacy Policy
  • Terms & Conditions

Newsletter

  • Sign Up! for emails and updates

Contact

  • Contact

As an Amazon Associate we earn from qualifying purchases.

Copyright © 2025 Mexico Publishing LLC

Rate This Recipe

Your vote:


A rating is required
A name is required
An email is required