Mexican Food Journal

  • Recipes
  • About
  • Contact
  • Subscribe
menu icon
go to homepage
  • Recipes
  • About
  • Contact
  • Subscribe
search icon
Homepage link
  • Recipes
  • About
  • Contact
  • Subscribe
×
Home

Pass the Chipotle Podcast

Food Writers

Pass the Chipotle Mexican Food Podcast

Pass the Chipotle: The Show that Takes You to Discover the Edible Treasures of Mexico

By Rocio Carvajal, food researcher, cook, and author.

My passion for using the power of storytelling to build bridges of dialogue and understanding has been a constant through my involvement in cultural projects related to the tangible and intangible heritage of Mexico, which is why I am so excited about this podcast.

Pass the Chipotle Mexican Food Podcast

As a keen traveller, I really enjoy eating my way through the places and countries I visit but it is equally delightful to actually get to know how those dishes came to be, learning about their influences and the way communities create bonds around their traditional festivities and meals, which is why I decided to create an audible compendium of edible postcards about my beloved country’s gastronomy.

The show has something to offer to all audiences, whether you are new to traditional Mexican food, a consumate foodie or simply want to know more about one of the world’s most acclaimed cuisines, the traditions and stories big and small behind this fascinating cuisine.

Pass the Chipotle Podcast 2

During the conceptual creation of the podcast I had to address two challenges, deciding whether to tell the story of Mexican gastronomy from the beginning and in chronological order and the other was to decide if the focus would be on the dishes or the stories, and since the meaty part of every good tale is in the making of it not just the ending, I decided to tell stories, present and past honouring the way Mexican culture manifest itself by blending centuries-old heritage and contemporary traditions.

Pass the Chipotle Podcast is also the companion of SABOR! This is Mexican Food Magazine and they complement perfectly by offering a delicious and thought-provoking way to explore the breadth and depth of the Mexican cookbook.

Rocio Carvajal Podcast

This bi-weekly show is available on iTunes and Stitcher, the first season of the show covers topics that range from: the stewardship of culinary traditions, the primordial crops that are the base of Mexican gastronomy, Food at the table of the Hungarian-Mexican empire, the influence of Baroque art in Mexican food, and many other subjects that will change the way you think about Mexican food, cooking, and eating.

Podcast Pass the Chipotle

You can listen to episodes of Pass the Chipotle HERE


Upcoming Guest on the Podcast

The addition to different voices from actors who are also challenging and transforming the way people approach food, brings diversity, empowerment, and opportunities to broaden the conversation and find innovative ways to make gastronomic heritage significant in our everyday life, and I have a special treat for the readers of The Mexican Food Journal as Douglas Cullen will feature as a special guest on the show and will share his journey and how he went from a newly arrived expat in Mexico to a true enthusiast of authentic Mexican food and became a blogger and private cooking instructor.

Subscribe to the show and follow @chipotlepodcast on twitter and don’t miss this great interview.

About Rocio

Rocio Carvajal

Rocio has a degree in Communication, an MA in International Aid for Development and studies in cultural management and medieval history. She’s passionate about food studies and the gastronomic heritage and traditions of Mexico which she explores through her many projects whether they are editorial, academic, cultural or food-related.

You can reach Rocio at: www.passthechipotle.com  | hello@passthechipotle.com | Twitter: @rocio_carvajalc and @chipotlepodcast | Instagram: @rocio.pinky

More from Rocio

  • SABOR Mexican Food Magazine

More People with a Passion for Sharing the Flavors of Mexico

  • Enrique Chavelas – Cookin Vallarta
  • Diana Silva – Molé Mama

Spicy Habanero Salsa

Salsas & Sauces

Tomato Habanero Salsa

Salsa Habanera

If you like your salsa hot, this is the one for you, a fiery red tomato habanero sauce like they make in the Yucatán. Habanero chiles have a fruity taste and are very hot, not for the faint of heart. A little goes a long, long way.

Tomato Habanero Salsa

How to Make

Ingredients:

A few simple ingredients make a great salsa.

  • 3 very ripe tomatoes (about 1 lb.)
  • ½ white onion
  • 2 habanero peppers (chiles)
  • 1 clove of garlic
  • 1tsp. apple cider vinegar
  • 3 tbsp. oil.

Note: If you are sensitive to hot peppers, which habaneros definitely are, you can wear gloves to avoid any discomfort.

Ingredients Tomato Habanero Salsa

Remove the stems from the tomatoes and chiles and quarter the tomatoes and onion.

Chopped Ingredients Habanero Salsa

Preheat 1 tbsp. oil to medium-hot. Cook the tomatoes, onion, habaneros, and garlic until they start to brown, about 10 minutes.

Cooked Ingredients Habanero Salsa

Blend with the salt, vinegar.

Habanero Salsa Ingredients in Blender

You’re salsa before being cooked. It’s starting to look good. The next step is “seasoning.”

Blended Salsa Ingredients

Fry the Salsa. This is an important step. Heat 2 tbsp. of oil to hot. Once the oil is hot, pour the blended salsa into the hot oil.

This is called “seasoning” the salsa and it adds depth of flavor.

Seasoning Habanero Salsa

Reduce the heat and simmer for 20 minutes. During this time the salsa will darken in color, slightly thicken and take on a more intense flavor. It’s now ready to serve.

Reducing the Salsa

Looks good, doesn’t it?

Yucatán Style Habanero Salsa
Tomato Habanero Salsa
Print Recipe
4.18 from 51 votes

Habanero Salsa Recipe

Yucatán style tomato habanero hot sauce recipe. Habanero chiles have a fruity taste and are very hot, not for the faint of heart. If you like it hot, this is the salsa for you.
Prep Time10 minutes mins
Cook Time30 minutes mins
Total Time40 minutes mins
Course: Salsa
Cuisine: Mexican
Keyword: Habanero Salsa Recipe, How to Make Habanero Salsa, Salsa Habanera
Servings: 8 servings
Calories: 61kcal
Author: Douglas Cullen

Ingredients

  • 3 very ripe tomatoes about 1 lb.
  • 2 habanero chiles
  • ½ white onion
  • 1  clove garlic
  • 1  tbsp  apple cider vinegar
  • 1 tsp  salt + to taste
  • 3 tbsp  cooking oil

Instructions

  • Remove the stems from the tomatoes and chiles and quarter the tomatoes and onion.
  • Preheat 1 tbsp. oil to medium-hot. Cook the tomatoes, onion, chile, and garlic until they start to brown, about 10 minutes.
  • Blend the browned tomatoes, onions, and garlic with the salt, vinegar.
  • Heat 2 tbsp. of oil to hot. Once the oil is hot, pour the blended salsa into the hot oil to "season" it.
  • Reduce the heat to low and simmer for 20 minutes to thicken and intensify the flavor.

Notes

Reducing the Heat
You can reduce the heat by only using 1 habanero chile. You can also remove the stems and seeds which will reduce the heat even more.
A Word of Caution
Habanero chiles are very hot. If you touch your mouth or eyes after handling them it will burn. Wash your hands thoroughly after working with chiles. Wearing gloves will help you avoid an uncomfortable situation.

Nutrition

Serving: 1/4 cup | Calories: 61kcal | Carbohydrates: 4g | Protein: 1g | Fat: 5g | Sodium: 6mg | Sugar: 2g

More Mexican Salsa Recipes

  • Salsa Verde
  • Restaurant Salsa
  • Avocado Salsa
  • Red Enchilada Sauce
  • Salsa Taquera

Taco Libre Austin 2017

Places and Events

Taco Libre Austin Poster 2017

Tacos + Lucha Libre + Música = Awesome!

TACO LIBRE AUSTIN is a gathering of the region’s BEST taquerias served with a side of a Lucha Libre wrestling and music from Piñata Protest, Nina Diaz, and The Vandoliers! 16 of the area’s best taquerias have been deliciously curated by The Taco Trail’s José Ralat. Tacos will range from traditional to contemporary. Each taqueria will have a $2 taco and there will be plenty of veggie options. This is a family friendly event taking place at the Austin-American Statesman from Noon-6p.m. Get your tickets here.
Taco Libre Austin Poster 2017

About the Event Curator, Jose Ralat of the Taco Trail:

No one knows more about tacos than The Taco Trail’s José Ralat who deliciously curates our participating taquerias. Ralat is the food editor of Dallas-based western lifestyle magazine Cowboys & Indians as well as the writer behind the Taco Trail blog, for which he has written hundreds of reviews and explored the history of tacos and accessories like the taco holder, which, for the record, he loathes. His work has been published by Texas Monthly, Munchies, and many other media outlets. He is the author of the forthcoming book, American Tacos: A History and Guide to the Taco Trail North of the Border. The New York Times has called him “an expert on the folklore of tacos.”

Photos Taco Libre Austin
Taco Libre Austin 2017 Poster

Mushroom Soup

Soups

Mexican Mushroom Soup Recipe

Sopa de Hongos o Sopa de Champiñones

A simple mushroom soup prepared with epazote which gives it its uniquely Mexican taste. This is another recipe that our photographer Andres’ mother used to cook for him when he was a kid growing up in Cuernavaca. Real Mexican home cooking.

Mexican Mushroom Soup Recipe

Gather Your Ingredients

You’ll need button mushrooms, white onion, garlic, epazote, and chicken broth. Substitute vegetable broth for the chicken broth to make it a vegan / vegetarian soup.

Ingredients Mexican Mushroom Soup

How to Make


Start by removing the stems from the mushrooms then discard the stems.

Button Mushrooms Stems Removed

Slice the mushroom caps into 3 pieces.

Sliced Button Mushrooms

Heat the oil to medium hot and then add the sliced mushrooms.

Cooking Button Mushrooms

Cook, stirring every 30 seconds until the mushrooms start to darken in color and start to release their liquid.

Cooking Mushrooms

Add the blended onion and garlic and the remaining chicken broth.

Adding Chicken Broth to Mushroom Soup

Add the epazote and boil for 5 minutes then cover. Reduce the heat and cook for 10 more minutes.

Cooking Mushroom Soup With Epazote

There you have it, a healthy easy to make mushroom soup that comes from the heart of Mexico. Serve each bowl with a couple of lime halves.

Mushroom Soup Sopa de Hongo

Provecho!

Let us know how it turns out for you. We think you will love it. It will become a weekday favorite.

Mexican Mushroom Soup Recipe
Print Recipe
3.25 from 4 votes

Mexican Mushroom Soup Recipe

A quick and easy mushroom soup that gets its uniquely Mexican flavor from epazote, a pungent herb used in Mexican cooking. One of the many recipes that our photographer Andres' mother used to cook for him when he was a kid growing up in Cuernavaca.
Prep Time10 minutes mins
Cook Time15 minutes mins
Total Time25 minutes mins
Course: Soup
Cuisine: Mexican
Keyword: how to make mexican mushroom soup, Mexican mushroom soup recipe, mushroom soup
Servings: 4 servings
Calories: 70kcal
Author: Andrés Carnalla

Ingredients

  • 2 lbs button mushrooms
  • ¼ large white onion
  • 1 clove garlic
  • 4 cups low sodium chicken broth
  • 1 small bunch epazote
  • 4 limes

Instructions

  • Blend the onion and garlic with 1 cup of the chicken broth.
  • Remove the stems from the mushrooms and then discard the stems.
  • Cup the mushroom caps into thirds.
  • Heat the oil over medium heat.
  • Add the chopped mushrooms.
  • Cook, stirring every 30 seconds until the mushrooms start to darken in color and start to release their liquid.
  • Add the blended onion and garlic and the remaining 3 cups of chicken broth.
  • Add 3 sprigs of epazote.
  • Cover the pot and boil for 5 minutes.
  • Reduce the heat and cook for 10 more minutes.
  • Serve with 1 or 2 slices of lime.

Notes

  • In Spanish the soup is called sopa de hongos o sopa de champiñon.
  • For a vegetarian / vegan soup you can substitute water or vegetable broth for the chicken broth.
  • A very healthy soup with or without the chicken broth.
  • Store in the refrigerator for up to 3 days.

Nutrition

Calories: 70kcal | Carbohydrates: 11g | Protein: 8g | Fat: 2g | Sodium: 900mg | Sugar: 7g

More Mexican Soups

  • Tortilla Soup
  • Cream of Cilantro Soup
  • Cream of Corn Soup
  • Cream of Tomato Soup
  • Lentil Soup

Mexican Red Rice

Side Dishes

Mexican Rice Recipe

Arroz Mexicano o Arroz Rojo

Enjoy this rustic Mexican Red Rice also known as Spanish rice. It’s a great side dish for beef, chicken or enchiladas with a much bolder taste than plain white rice. It’s very easy to make and will become part of your regular dinner rotation.

Mexican Rice Recipe

Let’s Make Some Rice!

Gather the ingredients for your Mexican rice. You will need medium grain rice, plum tomatoes, white onion, frozen peas, a carrot, garlic, and chicken broth or water. You probably already have everything on hand.

Ingredients to Prepare Mexican Rice
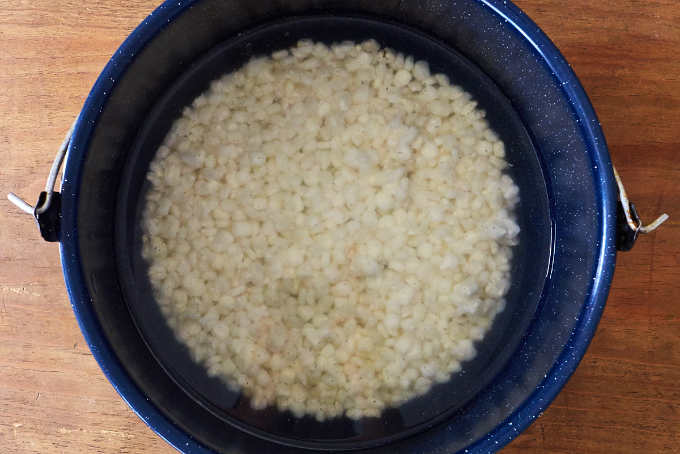
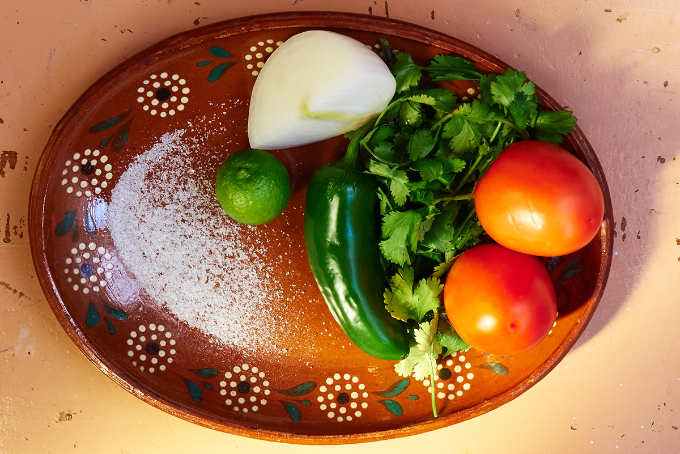
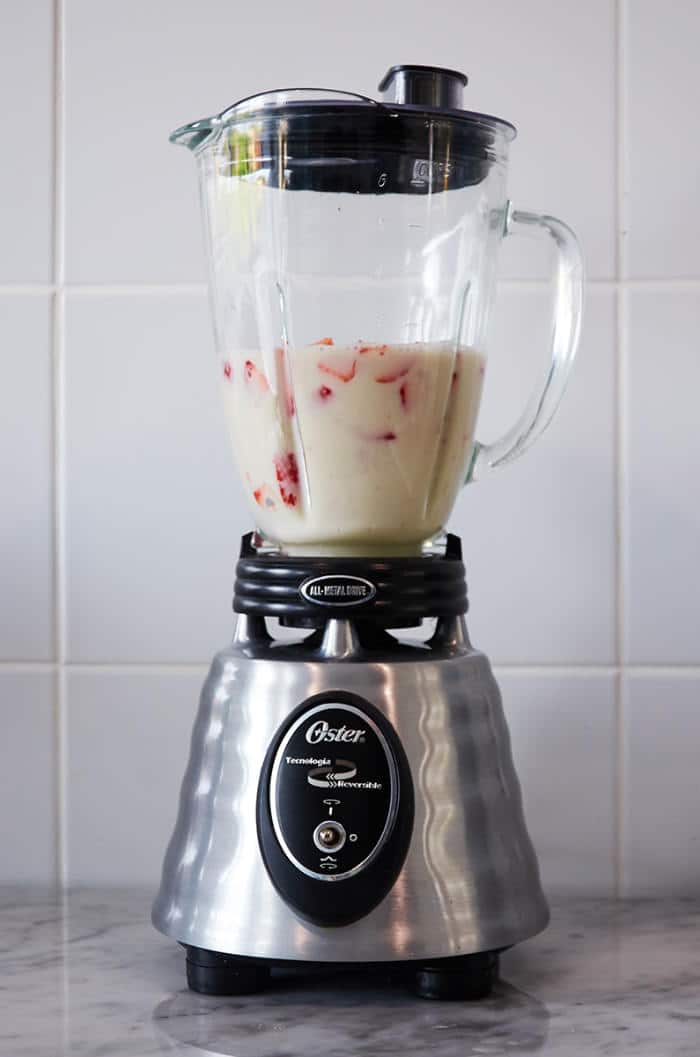
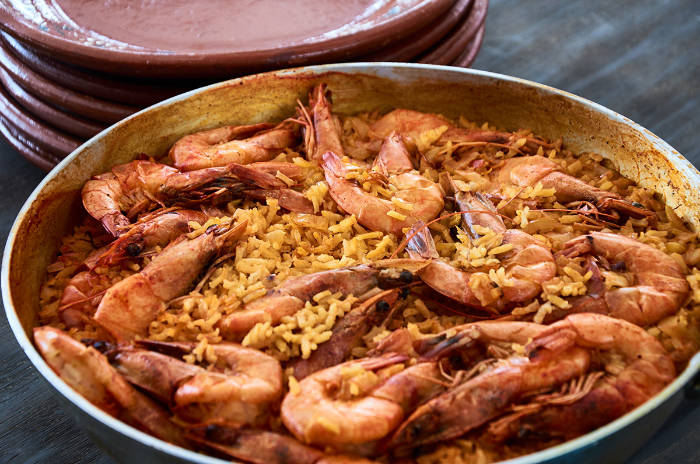
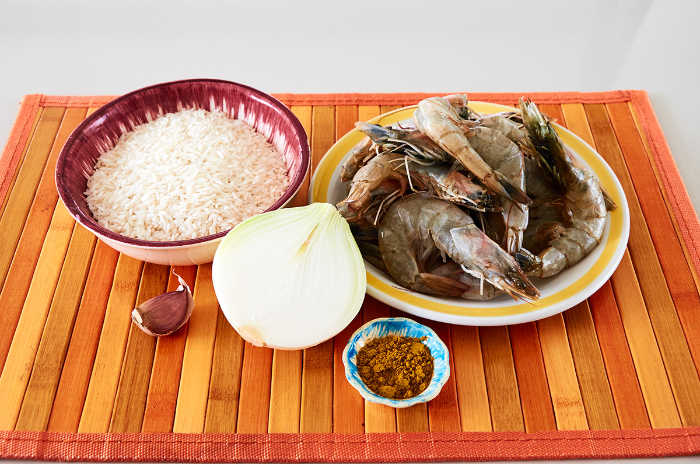
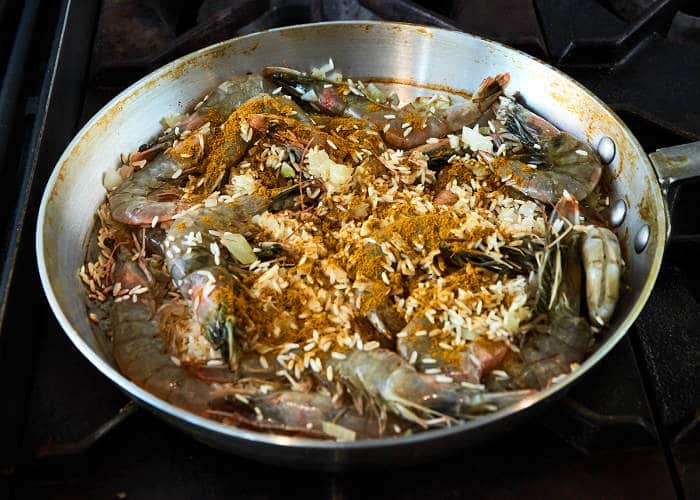
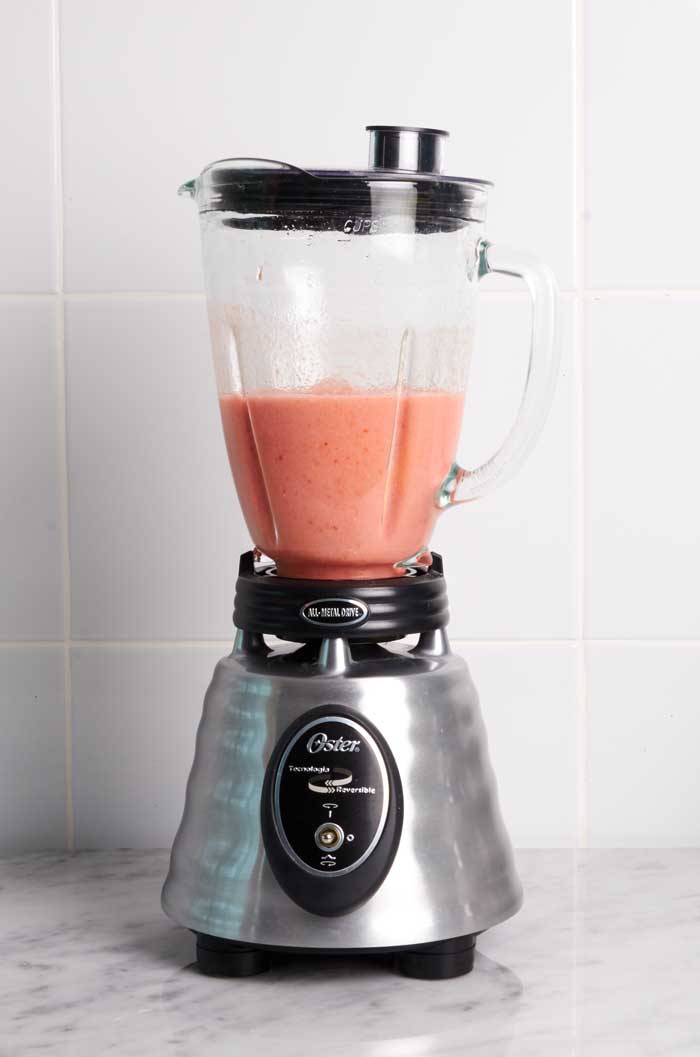
Soak the rice in water for 10 minutes and then drain. Soaking the rice removes some of the excess starch to give you fluffier rice.

Straining Soaked White Rice

Blend the tomatoes and garlic with the chicken broth or water.

Tomatoes and Garlic in Blender

This is what the blended tomatoes will look like. Not too appealing, yet. It will turn a beautiful red after being cooked.

Pureed Tomatoes

In a pot, preheat 3 tbsp. of cooking oil to medium hot. Add the diced onions and carrots to the hot oil. Cook for 30 seconds without stirring. Add the rice and peas and stir to mix the ingredients.

Preparing Mexican Rice

Add the blended tomatoes. Cover the pot and reduce the heat to low.

Preparing Mexican Red Rice

Cook for 25 minutes until the liquid has been absorbed by the rice. Turn off the heat and let the rice rest for 10 minutes. Fluff the rice with a fork and serve. Looks good, doesn’t it?

Mexican Red Rice Recipe

Provecho!

Bowl of Mexican Rice
Print Recipe
3.78 from 9 votes

Mexican Red Rice Recipe

Rustic Mexican red rice made with plum tomatoes, onion, carrot and peas. An easy to prepare, delicious side dish for beef, chicken or enchiladas.
Prep Time15 minutes mins
Cook Time25 minutes mins
Total Time40 minutes mins
Course: Side Dish
Cuisine: Mexican
Keyword: how to make Mexican rice, Mexican rice recipe, red rice recipe
Servings: 4 servings
Calories: 85kcal
Author: Andrés Carnalla

Ingredients

  • 1 cup of rice
  • 3 plum tomatoes Roma
  • ½ cup diced onion
  • ½ cup frozen peas
  • 1 large carrot diced
  • 1 clove garlic
  • 2 cups chicken broth preferably low sodium or water
  • 1 tsp. salt + as needed

Instructions

  • Soak the rice in just enough water to cover for 10 minutes then drain and set aside.
  • Blend the tomatoes and garlic with the 2 cups of chicken broth.
  • In a pot, preheat 3 tbsp. of cooking oil to medium hot.
  • Add the diced onions and carrots to the hot oil. Cook for 30 seconds without stirring.
  • Add the rice and peas and stir to mix the ingredients.
  • Lastly, add the blended tomatoes and chicken stock.
  • Cover the pot and reduce the heat to low.
  • Cook for 25 minutes until the liquid has been absorbed by the rice. Turn of the heat and let the rice rest for 10 minutes.
  • Stir the rice and add salt if needed.
  • Serve with your favorite dish.

Notes

This dish is also known as Spanish rice.

Nutrition

Serving: 1/2 cup | Calories: 85kcal | Carbohydrates: 29g | Protein: 5g | Fat: 1g | Sodium: 935mg | Sugar: 5g

More Mexican Rice Recipes

Green Rice

Tamarind Water

Beverages

Glass of Tamarind Water - Agua de Tamarindo

Agua de Tamarindo

If you are looking for a refreshing natural Mexican drink try tamarind water, one of the many aguas frescas enjoyed in Mexico. Our version is tart, a little sour and a little sweet. Tamarind is rich in vitamins and minerals and is a healthy substitute for soda with your meals.

Glass of Tamarind Water - Agua de Tamarindo

How to Make Tamarind Water

In Mexico, tamarind water is prepared from the dried pods which are available in any market. You can also buy tamarind concentrate which is a poor substitute for freshly prepared. Fresh is more work but it tastes so much better.

Tamarind - Tamarindo

The first step is peeling the tamarind pods. Remove as much of the hard shell as possible. Don’t worry if you can’t get all of the shell off. The remaining bits will come off when boiled.

Shelled Tamarindo

Add 3 cups of water to a medium-size pot and bring the water to a boil. Add the peeled tamarinds and reduce the heat to medium and cook for 10 minutes.

Boiling Tamarinds

After cooking the tamarinds, turn off the heat and allow the water to cool completely. Remove the tamarinds and reserve the soaking water.

Boiled Tamarinds

Once the tamarinds have cooled, you need to remove the sticky paste from the beans. Reserve the paste and discard the beans. This step is a bit tedious but it is important to get as most of the tamarind paste as possible. Much of the flavor comes from the paste. 

Removing Tamarind Pulp

Add the tamarind paste to your blender.

Tamarind Paste in Blender

Then add the soaking water and the brown sugar and blend for 1 minute.

Blending Tamarind Paste and Sugar

Strain the blended liquid into a ½ gallon pitcher and add 3 cups of water and give it a good stir.

Straining Tamarind Paste
Pitcher of Mexican Tamarind Water

Serve in a tall glass over lots of ice. You can add a squirt of lime juice to each glass if you’d like. We usually serve ours without the lime. We love the pure taste of the tamarind.

Tall Glass of Tamarind Water - Agua de Tamarindo

What is Tamarindo?

You might be wondering what on earth tamarindo is. Tamarinds are the fruit of the tamarind tree, a member of the fabaceae family which is the same family of plant as peas and beans. The trees are native to Africa but are now grown throughout the world in sub-tropical regions. The flavor of tamarind is loved in Mexico and it is used mainly to prepare tamarind and spicy candy like Pulparindo which you can buy at any corner store. Kids are crazy for tamarind candy.

Tall Glass of Tamarind Water - Agua de Tamarindo
Print Recipe
4.45 from 9 votes

Tamarind Water

Tamarind water called “agua de tamarindo,” a refreshing natural Mexican drink. It’s a delicious, tart, sour and sweet agua fresca rich in vitamins and minerals served throughout Mexico. A healthy alternative to soda that is easy to prepare.
Prep Time10 minutes mins
Cook Time10 minutes mins
Total Time50 minutes mins
Course: Beverage
Cuisine: Mexican
Keyword: How to Make Tamarind Water, Tamarind Water, Tamarind Water Recipe
Servings: 6 glasses
Calories: 76kcal
Author: Douglas Cullen

Ingredients

  • 15 dry tamarind pods peeled
  • 6 cups water
  • ¼ cup brown or refined sugar We prefer brown sugar for it’s richer taste.

Instructions

  • Peel the tamarind pods. Remove as much of the hard shell as possible. If you can’t get all of the shell off the remaining bits will come off when you boil the tamarinds.
  • Add 3 cups of water to a medium size pot and bring the water to a boil. Add the peeled tamarinds and reduce the heat to medium and cook for 10 minutes.
  • Let the water cool completely. Remove the tamarinds and reserve the soaking water.
  • Remove the sticky paste from the beans and reserve the paste. Discard the beans. (This is the most difficult part)
  • Add the soaking water, the tamarind paste and the sugar to the blender and blend for 1 minute.
  • Strain the blended liquid into a ½ gallon pitcher. 
  • Add 3 cups of cool water and stir.
  • Serve over lots of ice.

Notes

  • Add more sugar if your tamarind water is too tart for your taste. This recipe is on the tart side.
  • You can add a splash of lime juice to each glass of water if you’d like.
  • Adding ¼ teaspoon of salt in the pitcher will bring out the tamarind flavor even more.

Nutrition

Serving: 1cup | Calories: 76kcal | Carbohydrates: 19g | Protein: 1g | Sodium: 5mg | Sugar: 15g

More Aguas Frescas

  • Guava Water
  • Jamaica Water
  • Watermelon Water
  • Cucumber Water
  • Horchata

Red Pork Pozole

Soups

Bowl of Authentic Red Pozole

Pozole Rojo de Puerco

Red Pork Pozole soup is my favorite Mexican dish hands down. It’s simple, earthy, rich and satisfying. Pozole is pork or chicken – this recipe calls for pork – and hominy in a mildly spicy guajillo and ancho chile broth garnished with shredded cabbage or lettuce, diced onion, sliced radish, Mexican oregano and some arból chile for a little extra heat with a squirt of lime juice to bring it all together. The perfect dish.

Bowl of Authentic Red Pozole

Let Us Teach You How to Make Great Pozole

The Cooking Process

If you have never made pozole before it will help to visualize the process. Here’s a list of the main steps. The photos will walk you through the process.

Start with these steps:

These are done in separate pots at the same time.

  • Prepare the chile base
  • Cook the pork
  • Cook the hominy

Then complete these steps:

  • Combine the ingredients in 1 pot and simmer
  • Prepare the garnishes

Then the best part:

  • Serving and eating

Gather Your Ingredients

The main ingredients to make pozole are pork, hominy (maíz pozolero), ancho chiles, guajillo chiles, onion, garlic, and Mexican oregano and optional chiles de arból.

Ingredients for Red Pork Pozole

Cooking the Pork & Broth

Place the pork, a head of garlic a few bay leaves and half an onion in a large pot and just cover with water (about 6 cups). Bring the water to a boil and then reduce the heat to a simmer. Cook for 45 minutes. The pork is done when you can easily pull it apart with your fingers. If the pork doesn’t pull apart easily after 45 minutes, cook for another 15 minutes.

Cooking the Pork for Red Pozole

When the pork is cooked remove it from the cooking liquid and set aside. Strain the broth into a bowl and set aside.

Cooked Pork and Pork Broth

When the pork is cool to the touch, shred it with your fingers into 1″ long pieces.

Shredded Pork

Preparing the Chile Base

Remove the stems, seeds, and veins from the chiles and discard.

Removing Stems Seeds and Veins from Dried Chiles

Place the chiles, 3 cloves of garlic, and ½ white onion in a pot and just cover with water (about 3 cups).

Reconstituting Dried Chiles for Red Pozole Base

Bring to a boil and then turn off the heat. Allow the chiles to rest for 15 minutes to reconstitute them. Notice how the chiles have expanded and become pliable from absorbing the water.

Cooking the Ancho Guajillo Chile Base for Red Pork Pozole

Add the chiles, onion, garlic oregano, and soaking liquid to your blender. Blend for 1 minute until smooth. Do this in 2 batches.

Blending Chiles

Strain the blended chile base.

Straining the Chile Base

Press the pulp firmly with the back of the spoon to extract as much flavor as possible. Discard the chile pulp that remains.

Chile Pulp in Strainer

Heat 3 tablespoons of oil over medium-high heat and pour in the chile base. This is called “seasoning.” It is an important step that adds a lot of flavor to your pozole.

Frying The Chile Base

Simmer for 30 minutes until the base has thickened and darkened in color. Looking good, isn’t it?

Finished Chile Base for Red Pozole

Cooking the Hominy

Drain the canned hominy and rinse. Put the rinsed hominy in a large pot and cover with 2″ of water. Simmer while you are preparing the pork and chile base.

Hominy - Maiz Pozolero

Assembling the Pozole

Now it is time to bring all of the ingredients together. Add the chile base to the hominy.

Adding Chile Base to Hominy

Then add the pork broth and shredded pork. Add 3 teaspoons of sea salt. Bring to a boil then reduce the heat and simmer for 30 minutes. 

Salt is Important

The recipe calls for 3 tsps. of salt to start. This is the minimum. We start with this quantity of salt so that you can adjust it to your preferences. Most likely you will want to add more. Add ½ tsp. at a time then stir well. Taste. Continue until the flavors pops and the level of saltiness is just right for you.

Adding Pork Broth

When the pozole is ready to serve it will have taken on a beautiful deep red color. 

Cooked Pozole

Preparing the Garnishes

While your pozole is simmering you will need to get all of the garnishes ready. The traditional garnishes are: shredded cabbage or lettuce, diced onion, slices of radish, oregano, limes and finely chopped dried chiles or chile powder. It is common to enjoy pozole with tostadas or corn tortillas too.

Garnishes for Red Pork Pozole

This Is How I Prepare My Perfect Bowl

Everyone has a unique way of personalizing their pozole. This is how I prepare mine. You need to start with the garnishes: shredded cabbage or lettuce, chopped onion, sliced radish, oregano, chopped spicy arból chile, and lime wedges. Then you add your preferred garnishes in your preferred quantity.

Let’s begin. I start with a naked bowl of pozole.

Red Pork Pozole No Garnish

Add cabbage.

Red Pork Pozole With Cabbage

Add radish.

Red Pork Pozole With Cabbage and Radish

Add onion.

Red Pork Pozole With Garnishes

Add oregano.

Red Pork Pozole With Garnishes 2

And lastly, add chile de arból for some heat with a squirt of lime to tie all the flavors together.

Red Pork Pozole With Garnishes 3

Here It Is, My Perfect Bowl

What do you think!

Bowl of Authentic Red Pork Pozole With Garnishes

Hungry yet? Provecho!

Pozole Rojo de Puerco - Red Pork Pozole

Note: “Posole” or “pazole” are alternative spellings used to describe this dish.

Authentic Red Pork Pozole
Print Recipe
4.07 from 119 votes

Red Pork Pozole Recipe

Authentic Red Pork Pozole – a simple, earthy, rich and satisfying dish. Pork and hominy in a mildly spicy chile broth garnished with shredded cabbage, diced onion, sliced radish, and Mexican oregano finished with a squirt of lime juice.
Prep Time20 minutes mins
Cook Time1 hour hr 30 minutes mins
Total Time1 hour hr 50 minutes mins
Course: Dinner
Cuisine: Mexican
Keyword: ancho chile, hominy, pasilla chile, pork, soup, stew
Servings: 12 servings
Calories: 280kcal
Author: Douglas Cullen

Equipment

  • Large stock pot
  • Soup pot
  • 3 mixing bowls
  • Cutting board
  • Kitchen knife
  • Blender
  • Large strainer
  • Kitchen Spoons
  • 6 garnish bowls

Ingredients

Pozole

  • 3 pounds boneless pork leg or pork shoulder
  • 2 25 oz. cans of hominy drained and rinsed
  • 5 ancho chiles
  • 5 guajillo chiles
  • ½ white onion
  • 3 arból chiles optional, use if you want a spicier broth
  • 3 cloves of garlic + 1 head of garlic
  • 1 tablespoon Mexican oregano
  • 3 bay leaves
  • 3 teaspoon sea salt + to taste 3 tsp. is the minimum. Add ½ tsp. at a time then stir well. Taste and repeat until the desired flavor is reached.

Garnishes

  • ½ head of cabbage shredded
  • 1 large white onion diced
  • 6 radishes sliced into half moons
  • 6 limes quartered
  • 4 tablespoon Mexican oregano
  • 6 arból chiles finely chopped
  • Salt as needed

Instructions

FIRST STEPS

  • The first steps are done in separate pots at the same time.

Pork and Pork Broth

  • Place the pork, head of garlic a few bay leaves and half an onion in a large pot and just cover with water (about 6 cups).
  • Bring the water to a boil and then reduce the heat to a simmer. Cook for 45 minutes. The pork is done when you can easily pull it apart with your fingers. If the pork doesn't pull apart easily after 45 minutes, cook for another 15 minutes.
  • When the pork is cooked remove it from the cooking liquid and set aside. Strain the broth into a bowl and set aside.
  • Shred the pork with your fingers into 1" long pieces.

Chile Base

  • Remove the stems, seeds and veins from the chiles and discard.
  • Place the chiles, clove of garlic, and ½ white onion in a pot and just cover with water (about 3 cups).
  • Bring to a boil and then turn off the heat. Allow the chiles to rest for 15 minutes to reconstitute them. Notice how the chiles have expanded and become pliable from absorbing the water.
  • Add the chiles, onion, garlic oregano, and soaking liquid to your blender. Blend for 1 minute until smooth.
  • Strain the blended chile base. Discard the chile pulp that remains.
  • In a pot, heat 3 tablespoons of oil over medium-high heat and pour in the chile base. Reduce the heat to a simmer.
  • Cook for 30 minutes until the base has thickened and darkened in color.

Hominy

  • Drain the canned hominy and rinse.
  • Put the rinsed hominy in a large pot and cover with 2" of water.
  • Simmer while you are preparing the pork and chile base.

NEXT STEPS

    Assembling Your Pozole

    • Now it is time to bring all of the ingredients together.
    • Pour the prepared chile base into the hominy.
    • Then add the pork broth and shredded pork. 
    • Add 2 teaspoons of sea salt.
    • Bring to a boil then reduce the heat and simmer for 30 minutes.
    • Adjust the salt as necessary.

    Prepare the Garnishes

    • Shred the cabbage.
    • Dice the onion.
    • Slice the radish into half-moons.
    • Quarter the limes.
    • Finely chop the arból chile.
    • Place each garnish into individual serving bowls.

    FINAL STEPS

      Serving

      • Ladle the pozole into individual bowls to serve.
      • Each person garnishes their pozole as desired.
      •  The final step is to enjoy!

      Notes

      Optional:
      • You can add a pinch of cumin to deepen the flavor of the broth.
      • You can substitute 2 cups of water for 2 cups of chicken stock to enrich the flavor.
      “Posole” or “pazole” are alternative spellings.

      Nutrition

      Calories: 280kcal | Carbohydrates: 29g | Protein: 25g | Fat: 8g | Saturated Fat: 3g | Cholesterol: 68mg | Sodium: 899mg | Potassium: 843mg | Fiber: 9g | Sugar: 10g | Vitamin A: 4340IU | Vitamin C: 30.2mg | Calcium: 93mg | Iron: 3.9mg

      More Mexican Soups & Stews

      • Chicken Clemole
      • Authentic Tortilla Soup
      • Black Bean Soup With Avocado
      • Sopa de Fideo
      • Mexican Potato Soup

      Chipotle Fish Taco Sauce

      Salsas & Sauces

      Bowl of Authentic Mexican Fish Taco Sauce

      Salsa Chipotle para Tacos de Pescado

      The easiest, tastiest fish taco sauce ever. Saying “ever” sounds a bit over the top but it’s true. The sauce is mild, yet tangy, smoky and smooth and really brings out the flavor in fish without overpowering it.

      Chipotle Fish Taco Sauce Recipe

      Try it with our pan-fried fish tacos. Just substitute it for the pico de gallo. Great with Baja Fish Tacos too or as a way to liven up some fish sticks.

      Gather Your Ingredients

      For your fish tacos sauce, you will need

      • ½ cup mayonnaise
      • ½ cup sour cream or crema
      • 2 chipotle peppers in adobo
      • 1 clove garlic
      • 1 tablespoon Mexican oregano
      • Juice of 3 small Mexican limes
      • 1 teaspoon sea salt
      Ingredients Chipotle Fish Taco Sauce Recipe

      How to Make Fish Tacos Sauce

      The only prep work this recipe requires is finely chopping the chipotle peppers and the clove of garlic. The rest of the preparation is just stirring. Easy right?

      Finely Chopped Chipotle and Garlic

      Assembling the Sauce

      • Put all of the ingredients in a mixing bowl and give it a good mix with a fork. That’s it. Nothing to it.
      Fish Taco Sauce Ingredients in Mixing Bowl
      mixing fish taco sauce in bowl
      Mixing Fish Taco Sauce
      Stirring Chipotle Fish Taco Sauce

      Resting the Sauce

      • Once the ingredients are fully mixed, place the sauce in the refrigerator for two hours to let the flavors meld.
      • Giving the sauce time really improves the flavor. The sharpness of the garlic and lime juice mellows and the smoky chipotle shines through.
      • Don’t believe it?. Taste the sauce when you first mix it and then taste it after 2 hours. You’ll notice the difference.

      The Results

      How does it look? The best fish dressing ever. Provecho!

      Fish Taco Sauce with Chipotle
      Chipotle Fish Taco Sauce Recipe
      Print Recipe
      3.96 from 23 votes

      Creamy Chipotle Fish Taco Sauce

      The easiest, tastiest fish taco sauce ever. Really!  It's mild, yet tangy, smoky and smooth and really brings out the flavor in fish without overpowering it. Use with battered or grilled fish tacos. Give it a try!
      Prep Time5 minutes mins
      Total Time5 minutes mins
      Course: Sauce
      Cuisine: Mexican
      Keyword: chipotle, crema, fish tacos, salsa, Sauce, sour cream
      Servings: 8 servings
      Calories: 128kcal
      Author: Douglas Cullen

      Ingredients

      • ½ cup mayonnaise
      • ½ cup sour cream or crema
      • 2 chipotle peppers in adobo
      • 1 clove garlic
      • 1 tbsp. Mexican oregano
      • juice of 3 small Mexican limes key limes
      • 1 tsp. sea salt

      Instructions

      • Finely chop the chipotle pepper and the garlic clove.
      • Place all of the ingredients in a mixing bowl including the lime juice. When you add the oregano crumble it with your fingers to break it into smaller pieces.
      • Stir briskly with a fork.
      • Refrigerate the sauce 2 hours before serving.
      • Stir before serving.

      Notes

      Want it hotter?
      • If you prefer a spicier sauce, just add 1 or 2 more chipotles. Adding 2 chipotles will give it a big boost in heat and chipotle flavor.
      • You can add a dash of your favorite hot sauce too.
      Want an even deeper flavor?
      • Try adding ¼ tsp. of cumin or ¼ tsp. garlic powder.
      A Great Sandwich Spread Too
      • Try this sauce as a sandwich spread too. It’s a big step up from plain mayonnaise.
      Great With Shrimp Tacos Too
      Need a Fish Tacos Recipe
      • Try it with our pan-fried fish tacos. Just substitute it for the pico de gallo.
      Storage
      This sauce will keep well for 3 days in the refrigerator.

      Nutrition

      Calories: 128kcal | Carbohydrates: 2g | Protein: 1g | Fat: 13g | Saturated Fat: 3g | Cholesterol: 13mg | Sodium: 439mg | Potassium: 28mg | Fiber: 1g | Sugar: 1g | Vitamin A: 295IU | Vitamin C: 0.2mg | Calcium: 26mg | Iron: 0.4mg

      More Mexican Sauces and Dressings

      • Cilantro Lime Dressing
      • Chipotle Lime Yogurt Sauce

      Spicy Pineapple Salad

      Salads

      Spicy Pineapple Salad - Ensalada Arabe

      Ensalada Arabe

      Our photographer Andrés describes how he came to learn about this spicy pineapple salad called Ensalada Arabe or “Arabic Salad”, a dish filled with the childhood memories of his friend Daniel Navarro an artist from Guadalajara.

      Spicy Pineapple Salad - Ensalada Arabe

      A serendipitous Visit

      My wife and I had invited Daniel and his wife Beatriz to the house on one of the rare warm days in late February. They brought a simple salad which turned out to be one of those dishes where you just had to have the recipe after trying it.

      We asked for the recipe and the name of the dish; it was called “Ensalada Arabe.”

      A Dish from Childhood

      Daniel spent weekends at his great grandparent’s hacienda near Guadalajara called “Los Sauces Jalisco” His mother Dora Maria, who was from the town of Encarnación de Diaz in the Northern mountains of Jalisco, would prepare this salad during warmer weather at the ranch.

      One day, when Daniel’s friends were visiting the ranch his mother prepared this salad for them. After trying the dish, his friends said that the salad was an Arab salad because they had had a similar dish in an Arab restaurant.

      Daniel was surprised. He had never asked his mother how his mother had learned to prepare this dish. Perhaps it had been handed down for many generations. Like in many families, nobody was sure where the recipe had come from.

      Possible Origins of the Dish

      In the late 19th and early 20th century and again after World War II, Mexico received many immigrants from Lebanon and this dish may have originated with them.

      Did you know that the name Guadalajara comes from the Arabic WAD-al-HIDJARA, and means “river that runs between the rocks” or “rocky river?”

      If You Would Like to Know More about Daniel and His Work

      Daniel Hernandez Artista Obra

      Daniel was born in Guadalajara on December 14, 1968. He studied the Theory of Aesthetics with Guillermo Santamarina and music at the Escuela de Música de la Universidad de Guadalajara. As an artist, he is also self-taught.

      If you would like to find out more about Daniel and his art, which has been shown in Mexico, the United States, and Europe.

      How to Make

      Ingredients:

      Gather your ingredients. You will need:

      • a very ripe pineapple
      • ½ of a white onion
      • 2 chiles de arbol
      • 4 limes, salt
      • wheat crackers
      Ingredients Spicy Pineapple Salad

      Cut off the stem and remove the outer skin of the pineapple.

      Removing Skin from Pineapple

      Chop the pineapple into ½″ pieces.

      Chopped Pineapple

      Finely chop the white onion.

      Finely Chopped Onion

      Break open the chiles and remove the seeds. Then, finely chop.

      Finely Chopped Chile de Arbol

      In a mixing bowl, place all of the chopped ingredients plus the salt. Squeeze the lime juice over the ingredients. Mix well well with a spoon.

      Preparing Spicy Pineapple Salad

      Serve with wheat crackers.

      Pineapple Salad on Cracker
      Pineapple Salad with Crackers
      Spicy Pineapple Salad - Ensalada Arabe
      Print Recipe
      4.86 from 7 votes

      Spicy Pineapple Salad – Ensalada Arabe

      Recipe for a spicy pineapple salad called Ensalada Arabe or "Arabic Salad", a dish filled with the childhood memories of our photographer's friend, Daniel Navarro an artist from Guadalajara.
      Prep Time10 minutes mins
      Total Time10 minutes mins
      Course: Appetizer
      Cuisine: Mexican
      Keyword: Easy, fruit salad, pineapple, salad, spicy
      Servings: 8 servings
      Calories: 97kcal
      Author: Daniel Navarro

      Ingredients

      • 1 large ripe pineapple
      • ½ medium white onion
      • 2 chiles de arból
      • 4 limes
      • 1 tsp. salt
      • 24 wheat crackers

      Instructions

      • Cut off the stem and remove the outer skin of the pineapple. Discard.
      • Chop the pineapple into ½" pieces.
      • Finely chop the white onion.
      • Break open the chiles and remove the seeds. Then, finely chop.
      • In a mixing bowl, place all of the chopped ingredients plus the salt. Squeeze the lime juice over the ingredients. Mix well well with a spoon.
      • Serve with wheat crackers.

      Nutrition

      Calories: 97kcal | Carbohydrates: 23g | Protein: 1g | Fat: 1g | Saturated Fat: 1g | Sodium: 285mg | Potassium: 168mg | Fiber: 3g | Sugar: 13g | Vitamin A: 115IU | Vitamin C: 64.4mg | Calcium: 31mg | Iron: 0.7mg

      More Mexican Salad Recipes

      • Cucumber Salad
      • Cactus Salad
      • Spicy Tuna Salad
      • Chayote Zucchini Squash Salad
      • Beet Salad with Feta Cheese
      • Spicy Fruit Salad
      • Avocado Salad

      Fish Tacos with Pico de Gallo

      Fish & Seafood, Tacos

      Fish Tacos with Pico de Gallo Salsa

      Tacos de Pescado con Pico de Gallo

      Enjoy these easy pan-fried fish tacos with pico de gallo salsa. They are similar to Baja style fish tacos except the fish is lightly floured and pan-fried instead of battered and deep-fried and the taste of the fish is more delicate.

      Fish Tacos with Pico de Gallo Salsa

      Gather Your Ingredients

      You will need 1 ¼ lb. of a mild white fish, a head of romaine lettuce, corn tortillas or flour tortillas, flour, paprika, black pepper, and salt to make these easy fish tacos.

      Ingredients Fish Tacos

      Preparing the Fish

      Start by mixing the flour, black pepper, paprika, and salt in a mixing bowl.

      Flour Paprika Black Pepper

      Cut the fish into 2″ to 3″ inch pieces.

      Portioned Fish Fillets

      Cover the fish with the flour mixture.

      Flouring Fish Fillets

      Set the floured fish aside while you heat the oil to cook it.

      Floured Fish Fillets

      In a large frying pan, heat the 2 cups of oil to medium-hot. Cook the fish for about 3 minutes per side until it is golden on the outside and just cooked on the inside.

      Pan Frying Fish Fillets

      Set the fish aside on a paper towel covered plate to remove the excess oil.

      Fried Fish Fillets for Fish Tacos

      While the fish is draining, heat the corn or flour tortillas in a dry frying pan or on a comal.

      Pico de Gallo

      Pico de gallo is a simple salsa made with raw chopped tomato, onion, jalapeño, or serrano chile and cilantro. The cool, fresh crunch of the onion and chile peppers complements the hot fried fish.

      Pico de Gallo with Lime

      Gather your ingredients for your pico de gallo. The fresher the ingredients the better your salsa will be.

      Pico de Gallo Ingredients

      Chop the ingredients. The tomato is cut into ¼″ pieces after removing the seeds and pulp. The onion is cut into ⅛″ pieces. The jalapeño is chopped finely after removing the seeds and veins. The cilantro is chopped finely too.

      Pico de Gallo Ingredients Chopped

      Mix all of the ingredients in a bowl with the juice from 1 lime. Set aside while you prepare the fish.

      Pico de Gallo Salsa

      Serving

      Warm the tortillas on a hot griddle or comal until they are pliable. Keep the tortillas warm by wrapping them in a clean dish towel or keeping them in a tortilla warmer.

      On each tortilla, place 1 leaf of lettuce, 1 or 2 pieces of cooked fish. Top with a spoonful of pico de gallo and serve with a lime wedge on the side.

      To finish, add a pinch of salt and a squirt of lime juice to each taco if you’d like. Sour cream and a dash of hot sauce are easy additions too.

      Fish Tacos with Pico de Gallo Vertical
      Fish Tacos with Pico de Gallo Salsa
      Print Recipe
      4.67 from 6 votes

      Fish Tacos with Pico de Gallo

      Easy pan fried fish tacos with pico de gallo salsa. They are similar to Baja style fish tacos except the fish is lightly floured and pan fried instead of battered and deep fried. The taste of the fish is more delicate. 
      Prep Time30 minutes mins
      Cook Time15 minutes mins
      Total Time45 minutes mins
      Course: Fish, Lunch
      Cuisine: Mexican
      Keyword: fish, fish tacos, fried fish, pico de gallo, seafood, tacos
      Servings: 4 servings
      Calories: 450kcal
      Author: Douglas Cullen

      Ingredients

      Pico de Gallo

      • 2 medium tomatoes or 3 plum tomatoes
      • ¼ white onion
      • 1 jalapeño chile
      • 6 sprigs of cilantro
      • 5 limes
      • 1 teaspoon salt

      Fish Tacos

      • 1 ¼ lb. mild white fish we used tilapia for this recipe
      • 8 corn tortillas or flour tortillas
      • 8 leaves romaine lettuce
      • 4 tbsp  flour
      • ½ tsp  black pepper
      • ½ tsp  paprika
      • ½ tsp  salt
      • 2 cups cooking oil

      Instructions

      Pico de Gallo

      • Cut the tomato in quarters. Remove the seeds and pulp and discard.
      • Cut the tomato quarters in ¼” pieces.
      • Cut the onion into ¼” pieces.
      • Cut the stem off the jalapeño then cut the jalapeño into quarters. Remove the seeds and veins.
      • Finely chop the jalapeño.
      • Finely chop the cilantro.
      • Place all the chopped ingredients into a bowl. Sprinkle with the salt and squeeze the juice of the lime over the ingredients.
      • Mix with a spoon until all of the ingredients are evenly dispersed.
      • Set aside while you prepare the fish tacos.

      Fish Tacos

        Preparation

        • In a mixing bowl, add the flour, black pepper, paprika, and salt. Mix well.
        • Rinse and dry the 8 leaves of romaine lettuce.
        • Cut the fish into 2” to 3″ pieces.
        • Coat the pieces of fish in the flour mixture and set aside.
        • In a large frying pan heat the cooking oil to medium hot.
        • Fry the fish for about 3 minutes per side.
        • Place the cooked fish on a plate covered with paper towels to absorb the excess oil.
        • Heat the tortillas in a frying pan or comal.

        Serving

        • Warm the tortillas on a hot griddle or comal until pliable.
        • On each tortilla, place 1 leaf of lettuce, 1 or 2 pieces of cooked fish. 
        • Top with a spoonful of pico de gallo and serve with a halved lime on the side.

        Notes

        Optional

        • Sour cream or Mexican cream (crema)
        • A dash of your favorite Mexican hot sauce. We like Cholula, San Luis, or Tapatío

        Complementary Salsas

        We have another pico de gallo recipe that you will like too. These tacos also go well with our avocado salsa or restaurant salsa. Provecho!
        Try the creamy chipotle fish taco sauce too!

        Nutrition

        Calories: 450kcal | Carbohydrates: 48g | Protein: 35g | Fat: 16g | Saturated Fat: 2g | Cholesterol: 71mg | Sodium: 928mg | Potassium: 878mg | Fiber: 8g | Sugar: 4g | Vitamin A: 5720IU | Vitamin C: 36.3mg | Calcium: 108mg | Iron: 3.5mg

        More Mexican Fish & Seafood Recipes

        • White Fish a la Veracruzana
        • Shrimp with Curried Rice
        • Fried Fish Sandwich with Sweet Potato Chips
        • Garlic Shrimp Tacos
        • Shrimp Ceviche

        Enchiladas with Bean Sauce

        Enchiladas and Enmoladas

        Enchiladas with Bean Sauce Enfrijoladas

        Enfrijoladas de Jamón

        Andrés our photographer shares his childhood memories with this dish. Enjoy!

        Enfrijoladas de jamón take me back to my childhood. The kitchen wasn’t just the most important room in the house where my mother cooked delicious meals but also where she made memories.

        Enchiladas with Bean Sauce Enfrijoladas

        I grew up in the state of Morelos which borders Mexico City, and the States of México, Puebla, and Guerrero in the center of the country. In my house, my mother almost always cooked for us.

        Trips to restaurants were reserved for weekends and special occasions. There is one dish in particular that my mother made for us when she was short on time to prepare a more elaborate dish, enfrijoladas de jamón.

        The ingredients for this dish were almost always on hand. There was always ham which my mother used to prepare my sandwiches for school or serve us a light dinner. And, there were always beans that hadn’t been eaten the day before which became the base for this dish.

        This dish is a small story from my childhood, in which I ate delicious home-cooked food prepared by the marvelous, magical hands of my mother. I have memories of all her dishes but this one has a special place in my heart. Perhaps, because it’s such a simple dish it has such lasting memories.

        Ingredients for Ham Enchiladas with Bean Sauce

        To prepare this dish you will need some cooked beans, chicken stock, ham, corn tortillas, panela cheese and crema, Mexican cream.

        Ingredients Enchiladas with Bean Sauce, Enfrijoladas

        Making the Bean Sauce

        The sauce couldn’t be easier. Blend the beans with a little bit of the liquid they were cooked in with the chicken stock until smooth. Try our bean recipe, frijoles de la olla.

        Blending Beans with Chicken Stock

        The sauce should be smooth, not chunky.

        Pureed Beans

        Pour the blended beans into a frying pan.

        Cooking the Bean Sauce

        Cook over low heat for 20 minutes until the sauce has darkened and becoming slightly thicker.

        Bean Sauce for Enfrijoladas

        Preparing the Enfrijoladas

        You need to lightly fry the corn tortillas in hot oil to seal them so that they don’t absorb the bean sauce and that they become pliable so that you can fold them without breaking them. Fry for about 10 seconds on each side.

        Frying a Corn Tortilla for Enfrijoladas

        Fry all of the tortillas before assembling the enfrijoladas. Drain them on paper towels.

        Fried Corn Tortillas for Enfrijoladas

        To assemble the enfrijoladas, place a tortilla on the plate you will serve them on.

        Fried Tortilla for Enfrijoladas

        Add a slice of ham to each tortilla.

        Fried Tortilla with Ham for Enfrijoladas

        Fold the tortilla in half.

        Corn Tortilla Stuffed with Ham

        Three enfrijoladas per person is a good serving size, four if you are really hungry.

        Corn Tortillas Filled with Ham

        Spoon the warm bean sauce over the tortillas.

        Saucing Enfrijoladas

        Top each enfrijolada with a slice of panela cheese and spoonful of Mexican cream, crema.

        Enfrijoladas de Jamón - Enchiladas with Bean Sauce

        Hopefully, this recipe will have lasting memories for you too.

        Provecho!

        Enchiladas with Bean Sauce Enfrijoladas
        Print Recipe
        3.67 from 3 votes

        Ham Enchiladas with Bean Sauce – Enfrijoladas

        Recipe for Enchiladas with Bean Sauce or “Enfrijoladas de Jamón,” straight from the childhood kitchen of our photographer Andrés. Flavor and memory combined into a wonderfully simple home-cooked meal.
        Prep Time10 minutes mins
        Cook Time30 minutes mins
        Total Time40 minutes mins
        Course: Light Dinner, Lunch
        Cuisine: Mexican
        Keyword: bean sauce, beans, cheese, enchiladas, enfrijoladas, ham, queso fresco
        Servings: 16 enfrijoladas
        Calories: 243kcal
        Author: Andrés Carnalla

        Ingredients

        • 16 corn tortillas
        • 8 slices ham
        • 3 cups cooked beans with some of their cooking liquid – our recipe for beans
        • ½ cup cooking oil
        • ½ cup chicken broth
        • ¼ panela cheese or queso fresco
        • 1 cup crema or sour cream
        • 1 teaspoon salt + to taste

        Instructions

        Bean Sauce

        • Blend the beans with a little bit of the liquid they were cooked in with the chicken stock and 1 tsp. of salt until smooth.
        • Pour the blended beans into a frying pan.
        • Cook over low heat for 20 minutes until the sauce has darkened and becoming slightly thicker. Taste and adjust the salt if necessary.

        Assembling the Enfrijoladas

        • Fry each tortilla in medium hot oil for about 10 seconds each side. Remove before they start to harden or become crunchy.
        • Drain the tortillas on paper towels to remove the excess oil.
        • On each tortilla, add 1 slice of ham and fold the tortilla in half.
        • Place 3 or 4 ham filled tortillas on a plate.
        • Spoon a generous amount of the bean sauce over the
          enfrijoladas
          .
        • Top each
          enfrijolada
          with a slice of cheese and a spoonful of crema or sour cream.

        Notes

        What kind of beans can you use?
        • For this dish, pinto beans or black beans work well.
        Homemade beans or canned?
        • Homemade beans or whole canned beans work equally well for this recipe. If you do used canned beans, don’t add any salt to the beans when you blend them. Adjust the salt after you have cooked the sauce. Canned beans tend to be very salty and it’s easy to overdo the salt.

        Nutrition

        Calories: 243kcal | Carbohydrates: 26g | Protein: 10g | Fat: 12g | Saturated Fat: 2g | Cholesterol: 12mg | Sodium: 357mg | Potassium: 337mg | Fiber: 6g | Sugar: 1g | Vitamin A: 45IU | Vitamin C: 1mg | Calcium: 55mg | Iron: 1.6mg

        More Enchiladas Recipes

        • Chicken Enchiladas with Salsa Verde
        • Red Enchilada Sauce
        • Cheese Enchiladas with Mole Sauce (Enmoladas)
        • Enchiladas Potosinas

        Mexican Beef Rolls in Tomato Sauce

        Beef

        Recipe Mexican Beef Rolls in Tomato Sauce

        Rollos de Bistec con en Salsa de Tomate

        This is a unique recipe for Mexican beef rolls that are stuffed with bacon and banana and cooked in a mild tomato sauce.

        The basis for the dish comes from the cookbook “La Cocina Mexicana de Socorro y Fernando Del Paso.”

        Beef, bacon, banana and tomato sauce sounds like an odd combination but the flavors work surprisingly well together.

        Mexican Beef Rolls in Tomato Sauce

        Beef rolls are a satisfying home-cooked lunchtime dish typically served during la comida. Preparation is really simple and the results are delicious.

        Gather Your Ingredients

        To prepare this dish, you will need:

        • thinly sliced beef
        • bacon
        • banana
        • tomato
        • onion
        • garlic
        • flour
        • bay leaf
        • salt
        • pepper
        Ingredients Mexican Beef Rolls with Bacon and Banana

        Preparing the Beef Rolls with Bacon and Banana

        Cut each banana into 2 pieces. If they are very thick cut each piece in half lengthwise. You will have some leftover banana.

        Wrap each piece of banana with one strip of bacon. Roll the beef around the bacon-wrapped banana.

        Making Beef Rolls

        Secure each roll firmly with a toothpick.

        Secure Beef Roll with Toothpick

        Season the rolls generously with salt and pepper.

        Uncooked Seasoned Beef Rolls

        First, you will flour the rolls. The flour will help to brown them nicely.

        Flouring Beef Rolls
        Floured Beef Rolls

        Heat 4 tablespoons of cooking oil over medium heat in a large frying pan and add the rolls to brown them.

        Pan Frying Floured Beef Roll Ups

        Thoroughly brown them on all sides. Browning adds flavor to the meat and the browned bits that remain in the pan will add flavor to the sauce.

        Pan Frying Beef Rolls

        When they have fully browned place the rolls on a plate and set them aside while you prepare the sauce.

        Browned Mexican Beef Rolls

        Making the Tomato Sauce

        Blend the tomato, onion, and garlic with no added water for 2 minutes until the sauce is smooth.

        You will get a pale pink paste that doesn’t look too appetizing. That will change when you cook it. Don’t worry.

        Uncooked Tomato Salsa

        Strain the sauce into a mixing bowl to remove the seeds and skin. Don’t skip this step. It’s important for the texture of the sauce.

        Straining Uncooked Tomato Salsa

        In the same frying pan that you browned the beef rolls add 2 tablespoons of oil and bring the pan to medium-hot.

        Pour the sauce into the pan to fry it, which is called “seasoning” it.

        Frying Tomato Sauce

        Stir in the salt, pepper, sugar, and bay leaf and bring the sauce to a boil.

        Simmering Tomato Sauce

        Cooking the Beef Rolls

        Reduce the sauce from a boil to a simmer. Place the beef rolls into the sauce and cook for 25 minutes.

        Cooking Beef Rolls in Tomato Sauce

        Turn the rolls every 5 minutes and spoon sauce over them so that they cook evenly.

        Simmering Beef Rolls in Salsa Roja

        Serving

        Place the four beef rolls on a serving plate and spoon the sauce over them. Serve immediately.

        Adding Sauce to Beef Roll Ups
        Mexican Beef Rolls in Salsa Roja

        Side Dishes

        White rice and beans are good side dishes for your beef rolls.

        Provecho! Enjoy your Mexican Beef Roll-Ups.

        Recipe Mexican Beef Rolls in Tomato Sauce
        Print Recipe
        5 from 1 vote

        Mexican Beef Rolls in Tomato Sauce

        A unique recipe for Mexican beef rolls stuffed with bacon and banana and cooked in a mild tomato sauce based on a dish from the cookbook "La Cocina Mexicana de Socorro y Fernando Del Paso."
        Prep Time20 minutes mins
        Cook Time25 minutes mins
        Total Time45 minutes mins
        Course: Beef
        Cuisine: Mexican
        Keyword: bacon, bananas, beef, tomato sauce
        Servings: 4 servings
        Calories: 565kcal
        Author: Douglas Cullen

        Ingredients

        • 4 very thin beef steaks about 1 lb. of beef
        • 1 lb. tomato about 3 large tomatoes, 4 medium
        • 2 bananas
        • 4 strips bacon
        • ¼ medium white onion
        • ½ cup flour
        • 1 clove garlic
        • 1 tsp. salt
        • ½ tsp. black pepper
        • 1 teaspoon sugar
        • 1 bay leaf

        Instructions

        • PREPARING THE BEEF ROLLS
        • Cut each banana into 2 pieces. If they are very thick cut each piece in half lengthwise. You will have some leftover banana.
        • Wrap each piece of banana with one strip of bacon.
        • Roll the beef around the bacon-wrapped banana.
        • Secure each roll firmly with a toothpick.
        • Season generously with salt and pepper.
        • Flour the rolls.
        • Heat 4 tablespoons of cooking oil in a large frying pan and add the rolls to brown them.
        • Thoroughly brown the rolls on all sides.
        • When they are fully browned place them on a plate and set them aside while you prepare the sauce.
        • PREPARING THE TOMATO SAUCE
        • Blend the tomato, onion, and garlic with
          no added
          water for 2 minutes until the sauce is smooth.
        • Strain the sauce into a mixing bowl to remove the seeds and skin. Don't skip this step.
        • In the same frying pan that you browned the beef rolls add 2 tablespoons of oil and bring the pan to medium-hot.
        • Pour the sauce into the pan to fry it, which is called "seasoning" it.
        • Bring the sauce to a boil.
        • COOKING THE BEEF ROLLS
        • Reduce the sauce from a boil to a simmer.
        • Place the beef rolls into the sauce and cook for 25 minutes.
        • Turn the rolls every 5 minutes and spoon sauce over them so that they cook evenly.
        • SERVING
        • Place the four beef rolls on a serving plate and spoon the sauce over them.
        • Serve immediately.

        Notes

        Serving Recommendation
        • This dish is best eaten immediately. It doesn’t really reheat well.
        Substitutions
        • The tomato sauce for this dish doesn’t call for any chile. If you want some heat in the sauce, add ½ to 1 chile serrano when you blend the tomato, onion, and garlic.
        • Our easy salsa roja recipe would also go well with this dish.

        Nutrition

        Calories: 565kcal | Carbohydrates: 32g | Protein: 56g | Fat: 23g | Saturated Fat: 8g | Cholesterol: 159mg | Sodium: 755mg | Potassium: 1350mg | Fiber: 4g | Sugar: 12g | Vitamin A: 980IU | Vitamin C: 21.5mg | Calcium: 67mg | Iron: 5mg

        More Mexican Beef Dishes

        • Picadillo – Seasoned Ground Beef
        • Bistec a la Mexicana – Thinly Sliced Seasoned Beef
        • Authentic Carne Asada with Garlic Lime Marinade
        • Beef Tenderloin in a 3 Chile Goat Cheese Sauce
        • Pan-fried Meatballs (Albondigas)

        Clemole Rojo de Pollo

        Soups

        Clemole Rojo de Pollo

        Red Chile Mexican Chicken Stew / Soup

        I’m not sure if I should call clemole a stew or a soup. I’ll let you decide. Clemole is whole chicken legs and thighs cooked with large chunks of corn, chayote, zucchini squash and green beans in a red guajillo chile and tomato broth. It’s hearty, mildly spicy and filling. Really warms you up on a cool day.

        Clemole Rojo de Pollo

        Whether you consider it a soup or a stew you will surely consider it delicious. It’s quite common in Mexico to prepare soups that contain large chunks of corn, vegetables, or meat that you have to use your fingers to eat. This isn’t a delicate dish. You also may know this soup as Mole de Olla.

        Let’s Get Cooking

        Start by gathering all of your ingredients.

        Chicken Clemole Ingredients

        Prepare the Soup Base

        Break open the chiles and remove the seeds and veins and discard.

        Removing Seeds from Guajillo Chiles

        Place the chiles in a pan and just cover with water. Bring the water to a boil and then turn off the heat and allow the chiles to reconstitute for 15 minutes. Notice how the chiles have plumped up and become pliable.

        Soaked Guajillo Chiles

        Place the tomatoes in a pot and just cover with water. Bring to a boil and then reduce the heat to medium. Cook for 15 minutes.

        Boiling Tomatoes

        Blend the chiles and tomatoes together to form a loose paste. This will be the base for the broth.

        Blended Guajillo and Tomato Soup Base

        Prepare the Soup

        While you are preparing the guajillo chile and tomato base, put the chicken in the pot with 8 cups of water, the whole onion, and the head of garlic. Cook over low heat for 15 minutes. Don’t brown the chicken before cooking

        Chicken Onion Garlic in Pot

        Add the corn, chayote, and epazote. Cook for 15 more minutes.

        Chicken Corn Epazote in Pot

        Add the zucchini and green beans.

        Chicken and Vegetables Cooking in Enamel Pot

        Now it’s time to add the chile tomato base. Place a large strainer over the pot. Pour in the base. NOTE: If you don’t have a strainer that is large enough to span your pot, it’s easier to strain it into a bowl and then pour the base into the soup.

        Straining Guajillo Tomato Base

        Use a large kitchen spoon to press the base through the strainer. Discard the pulp.

        Pulp from Strained Guajillo Chiles and Tomato

        This is how your soup will look when you first add the chile tomato base.

        Cooking Clemole Rojo de Pollo

        Bring your soup to a boil. Notice how the broth takes on a darker heartier red color. Skim off the foam that rises to the top. Reduce the heat to medium and cook for 20 minutes. Add 1 tsp. of salt and then add salt until it’s to your taste.

        Removing Foam from Clemole Soup

        Discard the onion, epazote, and head of garlic before serving.

        Serve

        You can serve your clemole in either individual bowls or place it in a large serving bowl and serve it family-style at the table. Serve with a warm stack of corn tortillas and sliced lime to squirt into your soup.

        Clemole Rojo de Pollo Closeup

        Provecho!

        Clemole Rojo de Pollo
        Print Recipe
        5 from 2 votes

        Clemole de Pollo (Mexican Chicken Stew)

        Mexican style chicken stew with a red guajillo chile and tomato broth prepared with white corn, chayote, zucchini squash, green beans, and epazote.
        Prep Time10 minutes mins
        Cook Time50 minutes mins
        Total Time1 hour hr
        Course: Soup / Stew
        Cuisine: Mexican
        Keyword: chicken dish, chicken soup, chicken stew
        Servings: 6 servings
        Calories: 252kcal
        Author: Douglas Cullen

        Ingredients

        • 6 pieces of chicken legs and/or thighs
        • 2 ears of white corn
        • 2 chayotes
        • 1 white onion
        • ⅓ lb. green beans
        • 2 medium zucchini squash calabacita
        • 6 roma tomatoes
        • 6 sprigs of fresh epazote or 2 tbsp. dried
        • 1 head of garlic
        • 4 to 6 limes
        • 8 cups water
        • 1 tsp. salt + as needed
        • 18 corn tortillas warmed

        Instructions

        • CHILE TOMATO BASE
        • Break open the chiles and remove the seeds and veins.
        • Place the chiles in a pan and just cover with water.
        • Bring the water to a boil and then turn off the heat and allow the chiles to reconstitute for 15 minutes.
        • Add the whole tomatoes to a pot and cover them with water.
        • Bring to a boil and then reduce the heat and simmer for 15 minutes.
        • Blend the tomatoes and chiles with a little bit of the water you used to soak the chiles to form a loose paste.
        • Set aside the chile tomato base.
        • SOUP
        • Put the chicken in the pot with 8 cups of water, the whole onion, and the head of garlic. Cook over low heat for 15 minutes. Don't brown the chicken before cooking.
        • Add the chunks of corn, chayote and epazote. Cook for 15 more minutes over low heat.
        • Add the chunks of zucchini squash and green beans.
        • Strain the blended guajillo chile tomato base directly into the pot.
        • Bring to a boil and remove any foam that rises to the top.
        • Reduce the heat and cook for 20 minutes.
        • Add 1 tsp. of salt. Then add as much salt as needed to your taste.
        • Discard the onion, epazote and head of garlic before serving.
        • Serve with sliced lime.

        Nutrition

        Calories: 252kcal | Carbohydrates: 57g | Protein: 8g | Fat: 3g | Saturated Fat: 1g | Cholesterol: 1mg | Sodium: 391mg | Potassium: 718mg | Fiber: 11g | Sugar: 8g | Vitamin A: 875IU | Vitamin C: 60.6mg | Calcium: 150mg | Iron: 2.5mg

        More Mexican Soups

        • Chicken Tortilla Soup
        • Black Bean Soup
        • Quick Potato Soup
        • Cream of Cilantro Soup
        • Lentil Soup
        • Sopa de Fideo

        Gorditas Encarceladas by Tia Vicky

        Antojitos

        Tia Vicky Making Gorditas Encarceladas

        I am Aunt Vicky

        “I’m Aunt Vicky; take a seat and I will prepare some delicious gorditas encarceladas for you” we were told by a kind, tenacious woman with a glow about her in the town of Estación Catorce in the state of San Luis Potosí.

        Tia Vicky Making Gorditas Encarceladas

        “Jailed Gorditas”

        Tia Vicky sells gorditas encarceladas, which means “jailed gorditas,” in her small shop. They are called “jailed gorditas“ because the cheese they are prepared with is “jailed” in the masa, or dough.

        Gordita Shop Tia Vicky in Estación de Catorce, San Luis Potosi

        How We Ended Up in Tia Vicky’s Restaurant

        We were on a photography trip for SEEK Workshops to the town of Real de Catorce, a ghost town in the San Luis Potosí Sierras and we decided to take a side trip to Estación Catorce (Spanish link) a tiny town of 1200 people to have a look.

        When we arrived in Estación Catorce we were hungry and looking for somewhere to get a bite to eat. We asked in the main plaza if there was anyplace to eat. The enthusiastic response was, “with Tia Vicky.”

        Real de Catorce, Mexico

        Our taxi to Estación Catorce was a vintage Willys. The last Willys taxi back to Real de Catorce leaves at 2:00pm which we missed because we were having such an enjoyable time eating and talking to Tia Vicky. We ended up walking 4 ½ hours to get back.

        Photographers in Real de Catorce

        Tia Vicky at Work

        While Tia Vicky was at work making gorditas we asked if we could photograph her and the process of preparing gorditas. She happily agreed and even offered to share her recipe with us.

        Tia Vicky making "gorditas encarceladas"
        Cooking Gorditas on the Comal
        Gorditas on the Comal
        Gorditas Encarceladas

        How to Make Gorditas Encarceladas

        We made some gorditas encarceladas the way that Tia Vicky showed us. They came out great. Let us show you how to make them with a really tasty potato and chorizo filling. (Recipe for the potato chorizo filling)

        Homemade Gorditas Encarceladas with Potato and Chorizo

        First Prepare the Masa (Corn Meal Dough)

        Buy masa harina, cornmeal to make the dough. You will probably find two types of masa harina at the supermarket, one that says it is for tortillas and one that says it’s for tamales. The one for tortillas is milled finer and the one for tamales is milled coarser. We prefer the coarser cornmeal used for tamales. But either works well.

        Corn Meal for Gorditas

        Add the water to the cornmeal.

        Adding Water to Corn Meal

        Knead with your hands to incorporate the water. You dough turns out better when you knead it by hand not with a mixer.

        Kneading Masa for Gorditas by Hand

        The finished masa (dough).

        Prepared Masa (Corn Meal Dough) for Gorditas

        Prepare the Gordita Filling

        Tia Vicky prepares the filling for the gorditas with a queso de rancho, a cheese prepared for local consumption only in her region. You can use cotija cheese, or Chihuahua cheese.

        Break up the cheese first.

        Queso Cotija Mexican Cheese

        Break open the ancho chiles and remove the seeds and veins.

        Dried Ancho Chiles

        Soak the chiles in hot water for 15 to 20 minutes until they have reconstituted and softened.

        Soaking Ancho Chiles to Reconstitute

        Use a food processor or blender to combine the ancho chile and cheese until you have a coarse paste. Don’t overmix. It should have some texture.

        Cotija Cheese and Ancho Chile Paste

        Form the Gorditas

        Form a palm-sized ball of masa, dough.

        Shaping a Ball of Masa to Make Gorditas Encarceladas

        Make an indentation in the center of the ball.

        Making an Indentation in the Dough Ball

        Fill the indentation with about 1 ½ tablespoons of the chile cheese paste.

        Filling the Dough with Chile Cheese Paste

        Fold the edges of the dough over the filling and then press the ball to form the gordita. We used the lid of a mayonnaise jar to press the gorditas

        Shaping Gorditas by Hand

        Notice how the ancho chile and cheese becomes “jailed” in the dough.

        Forming Gorditas

        Cook the Gorditas

        Once you have formed the gorditas, it’s time to cook them. In a dry pan over medium-high heat cook them on each side for about 5 minutes.

        Gordita in Frying Pan

        Cook until golden brown. We cooked ours until they were extra toasted.

        Cooking a Gordita in Frying Pan

        Fill the Gorditas

        With a sharp knife carefully split it gordita open. When the gorditas have cooled just slightly to the touch carefully split each one open with a sharp knife.

        Splitting Open a Gordita

        Fill your gordita with your favorite guisado. We used potato and chorizo. They would also be great with some frijoles de la olla.

        Gorditas with Potato and Chorizo

        Time to Eat

        Enjoy your San Luis Potosí style gorditas encarceladas! Top with your favorite salsa. Try the salsa verde or salsa roja recipe.

        Gorditas with Potato and Chorizo
        Gorditas Encarceladas with Potato and Chorizo
        Print Recipe
        5 from 2 votes

        Gorditas Encarceladas by Tia Vicky

        Tia Vicky's "gorditas encarceladas", which means “jailed gorditas,” because the cheese and chile are "jailed" in the masa, dough. These gorditas are typical to San Luis Potosí.
        Prep Time30 minutes mins
        Cook Time30 minutes mins
        Total Time1 hour hr
        Course: Antojitos
        Cuisine: Mexican
        Keyword: chorizo, gorditas, potato
        Servings: 20 gorditas
        Calories: 229kcal
        Author: Douglas Cullen

        Ingredients

        • 2 lbs. masa harina cornmeal
        • ½ lb. Oaxaca Chihuahua, cotija or panela cheese
        • 4 ancho chiles
        • 6 cups water plus ½ cup if needed
        • 1 tsp. salt

        Instructions

        • PREPARING THE GORDITA DOUGH
        • Place your cornmeal in a large mixing bowl.
        • Add the 6 cups of water.
        • Knead with your hands to incorporate the water.
        • If the dough is too dry, add a few tablespoons of water at a time until the dough has the correct consistency. It should be slightly moist but not sticky.
        • PREPARING THE FILLING
        • Break up the cheese first.
        • Break open the ancho chiles and remove the seeds and veins.
        • Soak the chiles in hot water for 15 to 20 minutes until they have reconstituted and softened.
        • Use a food processor or blender to combine the ancho chile and cheese until you have a coarse paste. Don't overmix. It should have some texture.
        • FORMING THE GORDITAS
        • Form a palm-sized ball of masa, dough.
        • Make an indentation in the center of the ball.
        • Fill the indentation with about 1 ½ tablespoons of the chile cheese paste.
        • Fold the edges of the dough over the filling and then press the ball to form the gordita.
        • COOKING
        • In a dry pan over medium-high heat cook them on each side for about 5 minutes. Cook until golden brown.
        • With a sharp knife carefully split it gordita open. When the gorditas have cooled just slightly to the touch carefully split each one open with a sharp knife.
        • Fill your gordita with your favorite guisado. We used potato and chorizo. They would also be great with some frijoles de la olla.
        • SERVING
        • Serve stuffed with your favorite guisado and topped with your favorite salsa.

        Notes

        Tia Vicky uses “queso de rancho” for her gorditas which is locally made and only available in her region so she recommends using Oaxaca, Chihuahua, cotija or Panela cheese. Each cheese gives the gorditas a slightly different flavor.

        Nutrition

        Calories: 229kcal | Carbohydrates: 40g | Protein: 7g | Fat: 5g | Saturated Fat: 3g | Cholesterol: 4mg | Sodium: 230mg | Potassium: 250mg | Fiber: 5g | Sugar: 3g | Vitamin A: 1950IU | Vitamin C: 2.2mg | Calcium: 73mg | Iron: 3.8mg

        **The story is written as told to me by Andrés Carnalla.

        More Guisado Recipes

        • Potato Chorizo Guisado
        • Rajas con Queso
        • Chicken Tinga


        Potato Chorizo Guisado

        Antojitos

        Gordita Filled with Potato Chorizo Guisado

        Great for Tacos & Gorditas

        Potato and chorizo guisado is great for filling gorditas and tacos. Preparation is super simple and it’s packed with flavor. The word guisado roughly translates as “stew” but think of guisados more like cooked fillings that are prepared in a pan or a pot. Here we have served our guisado with Tia Vicky style gorditas encarceladas.

        Gordita Filled with Potato Chorizo Guisado

        Ingredients

        This guisado couldn’t be simpler. You need 3 medium white waxy potatoes, ½ pound of Mexican chorizo, cooking oil and a pinch of salt.

        White Potatoes and Chorizo

        Preparation

        Start by removing the outer membrane from the chorizo.

        Removing Membrane from Chorizo

        Peel and chop the potatoes into ¼″ cubes.

        Diced White Potatoes

        Over high heat, brown the chorizo for 1 minute until it starts to release its fat.

        Browning Chorizo

        Add the chopped potatoes to the pan.

        Adding Potatoes to Browned Chorizo

        Cook for 15 to 20 minutes stirring occasionally. Be sure that the potato is cooked thoroughly and is lightly browned on the outside. Add salt if needed. This is how it should look.

        Potato and Chorizo Guisado

        Gordita Filled with Potato Chorizo Guisado
        Print Recipe
        5 from 2 votes

        Potato Chorizo Gordita Filling

        Potato and chorizo guisado, great for stuffing gorditas, filling tacos and topping huaraches. As simple as it gets.
        Prep Time10 minutes mins
        Cook Time20 minutes mins
        Total Time30 minutes mins
        Course: Stew
        Cuisine: Mexican
        Keyword: chorizo, gordita filling, gorditas, potato
        Servings: 6 servings
        Calories: 178kcal
        Author: Douglas Cullen

        Ingredients

        • 3 white waxy potatoes
        • ½ lb. chorizo
        • 1 tablespoon cooking oil
        • Salt as needed

        Instructions

        • Split the chorizo and remove the outer membrane
        • Peel the potato and cut them into ¼” squares
        • Preheat a large frying pan on high and add 1 tbsp. of cooking oil
        • Add the chorizo to the pan and cook for 1 minutes until the starts to brown and release its fat.
        • Add the potato and cook for approximately 15 minutes. You want the potato to be fully cooked and lightly browned.
        • Add salt to taste

        Notes

        • Salsa verde is a great complement for any dish that uses chorizo and potato.
        • This guisado will keep for 3 days in the refrigerator if you have any left over. 

        Nutrition

        Calories: 178kcal | Carbohydrates: 11g | Protein: 8g | Fat: 11g | Saturated Fat: 4g | Cholesterol: 24mg | Sodium: 461mg | Potassium: 351mg | Fiber: 2g | Vitamin A: 135IU | Vitamin C: 9.7mg | Calcium: 26mg | Iron: 3.5mg

        More Recipes with Chorizo

        • Potato and Chorizo Tacos
        • Chorizo and Eggs
        • Chorizo and Egg Breakast Burrito

        Tacos of Texas

        Food Writers

        Tacos of Texas Book Cover

        A Book of Love

        You would assume a book titled the Tacos of Texas is about tacos, and it is, but it’s really a book of love; love for family, love for one’s culture, love for one’s traditions, love for the State of Texas and love for the infinitely variable and satisfying taco. 440 pages of love expressed through tacos.

        Tacos of Texas Book Cover

        The Authors

        Mando Rayo and Jarod Neece drove over 7,000 miles through Texas in search of ever town and region’s iconic taco. The ate, and documented the best tacos and the people who make them. In every conversation, the love shines through.

        Tacos of Texas Book Authors

        Mando was born and raised in El Paso, as he says “with a tortilla in my hand” and is now in “my Golden Age of Cooking Super-Terrific Tacos stage.” Mando was kind enough to spend an hour speaking with me about the book and the taco scene in Texas. His pride in food, family, and culture plus his crazy deep taco knowledge is what struck me the most. The dude knows tacos on every level.

        By day he runs a full-service multi-cultural marketing agency, Mando Rayo + Collective and by night he is a “Taco Journalist.” His desert island taco is the taco de pastor.

        Jarod was born in Beaumont whose first experience with Mexican food was dipping hot fresh tortillas in a bowl of queso at the Monterrey House. He did a stint working for a Tex-Mex restaurant, Tampicos in Lafayette, Louisiana. His experiences in “South Austin” is where his eyes were opened up to the true glory of the taco at Polvos and La Mexicana.

        Their taco love destined to bring them together, and it did, where they teamed up to work on Jarod’s website Taco Journalism which profiles all of the great the taco spots of Austin. Their first book together is Breakast Tacos of Austin.

        The Love Shines Through

        The authors divided Texas taco country into 10 distinct taco regions: Rio Grande Valley, Laredo, El Paso, Austin, Corpus Christi, San Antonio, Houston, Dallas – Fort Worth, Midland Odessa, and Abilene. What comes through in every conversation, in every region is love.

        Mando Rayo and Family

        Here are a some examples:

        I loved the way that her flour tortillas puffed up so toasty and light, and the way that her salsa sitting in her molcajete had a fresh-from-the-garden flavor that floated into the air and enticed your nose… Carmen Talfolla, State Poet Laureate of Texas

        In the 29 years I have cooked professionally, I have travelled the globe of foods. But the hold that Mexican food has on my soul wins out every time. I have for many years embraced al alma la cocina Mexicana. Jonathan Jones, El Big Bad

        People like that we prepare the ingredients by hand, fresh every day. The corn flour tortillas are prepared by hand as well. We keep things simple. All the ingredients stay very simple – vapor y amor! Elva Porras, Elva’s Taco Casa

        One of my fondest memories – and my first introduction to tacos – is my dad being behind the stove cooking chicharrones and Mexican barbacoa. Ricardo Romo, President University of Texas at San Antonio

        Our family’s motto has always been to put the needs of other before ours, and so we figured, let’s share with others the Mexican food that makes us so happy! Leo Chavez, Tacoketo


        Recipes from the Source

        After reading all of the interviews, you will be inspired to eat some tacos and make some tacos. Luckily for you, the book includes 43 recipes from around the state. Like these Guisado Verde Tacos from La Nueva Fresh & Hot in Dallas.

        Tacos of Texas Guisado Verde Tacos

        Or these Tacos de chicharron from the Santiago family in El Paso.

        Tacos of Texas Taco de Chicharron

        More examples of the great taco recipes in the book: Tacos al pastor a la Tuma from Urban Taco in Dallas, South Texas Shrimp Tacos from Maria Teresa G. Pedroche, Beef Suadero Tacos with Chile Pasilla Salsa from Mixtli in San Antonio, Lengua Tacos, Mary Rangel-Gomez, and Eric Gomez in Corpus Christi and Puerco en Salsa Roja from Rebeca Guzman in Laredo.

        Buy the Book!

        If you love tacos, and of course you do. You must get a copy of the Tacos of Texas. Really! We aren’t making money by promoting it. Our motives are pure. We want to ensure sure that the book has the success it deserves. Just think, if this book is successful then there may be a whole series of books: The Burritos of Texas, The Enchiladas of Texas, The Ultimate Guide to Tex-Mex even The Tacos of Texas Volume #2, #3, #4 and more. Just hoping!

        More Tacos of Texas

        If you want some more Tacos of Texas you can find it here:

        The Tacos of Texas Youtube Channel

        More Books, Magazines, and Podcasts

        • Molé Mama
        • SABOR! Mexican Food Magazine
        • Pass the Chipotle Podcast

        Vegan Strawberry Tamales

        Tamales

        Vegan Strawberry Tamales

        Tamales de Fresa

        Cover Vegan Tamales Unwrapped by Dora Stone

        If you love tamales but are worried about the lard typically used to make them, these strawberry tamales prepared with vegan butter or coconut oil are the tamales for you. We prepared them using a recipe from the cookbook Vegan Tamales Unwrapped written by Dora Stone from Dora’s Table.

        Dora adapts your favorite Mexican recipes making them completely vegan yet retaining their authentic flavor.

        Vegan Strawberry Tamales

        Everything Needed for Preparation

        Start by gathering all of your ingredients.

        Ingredients Vegan Strawberry Tamales

        Preparing the Masa

        Blending Strawberries and Almond Milk

        The liquid you use to prepare the masa (dough for tamales) is almond milk pureed with fresh strawberries.

        Blend until very smooth.

        Blended Strawberries and Almond Milk

        Mixing the Masa

        Add the coconut oil and sugar to your mixing bowl.

        Coconut Oil and Sugar in Mixing Bowl

        Use a hand mixer or stand mixer to make a paste of the sugar and coconut oil.

        Coconut Oil Sugar Paste

        Add the almond milk mixture and masa harina (corn flour to make tamales) to the paste.

        Masa for Tortillas and Strawberry Almond Milk

        This is how it should look after mixing.

        Mixed Masa for Strawberry Tamales

        Add ½ of the chopped strawberries.

        Adding Strawberries to Masa

        Mix until the strawberries are incorporated into the dough.

        Masa for Vegan Strawberry Tamales

        Preparing the Corn Husk Wrappers

        Place the dried corn husk in a very large bowl and cover with hot water.

        Soaking Corn Husks for Tamales

        Use a plate to keep the husks submerged so that they absorb water evenly.

        Soaking Corn Husks for Tamales

        Filling and Wrapping Tamales

        Here’s how you assemble the tamales. Extend 1 large corn husk.

        How to Fill Tamales

        Spread 2 to 3 tablespoons of masa (dough) onto the wide end of the corn husk.

        Filling Tamales with Masa

        Add 1 teaspoon of strawberry jam up the center of the masa.

        Strawberry Jam Tamale Filling

        Fold the corn husk over the dough tightly.

        Rolling a Tamale
        How to Wrap Tamales

        Fold the tip of the corn husk over so that you have formed a nice little packet.

        Wrapped Tamale

        Tying Tamales

        You can tie the tamales to keep them from opening up if you would like. To make the ties, pull off long narrow strips of corn husk.

        How to Tie Tamales

        Wrap the strip around the tamale and tie. In the book, Dora shows you many different ways to wrap and tie tamales.

        Ready to Cook

        Now that all of your tamales are wrapped and tied it’s time to cook them.

        Wrapped Tamales

        Steaming the Tamales

        Put a couple of cups of water in the bottom of your steamer and add the steamer rack. Cover the steamer rack with a layer of corn husks. Place the tamales in the steamer vertically with the open end of the tamale facing up. Don’t allow the tamales to touch the water. Cover to cook.

        Tamales in Steamer

        Improvising a Steamer

        If you don’t have a tamale steamer, you can improvise one by using a larger tall pot. put a couple of cups of water in the pot and then place a heavy ceramic bowl in the bottom. Cover the bowl with corn husks and then add the tamales. Cover to cook. We had to use this trick because we couldn’t find the steamer rack :)

        Improvised Tamale Steamer

        Enjoy Your Tamales!

        These tamales are delicious. They’re a great dessert at the end of a Mexican meal. They are also great with a cup of hot atole or coffee when you want a light breakfast.

        Strawberry Vegan Tamales
        Vegan Strawberry Tamales
        Print Recipe
        4.50 from 2 votes

        Vegan Strawberry Tamales

        How to make vegan strawberry tamales from a recipe created by Dora Stone from Dora's Table. Coconut oil or vegan butter replace the traditional lard used to make tamales. Fresh strawberries and strawberry jam give them loads of flavor.
         
        Prep Time1 hour hr 30 minutes mins
        Cook Time1 hour hr
        Total Time2 hours hrs 30 minutes mins
        Course: Tamales
        Cuisine: Mexican
        Keyword: how to make strawberry tamales, strawberry tamales, strawberry tamales recipe, vegan tamales
        Servings: 18 tamales
        Calories: 202kcal
        Author: Dora Stone (Vegan Tamales Unwrapped)

        Ingredients

        • 2 cups strawberries cut into chunks
        • 2 cups almond milk warm
        • 1 cup 8 oz. vegan butter at room temperature (IMPORTANT NOTE: we substituted chilled coconut oil because we are unable to get vegan butter in Mexico. The tamales still turn out great!)
        • ½ cup sugar granulated
        • 1 ½ tsp. baking powder
        • 1 tsp. salt kosher
        • 4 cups 1 lb. 2oz masa harina
        • 1 cup water warm
        • 1 ½ cup strawberry jam
        • 30 corn husks dried

        Instructions

        • To prepare the corn husks: Soak the corn husks in hot water in a large pot or in your kitchen sink. Place a plate over them to weigh them down so they are completely submerged. Let them soak for at least an hour.
        • To make the filling: Blend the 2 cups of almond milk and 1 cup of the strawberries until smooth.
        • To make the dough: Beat the butter and sugar on medium-high speed with an electric mixer until the butter has doubled in size and is nice and fluffy (about 3 minutes). Add the baking powder and salt. Beat for 1 minute to incorporate into the butter.
        • Add half of the masa harina. Then add the strawberry almond milk. After they are completely incorporated, add the “other half of the masa harina and the water. Add the remaining cup of chopped strawberries and beat at low speed until thoroughly mixed. It should have the consistency of a thick cake batter. If necessary, add more water until you reach that consistency.
        • For lighter and fluffier tamales, let the dough rest for an hour in the refrigerator. Remove the dough from the fridge and beat it again, adding enough liquid to get it to the consistency it had before.
        • Remove the corn husks from the water and set on paper towels. Reserve the largest husks to wrap the tamales and the small ones to line the steamer.
        • To set up your steamer: Fill the bottom with water making sure the water is not touching the steamer rack. Line the rack and sides of the steamer pot with corn husks. Set aside.
        • Place the tamal in the steamer vertically, leaning against the side of the steamer, with the open end on top. Repeat this process until you run out of dough and all the tamales are in the steamer. Cover them with a layer of corn husks. If the steamer is not full, fill the empty spaces with more corn husks. Cover the pot and bring the water to a boil. Turn heat down to medium and cook for 40 minutes. Check the tamales. When they separate easily from the corn husks, it means they are done. If they are not done, steam for 10 more minutes and check again.
        • Remove steamer from the heat and let sit covered for 10 minutes. Uncover and let cool for at least an hour. Don’t be alarmed if the tamales seem really soft. As they cool, they will firm up.

        Notes

        • If you would like to make these with fresh masa, replace the masa harina with 2 lbs. of fresh masa and use only 1 cup of almond milk.
        • To substitute the fat, you can use 8 oz. of coconut oil.
        • For tamales without fat, substitute with 8 oz. of cooked, unsweetened pumpkin.
         

        Nutrition

        Serving: 1tamale | Calories: 202kcal | Carbohydrates: 46g | Protein: 3g | Fat: 1g | Saturated Fat: 1g | Sodium: 154mg | Potassium: 154mg | Fiber: 2g | Sugar: 20g | Vitamin A: 54IU | Vitamin C: 12mg | Calcium: 94mg | Iron: 2mg

        More Recipes from Dora’s Table

        • Whole Wheat Flour Tortillas

        Mexican Dessert Recipes

        • Cream Cheese Flan Napolitano
        • Tres Leches Cake
        • Pan-fried Bananas with Lechera
        • Arroz con Leche

        More Tamales Recipes

        • Chicken Tamales with Salsa Verde

        Mexican Hot Chocolate

        Beverages

        Authentic Mexican Hot Chocolate

        Chocolate Caliente Mexicano

        When the weather gets chilly, there is no better drink to warm you up than traditional Mexican hot chocolate frothed by hand with a wooden molinillo. It’s sooo… good!

        Mexican Hot Chocolate

        Choosing Chocolate

        The best chocolate comes from the state of Oaxaca which is what we used for this recipe. The city of Zacatecas produces a very good chocolate de metate, or stone ground chocolate. Chocolate is sold in bars called tablillas (tablets). It is sweetened with sugar and spiced with cinnamon. Mexican chocolate has a slightly grainy rustic texture which isn’t completely smooth in the cup. Don’t consider that a negative. That’s how it’s supposed to be. The texture is an integral part of the drink.

        Mexican Chocolate Bar to Prepare Hot Chocolate

        Where to Buy

        You can find Mexican chocolate at most supermarkets. The two easiest to find brands are”Abuelita” by Nestlé and Ibarra. If you can’t find it at your local supermarket, you can order artisanal chocolate from Oaxaca through HERNÁN, specialists in premium Mexican food and kitchenware. (BUY)

        Disclosure: Some of the links are affiliate links, meaning, at no additional cost to you, we will earn a small commission if you click through and purchase a product. We only recommend authentic products that we use ourselves and love.

        How to Use a Molinillo

        Molinillos (mo-lee-nee-yos)are the traditional way to froth your hot chocolate. Think of molinillo as a wooden whisk. It’s a beautiful addition to your Mexican kitchen. A regular wire whisk is a good substitute. If you would like to try using a molinillo you can also get them from HERNÁN. (BUY)

        Mexican Molinillo to Prepare Hot Chocolate

        To use, place the handle of the molinillo between your palms and roll it back-and-forth quickly. This action aerates the milk which makes it frothy. To get your hot chocolate just right it takes some time and effort.

        Frothing Hot Chocolate with Molinillo

        After working the molinillo for some time the chocolate starts to take on the creamy frothy texture that you want. The more you spin the molinillo the lighter and frothier your drink gets. It’s all up to you.Prepared Mexican Hot Chocolate

        Enjoy!

        Serve with a pastry and garnish each cup with a cinnamon stick and top with marshmallows if you like. Mmmm…

        Authentic Mexican Hot Chocolate with Cinnamon

        Authentic Mexican Hot Chocolate
        Print Recipe
        4.20 from 5 votes

        Mexican Hot Chocolate

        Traditional Mexican hot chocolate, sweetened with sugar, spiced with cinnamon, and frothed by hand with a wooden molinillo. No better drink to warm you up when the weather is chilly.
        Prep Time2 minutes mins
        Cook Time30 minutes mins
        Total Time32 minutes mins
        Course: Beverage
        Cuisine: Mexican
        Keyword: chocolate, drink, hot chocolate, winter
        Servings: 4 servings
        Calories: 161kcal
        Author: Douglas Cullen

        Ingredients

        • 2 bars of Mexican drinking chocolate BUY
        • 4 ¼ cups 1 liter of milk or water
        • 4 cinnamon sticks for garnish

        Instructions

        • Pour your milk of water into a tall narrow pot over very low heat.
        • Add 2 bars of chocolate (approximately 6 ounces).
        • When the chocolate starts to dissolve gently move it with the molinillo until it fully dissolves, about 20 minutes.
        • Once all of the chocolate has fully dissolved, vigorously froth the drink with the molinillo for 10 minutes to develop a frothy creamy texture.

        Notes

        Preparation Notes
        • Your hot chocolate is richer when you prepare it with milk.
        • If you choose to prepare it with water the flavor of the chocolate is more pronounced.
        • Either method of preparation is authentic.
        • Each brand of chocolate is a little bit different. Adjust the quantity to your liking. You may want to add a little or take away a little.
        Important
        • Do not allow the milk to boil. If the milk gets close to the boiling point remove it from the heat for a couple of minutes and continue to froth. After a minute or two return it to the heat.
        Serve and Garnish
        • Garnish each mug with a cinnamon stick. Serve with a small pastry or sweet bread. Add marshmallows to each cup if you like.

        Nutrition

        Calories: 161kcal | Carbohydrates: 13g | Protein: 8g | Fat: 9g | Saturated Fat: 5g | Cholesterol: 26mg | Sodium: 112mg | Potassium: 342mg | Sugar: 13g | Vitamin A: 420IU | Calcium: 293mg | Iron: 0.1mg

        More Mexican Beverages

        • Agua de Jamaica
        • Agua de Guayaba
        • Hot Chocolate with Kahlua
        • Horchata

        Chile Pasilla Tomatillo Salsa

        Salsas & Sauces

        Chile Pasilla Tomatillo Salsa Vertical

        Salsa de Chile Pasilla con Tomatillo

        Enjoy this mild, full flavored rustic salsa prepared with dried pasilla chiles and tangy tomatillos. The authentic taste pairs well with chicken and beef. For a vegan option, try it with roast carrots and cauliflower.

        Chile Pasilla Tomatillo Salsa

        Salsa Ingredients

        This salsa couldn’t be simpler. It only requires 3 ingredients; the dried pasilla chiles, tomatillos, garlic plus a little salt.
        Ingredients Chile Pasilla Tomatillo Salsa

        Deseeding the Chiles

        Remove the stems, seeds and veins from the chiles and discard. Don’t worry if a few seeds remain. They are edible. In fact, many Mexican salsas call for the chile seeds to be included.

        Deseeding Pasilla Chiles

        Reconstituting the Chiles

        To get the chiles ready, they need to be reconstituted. Place the chiles in a pan with just enough water cover them, bring to a boil and then turn off the heat. Allow them to soak for 15 minutes. Notice how the chiles have absorbed some of the water and that have become soft and pliable.

        Reconstituting Pasilla Chiles

        Cooking the Tomatillos

        You need to cook the tomatillos before blending them. Place the tomatillos in a pan with just enough water to cover, bring to a boil then reduce the heat to low and simmer for 15 minutes. Notice how their color has changed which indicates that they are fully cooked.

        Boiling Tomatillos

        Blending the Salsa

        After reconstituting the chiles and cooking the tomatillos you are going to blend them with a little of the tomatillo cooking water, about ½ cup. Blend for 45 seconds. Since this is a country style salsa you want it to have some texture so don’t over blend.

        Simmering the Salsa

        Simmering the salsa for 15 minutes concentrates the flavors and give it more body.

        Simmering Chile Pasilla Tomatillo Salsa

        The Reduced Salsa

        Notice how it has darkened quite a bit. You can serve it right away but it tastes even better if you can let it sit for 1 hour to allow the flavors to meld.

        Reduced Chile Pasilla Tomatillo Salsa

        Provecho!

        Your salsa is ready to serve! Place it in a nice serving dish and serve in the center of the table so each diner can serve themselves.

        Chile Pasilla Tomatillo Salsa Vertical

        Chile Pasilla Tomatillo Salsa Vertical
        Print Recipe
        5 from 4 votes

        Chile Pasilla Tomatillo Salsa Recipe

        Full flavored rustic salsa prepared with dried pasilla chiles and tangy tomatillos.
        Prep Time10 minutes mins
        Cook Time35 minutes mins
        Total Time45 minutes mins
        Course: Salsa
        Cuisine: Mexican
        Keyword: dried peppers, pasilla peppers, salsa, tomatillos
        Servings: 4 servings
        Calories: 42kcal
        Author: Douglas Cullen

        Ingredients

        • 12 small tomatillos
        • 8 pasilla chiles
        • 2 cloves garlic
        • 1 teaspoon salt + more if needed

        Instructions

        • Remove the stems, seeds and vein from the chiles.
        • Remove the husks from the tomatillos and rinse the tomatillos under running water.
        • Place the chiles in a pan with just enough water cover them, bring to a boil and then turn off the heat. Allow them to soak for 15 minutes.
        • Place the tomatillos in a pan with just enough water to cover, bring to a boil then reduce the heat to low and simmer for 15 minutes. Blend the chiles and tomatillos with a little of the tomatillo cooking water, about ½ cup for 45 seconds.
        • Put the blended salsa and 1 tsp. of salt into a pan over low heat and simmer for 15 minutes.
        • Adjust the salt to taste.

        Notes

        • You can serve the salsa immediately but it tastes even better if you can allow it to rest for 1 hour to allow the flavors to meld.
        • If you want an extra tangy salsa add 1 tsp. of apple cider vinegar when you are simmering.
        • It will keep well for 2 days in the refrigerator.

        Nutrition

        Serving: 1/4 cup | Calories: 42kcal | Carbohydrates: 7g | Protein: 1g | Polyunsaturated Fat: 1g | Sodium: 256mg | Sugar: 2g

        More Salsa Recipes

        • Classic Salsa Verde
        • Red Enchilada Sauce
        • Creamy Avocado Salsa
        • Easy Salsa Roja
        • Salsa Taquera

        Chicken Enchiladas with Salsa Verde

        Enchiladas and Enmoladas

        Chicken Enchiladas with Salsa Verde

        Enchiladas de Pollo en Salsa Verde

        Who doesn’t love enchiladas? We certainly do! Try our recipe for authentic chicken enchiladas in homemade salsa verde. 

        Most enchiladas in Mexico are “no-bake” enchiladas and enchiladas are always made with corn tortillas. Typically, enchiladas are served warm not piping hot.

        Chicken Enchiladas with Salsa Verde

        The interplay and balance of flavors are what make enchiladas so delicious. Each bite should have a bit of chicken, salsa verde, crema, ranchero cheese, and red onion.

        The Ingredients

        Everything you need to prepare chicken enchiladas with salsa verde: chicken breast, salsa verde, fresh corn tortillas, crema, red onion, and ranchero cheese.

        Choosing Tortillas for Your Enchiladas

        Authentic enchiladas are always made with corn tortillas. The best tortillas are prepared from ground corn, not corn flour although it is not always easy to friend the ones prepared with ground corn.

        If you have a Mexican market or tortilleria in your town you may be able to get them. Try to find them. It’s worth it.

        Ingredients Chicken Enchildas Salsa Verde


        Follow These Steps for Amazing Salsa Verde Chicken Enchiladas

        1. The Salsa

        For great enchiladas, you need a great salsa. Use our Salsa Verde Recipe (green salsa or green sauce). Prepare the salsa first. While the salsa is cooking, cook and shred the chicken breasts.

        Cooked Salsa Verde

        2. Cooking and Shredding the Chicken

        Place the chicken breasts in a pot and just cover with water. Cook over low heat until the chicken breasts are just cooked through, about 20 minutes.

        Simmering Chicken Breasts

        Save the cooking liquid. It’s a great flavor booster for other dishes.

        Cooked Chicken Breasts in Pot

        Allow the chicken to cool and then shred it by hand.

        Shredded Chicken for Enchiladas

        Time to Prepare the Enchiladas

        3. Frying the Tortillas

        An important step in preparing enchiladas is frying the corn tortillas. You fry them to make them pliable so that you can roll them. Frying also seals the tortilla so that it doesn’t absorb the salsa and become mushy.

        Frying a Corn Tortilla

        In very hot oil, fry the tortillas individually for about 10 seconds per side. You don’t want them to get crispy because if they are crispy you won’t be able to roll them.

        Frying a Corn Tortilla for Enchiladas

        After frying the tortillas, place them on a plate lined with paper towels to absorb the excess oil.

        4. Rolling Enchiladas – The Easy Way

        The easiest and least messy way to roll enchiladas is to roll them on a baking sheet. Tip: Slide the rolled enchiladas against the lip of the baking tray which will keep them from unrolling.

        To roll enchiladas start by placing a fried tortilla in the center of the tray.

        Corn Tortilla on Baking Tray

        Add about a tablespoon of shredded chicken to each tortilla. Don’t put too much chicken on each tortilla. Roll the enchilada firmly but not too tightly.

        Rolling Chicken Enchiladas
        Rolling Chicken Enchiladas on Baking Tray

        Try to roll the enchiladas as uniformly as possible. The more uniform they are the better the dish looks when you serve it. If you don’t like how your enchiladas turned out you can always open them up and re-roll them.

        Rolled Chicken Enchiladas on Baking Tray

        With a little practice, your enchiladas will come out perfectly even every time.

        5. Plating and Serving

        This dish is typically served warm not piping hot. (If you prefer them good-and-hot leave all of the rolled enchiladas on the baking tray and put the tray into your oven preheated to 350 degrees for 7 minutes.)

        Place 4 rolled enchiladas on each serving plate.

        Chicken Enchiladas on Spatula

        Place them gently so that they don’t unroll.

        Plating Chicken Enchiladads

        Center them on the plate as best as you can.

        Plating and Serving Chicken Enchiladas

        Spoon the salsa verde down the center of the enchiladas.

        Spooning Salsa Verde on Chicken Enchiladas

        Then spoon the Mexican cream, crema onto the enchiladas.

        Spooning Crema on Chicken Enchiladas

        Sprinkle about ½″ ounce of crumbled ranchero cheese onto the enchiladas.

        Sprinkling Queso Ranchero on Chicken Enchiladas

        Garnish with 3 thinly sliced red onion rings.

        Garnishing Chicken Enchiladas with Red Onion

        6. Time to Eat – Provecho!

        Looks delicious, don’t they? These are guaranteed to please!

        Chicken Enchiladas Salsa Verde
        Chicken Enchiladas with Salsa Verde
        Print Recipe
        3.22 from 14 votes

        Chicken Enchiladas with Salsa Verde Recipe

        Authentic shredded chicken enchiladas in homemade salsa verde garnished with Mexican cream, ranchero cheese, and thinly sliced red onion rings. Easy to make and delicious.
        Prep Time1 hour hr
        Cook Time20 minutes mins
        Total Time1 hour hr 20 minutes mins
        Course: Enchiladas
        Cuisine: Mexican
        Keyword: chicken, enchiladas, salsa verde
        Servings: 4 servings
        Calories: 577kcal
        Author: Douglas Cullen

        Ingredients

        • 16 ounces boneless chicken breast
        • 4 cups salsa verde
        • 16 corn tortillas
        • ½ cup Mexican cream crema
        • 3 ozs. ranchero cheese or queso fresco
        • 1 small red onion
        • 1 cup cooking oil

        Instructions

        • PREPARING THE SALSA
        • Prepare the salsa verde according to this
          Salsa Verde Recipe
          .
        • COOKING THE CHICKEN
        • Place the chicken breasts in a pot and just cover with water. Cook over low heat until the chicken breasts are just cooked through, about 20 minutes.
        • Allow the chicken to cool and then shred it by hand.
        • FRYING THE TORTILLAS
        • Preheat to very hot 2 cups of cooking oil.
        • Fry the tortillas individually in the hot oil for about 10 seconds per side.
        • Place fried tortillas on a plate lined with paper towels to drain the excess oil from the tortillas.
        • ROLLING THE ENCHILADAS
        • To roll enchiladas start by placing a fried tortilla in the center of a baking tray.
        • Add 1 tbsp. of shredded chicken across the tortilla.
        • With your fingers, roll the tortilla into a tight tube.
        • Do this with all 16 tortillas.
        • PLATING AND SERVING
        • Place 4 enchiladas on each serving plate.
        • Spoon ¾ to 1 cup of salsa verde down the center of the enchiladas.
        • Then spoon approximately 1 tablespoon of Mexican cream across the enchiladas.
        • Sprinkle the enchiladas with ½oz. to ¾oz. of crumbled ranchero cheese.
        • Garnish with 3 thinly sliced red onion rings.

        Notes

        These are no-bake enchiladas.
        Substitutions
        • You can substitute sour cream for the Mexican cream (crema) called for in the recipe.
        • You can substitute white onion for the red onion.
        • You can also prepare them with salsa roja instead of salsa verde.

        Nutrition

        Calories: 577kcal | Carbohydrates: 65g | Protein: 31g | Fat: 20g | Saturated Fat: 2g | Cholesterol: 89mg | Sodium: 1932mg | Potassium: 1112mg | Fiber: 7g | Sugar: 17g | Vitamin A: 1580IU | Vitamin C: 12mg | Calcium: 148mg | Iron: 1.8mg

        More Enchilada Recipes

        • Red Enchilada Sauce
        • Cheese Enchiladas with Mole
        • Ham Enchiladas with Bean Sauce
        • Enchiladas Potosinas

        More Salsa Verde Recipes

        • Salsa Verde Dishes


        Stewed Chayote in White Wine

        Side Dishes

        Stewed Chayote with White Wine, Raisins, Pumpkin Seeds

        Chayote Cocido con Vino Blanco

        This is a guest post by Leslie Korn PhD, MPH. She has lived in Mexico since 1973 where she conducts research and teaches about indigenous culinary and botanical traditions, and has a clinical practice in Mental Health Nutrition.

        You can find out more about her experience here. Her various books on food and nutrition can be found on Amazon and digital books on iTunes. Enjoy the recipe. It’s a good one!

        What is Chayote?

        Chayote, also called a vegetable pear is an ancient vegetable that is among the traditional foods originating in Mexico. Chayote is a member of the Cucurbitaceae, or squash family. 

        Unlike other types of squash, it has one single large seed in the center of the fruit.  Its scientific name is Sechium edule and is also called mirliton, choco, or in Nahua, chayotl.

        Spineless Chayote

        It is versatile and very mild in flavor, which makes it an ideal balance to the strong flavors in this recipe. Rich in B-Vitamins and antioxidants so essential for brain health, chayote is a humble vegetable that will not disappoint.

        Chayote leaves have long been used to make a tea to dissolve kidney stones and reduce high blood pressure. Chayote is available in Mexican food markets and most large chain grocery stores.

        To prepare chayote it is best peeled under cold running water as it has a sticky sap that can irritate the skin. Some varieties have prickly thorns on the outside of the skin and gloves should be used.

        Peel it as you would a cucumber and then slice in half, removing the inner seed and then slice and cut into 1-inch cubes and set aside in a bowl while you prepare the remainder of the dish.

        How to Make

        We prepared and photographed the dish following Dr. Leslie’s instructions. It is a simple dish to make with great results.

        First, Gather Your Ingredients

        Ingredients:

        • chayotes
        • onion
        • raisins
        • garlic
        • white wine
        • pumpkin seeds or pine nuts to garnish the dish

        Chayotes come in two varieties spineless or with spines. The spineless variety, which we used for this recipe, is much easy to work with.

        Ingredients to Prepare Stewed Chayote Dish

        Prepare the Chayote

        If you have never cooked with chayote you will find it easy to prepare. Start by peeling the chayotes.

        Peeled Chayote

        Slice them in half.

        Sliced Chayotes

        Remove the hard seed with a spoon.

        Removing Seed From Chayote

        Chop the chayote into 1″ cubes.

        Cubed Chayote

        Cooking the Dish

        Chop the onion into ¾″ pieces. Remove the seeds from 1 serrano chile. You will only use ½ of the serrano to flavor the dish. Peel the clove of garlic. Fry in 2 tbsp. of olive oil.

        Frying White Onion, Garlic, Serrano Chile

        Fry for 5 minutes until the onion is just starting to brown.

        Fried White Onion, Garlic, Serrano Chile

        Add the chayote and raisins.

        Chopped Chayote in Frying Pan

        Add the white wine.

        White Wine Added to Chayote

        Cook and cover for 20 minutes stirring once. Add salt to taste. While the dish is cooking toast the pumpkin seeds or pine nuts.

        Fully Cooked Chayote

        The Finished Dish

        Place the cooked chayote on a serving dish and sprinkle with the toasted pumpkin seeds or pine nuts. Serve warm. Provecho!

        Stewed Chayote, White Onion, Raisins, Pumkpin Seeds
        Stewed Chayote with White Wine, Raisins, Pumpkin Seeds
        Print Recipe
        4.17 from 6 votes

        Stewed Chayote in White Wine

        Chayote, white onion, and raisins stewed in white wine and garnished with pumpkin seeds or pine nuts. A delicious vegan Mexican recipe.
        Prep Time10 minutes mins
        Cook Time30 minutes mins
        Total Time40 minutes mins
        Course: Vegetable
        Cuisine: Mexican
        Keyword: chayote, Mexican, vegan, vegetarian
        Servings: 4 servings
        Calories: 228kcal
        Author: Dr. Leslie Korn

        Ingredients

        • 2 tbsp. olive Oil
        • 1 clove garlic
        • ½ white onion
        • small serrano chili
        • ½ cup raisins
        • 2 chayote diced into 1-inch cubes
        • ¾ cup white wine
        • ¼ cup pine nuts can substitute raw green pumpkin seeds
        • salt and pepper to taste

        Instructions

        • Peel the chayote. Remove the seeds and chop into 1" pieces.
        • Chop the onion into ¾" pieces.
        • Heat up the oil gently and add the garlic, onion, and half a serrano chili (de-seeded). Let cook for a few minutes and then add the raisins, chayote, and white wine. Cover and simmer on a low light for 20 minutes.
        • The chayote will be firm and crunchy, but tender when ready. While the chayote is simmering toast the pine nuts (or pumpkin seeds) until brown.
        • For the last few minutes uncover the chayote so the wine cooks off. Add salt and pepper. Pour the chayote into a serving bowl and top with the nuts.

        Notes

        Cooking tip:
        My friend Alicia taught me this old Mexican trick to avoid the after-effects of chili oil on your hands that can in turn sting your eyes. After handling the chili do not wash your hands. It will only spread the oil.
        Instead, rub your hands through your hair (if bald, find someone else’s hair!) the hair will absorb the oil perfectly. Then you may wash with soap and water.

        Nutrition

        Calories: 228kcal | Carbohydrates: 21g | Protein: 2g | Fat: 13g | Saturated Fat: 1g | Sodium: 10mg | Potassium: 334mg | Fiber: 3g | Sugar: 2g | Vitamin C: 7.3mg | Calcium: 24mg | Iron: 1.3mg

        More Mexican Side Dishes

        • Warm Chayote and Zucchini Squash Salad
        • Green Rice
        • Red Rice
        • Pineapple Salad
        • Avocado Salad

        Veracruz Style White Fish

        Fish & Seafood

        White Fish Veracruz Style

        Pescado a la Veracruzana

        Delicious, beautiful, healthy, and easy to prepare, this white fish  “a la Veracruzana” covers all the bases.

        Any dish that is served ” a la Veracruzana,”  which means Veracruz style, is served with a mild tomato sauce prepared with olives and capers.

        This is one of the few sauces served in Mexico that doesn’t have any chile in it.

        White Fish Veracruz Style

        Ready to Cook?

        Start by gathering all of your ingredients. For this dish, you will need white fish fillets, tomato, onion, olives, capers, garlic, thyme, bay leaf, and chicken broth.

        The full ingredient list is below in the recipe. The traditional fish for this dish is red snapper. When prepared with red snapper the dish is called, “huachinango a la Veracruzana.” We used tilapia but any firm mild white fish works well.

        Ingredients Veracruz Style White Fish

        Prepare the Sauce First

        Over medium heat, fry the onion and garlic in 3 tablespoons of cooking oil for 4 minutes. You are starting to build flavor in the sauce.

        Sauteeing Onions and Garlic for Veracruz Sauce

        Add the tomato, black pepper, and salt.

        Cooking Tomatoes for Veracruz Sauce

        Reduce the heat to low and cook for 15 minutes until the tomatoes have given off much of their liquid.

        Cooking Tomatoes for Veracruz Sauce

        Crush the tomatoes, onion, and garlic with a bean or potato masher.

        Crushing Tomatoes for Veracruz Sauce

        Next, add the spices and stir.

        Spices Added to Vercruz Sauce

        Add the chicken broth.

        Chicken Broth Added to Vercruz Sauce

        Add the chopped olives and capers and stir. Simmer for 15 more minutes. It’s starting to look good, isn’t it?

        Olives Added to Vercruz Sauce

        Cooking the Fish

        After the sauce has simmered for 15 minutes, start cooking the fish. In a separate pan over medium heat, lightly brown each side of the fish in 3 tablespoons of oil.

        Pan Frying Tilapia

        Don´t let the fish get too brown.

        Pan Frying Tilapia

        Once you have browned the fish on both sides, place each fish fillet in the simmering sauce.

        Simmering Fish in Veracruz Sauce

        Cook for 10 minutes until the sauce has thickened slightly and the fish is fully cooked and has taken on the flavor of the sauce. Check the flavor of the sauce and adjust the salt if necessary.

        Now it’s looking really good!

        Simmering Fish in Veracruz Sauce

        Serve and Enjoy

        Serve the fish with white rice. First, put the rice on the plate then place the fish next to the rice. Gently spoon about 1 cup of the sauce over the fish and serve immediately.

        White Fish Veracruz Style Recipe
        White Fish Veracruz Style Recipe
        Print Recipe
        3.55 from 48 votes

        Veracruz Style White Fish

        Veracruz style white fish prepared with a tomato sauce with olives and capers. One of the few sauces served in Mexico that doesn't have any chile in it.
        Prep Time10 minutes mins
        Cook Time1 hour hr
        Total Time1 hour hr 10 minutes mins
        Course: Fish
        Cuisine: Mexican
        Keyword: how to make Veracruz fish, pescado a la veracruzana, Veracruz fish recipe
        Servings: 4 servings
        Calories: 213kcal
        Author: Douglas Cullen

        Ingredients

        • 4 white fish fillets 4 to 6 ozs. each
        • 5 medium tomatoes
        • 4 cloves garlic
        • 1 tbsp. dried thyme
        • 1 tsp. black pepper
        • 1 tsp. epazote
        • 1 tsp. salt + as necessary
        • 6 bay leaves
        • 28 green olives
        • 12 capers
        • 1 cup low-sodium chicken broth

        Instructions

        • PREPARING THE SAUCE
        • Over medium heat, fry the onion and garlic in 3 tablespoons of cooking oil for 4 minutes.
        • Add the tomato, black pepper, and salt.
        • Reduce the heat to low and cook the sauce for 15 minutes until the tomatoes have given off much of their liquid.
        • Then, crush the tomatoes, onion, and garlic with a bean or potato masher.
        • Next, add the spices and stir.
        • Add the chicken broth.
        • Add the chopped olives and capers and stir. Simmer for 15 more minutes.
        • COOKING THE FISH
        • After the sauce has simmered for 15 minutes, start cooking the fish. In a separate pan over medium heat, lightly brown each side of the fish in 3 tablespoons of oil.
        • Once you have browned the fish on both sides, place each fish fillet in the simmering sauce.
        • Cook for 10 minutes until the sauce has thickened slightly and the fish is fully cooked and has taken on the flavor of the sauce.
        • Check the flavor of the sauce and adjust the salt if necessary.
        • SERVING
        • Serve the fish with white rice. First, put the rice on the plate then place the fish next to the rice. Gently spoon about 1 cup of the sauce over the fish and serve immediately.

        Nutrition

        Calories: 213kcal | Carbohydrates: 8g | Protein: 23g | Fat: 11g | Sodium: 913mg | Sugar: 3g

        More Mexican Fish and Seafood Dishes

        You might enjoy preparing one of our other recipes.

        • Curried Rice with Shrimp
        • Fried Fish Sandwich with Spicy Chipotle Mayo
        • Garlic Shrimp Tacos
        • Fish Tacos
        • Shrimp Ceviche Acapulco

        Did you enjoy this recipe for Veracruz Style White Fish? Any questions about the preparation?

        Please let us know in the comments below if you have prepared this dish and how it turned out for you. Also, if you have any questions on preparation you can let us know in the comments too. We think you will love this recipe!

        Salsa Roja

        Salsas & Sauces

        Easy Mexican Red Tomato Salsa

        **Updated with more step-by-step photos to help you achieve the perfect salsa**

        The two most common salsas in Mexico are salsa roja, a red salsa prepared with tomatoes and salsa verde, a green salsa prepared with tomatillos. Both are versatile salsas enjoyed with a wide variety of dishes.  

        Every family has its favorite variations. Give this very easy recipe for an authentic salsa roja a try. Guaranteed happiness!  Make a double batch to freeze so that you always have salsa on hand when you want it.

        Bowl of Mexican Salsa Roja

        Fresh Ingredients Make the Best Salsa

        Fresh ingredients always make the best salsas. Make sure that your tomatoes are really red and ripe which gives the salsa better color and a richer flavor. Really fresh cilantro gives the salsa a nice herbal tang. Avoid tired wilted cilantro because it has lost much of its flavor.

        Ingredients to make salsa roja.
        • 5 plum Roma tomatoes
        • 1 white onion
        • 12 stalks of cilantro
        • 2 serrano chiles
        • 2 cloves garlic
        • 1 teaspoon salt + salt to taste
        • 2 tablespoons cooking oil
        • 4 cups water

        HOW TO MAKE SALSA ROJA | 1-MINUTE VIDEO

        Slice the tomatoes in half.

        Roma tomatoes (plum) cut in half.

        Slice the onion into quarters.

        Quartered White Onion on Cutting Board

        Remove the stems, then slice the serrano peppers in half and remove the seeds. You can leave the seeds in if you prefer. This will add more heat to your salsa.

        Green Serrano Peppers on Cutting Board

        Add all of the ingredients except the cilantro and salt to a pot. Add just enough water to cover the vegetables. (About 2 cups)

        Bring the water to a boil and then reduce to low. Simmer 20 minutes.

        Simmered Salsa Roja Ingredients

        Blend all of the ingredients including the cilantro with the cooking water (Blend in 2 batches.)

        Salsa Roja Ingredients in Blender Jar

        Preheat 2 tablespoons of oil on high.

        Pouring cooking oil into pot to pre-heat.

        Slowly pour the blended salsa into the hot oil. This is called “seasoning” the salsa and it’s an important step to develop the flavor of your salsa.

        Seasoning Salsa Roja

        Reduce the heat and simmer for 20 minutes. Notice that the salsa has reduced and thickened. Add the salt and stir. Adjust the salt as needed.

        Adding Salt to Salsa Roja

        The Finished Salsa

        Bowl of Mexican salsa roja (closeup).

        Homemade Salsa is Always Better

        Homemade salsa is always better. It really doesn’t take much work and the results are so much more delicious. Once you get in the habit of making salsa from scratch you will never buy salsa again. Your tastebuds just won’t let you. Really!

        Time to make some salsa! Provecho!

        Bowl of Mexican Salsa Roja
        Print Recipe
        3.64 from 107 votes

        Easy Salsa Roja Recipe

        Versatile salsa roja recipe that is really easy to prepare. Made with plum tomatoes, white onion, serrano chile, cilantro, and garlic. Great with chilaquiles, eggs, beef, and chicken.
        Prep Time5 minutes mins
        Cook Time40 minutes mins
        Total Time45 minutes mins
        Course: Salsa
        Cuisine: Mexican
        Keyword: easy salsa roja, How to make salsa roja, salsa roja, salsa roja recipe
        Servings: 8 servings
        Calories: 24kcal
        Author: Douglas Cullen

        Equipment

        • 1 large pot
        • Kitchen knife
        • Cutting board
        • Kitchen spoon
        • Blender
        • Serving bowl

        Ingredients

        • 5 plum Roma tomatoes
        • 1 white onion
        • 12 stalks of cilantro
        • 2 serrano chiles
        • 2 cloves garlic
        • 1 tsp. salt + salt to taste
        • 2 tbsp. cooking oil
        • 2 cups water

        Instructions

        • Cut the onion in quarters.
        • Cut the tomatoes in half.
        • Cut the stems off the chiles, slice in half, and remove seeds.
        • Peel the garlic.
        • Add all of the ingredients except the cilantro and salt to a large pot.
        • Add just enough water to almost cover the ingredients (about 4 cups).
        • Bring the water to a boil and then reduce to low. Simmer for 20 minutes.
        • Blend all of the ingredients including the cilantro with the cooking water (blend in 2 batches).
        • Heat 2 tablespoons of cooking oil in the same pot over medium heat.
        • Pour the blended salsa into the hot oil.
        • Reduce the heat and simmer for 20 minutes.
        • Adjust the salt to taste.

        Notes

        • With 2 serrano chiles, the salsa is medium hot. Reduce the number of chiles to 1 if you prefer a mild salsa or increase the quantity to 3 if you prefer a very hot salsa.
        • You don’t need to remove the seeds and veins from the chiles.
        • This salsa freezes very well.
        • Divide the salsa into 2 cup batches and pour into freezer bags. The next time you need salsa you will have four ½ cup portions ready to use.

        Nutrition

        Calories: 24kcal | Carbohydrates: 5g | Protein: 1g | Fat: 2g | Sodium: 247mg | Sugar: 3g

        More Mexican Salsa Recipes

        Mexico has an endless variety of incredible salsas. Here are a few more that we are sure you will enjoy. Which one is your favorite? They are all worth a try.

        • Pico de Gallo
        • Mexican Restaurant Salsa
        • Cascabel Salsa
        • Salsa Verde
        • Avocado Salsa
        • Habanero Salsa

        Did you enjoy this recipe? Any questions?

        Please let us know in the comments below if you have prepared this salsa and how it turned out for you. Also, if you have any questions on preparation you can let us know in the comments too.

        Creamy Avocado Salsa

        Salsas & Sauces

        Salsa de Aguacate con Crema

        Mild Mexican taquería style creamy tomatillo avocado salsa which reminds me of the salsa that they serve with tostadas at La Siberia in Monterrey, Nuevo Leon. When you aren’t in the mood for a big bold salsa this is perfect. The addition of heavy Mexican cream cuts the heat from the serrano chile and softens the flavor. Tomatillos give it a pleasant tang. As a bonus, it’s a very kid-friendly salsa. You might know it as guacamole salsa.

        Creamy Avocado Salsa in Serving Bowl

        How to Make Avocado Salsa

        This is probably the easiest salsa you will ever make. It is a raw uncooked salsa that shouldn’t take more than 10 minutes tops to prepare.

        Ingredients:

        • 3 ripe avocados
        • 3 tomatillos
        • 1 serrano pepper
        • 1 clove garlic
        • 4 tablespoons Mexican cream or sour cream
        • 6 tablespoons water
        • 1 tsp. salt
        Creamy Avocado Salsa Ingredients on Cutting Board

        Preparation

        Pit the avocados and remove the flesh.

        Scooping out avocado flesh.
        Pitted avocados on plate.

        Peel and wash the tomatillos then cut into quarters.

        Quartered tomatillos on plate.

        Cut the stem off of the serrano chile.

        Serrano pepper with stem removed on cutting board.

        Peel the garlic clove.

        Peeled garlic clove on cutting board.

        Add all of the ingredients blender and blend until very smooth. If the salsa is too thick to blend add water 2 tbsp. at a time until the salsa blends smoothly.

        Avocado Salsa Ingredients in Blender

        Looks good, doesn’t it?

        Pouring avocado salsa into serving bowl.

        Chill the salsa for 1 hour to allow the flavors to meld. Add salt more salt if necessary.

        Adapt the Recipe to Your Taste

        Like it hotter? Add another serrano chile. Love garlic? Add another clove. It’s a very flexible recipe. Play around with it until you get it just how you like it. Just be sure to chill the salsa for 1 hour before serving to allow the flavors to blend.

        What to Serve With

        Serve this salsa with chicken taquitos, chicken tostadas, potato and chorizo tacos, or nachos. It’s a great avocado dip for a vegetable appetizer plate too. You’ll notice that this recipe is similar to the avocado salsa recipe that is part of the chicken taquitos post but with some key differences. This recipe includes Mexican cream but doesn’t include cilantro or onion. It is a little bit richer and a little bit smoother. Feel free to substitute sour cream for the Mexican cream if you are unable to find it.

        Tomatillo Avocado Salsa in Serving Bowl

        What are you waiting for? Time to make some salsa!

        How to Choose the Best Avocados

        Very ripe avocados are key to getting the smoothest salsa possible. For this salsa, you want ones that are ripe and soft almost to the point of being mushy. To check the ripeness of an avocado, use your thumb and gently push on the top where the stem connects. This is the narrower end of the avocado. Soft avocados will give easily when pressed. If it doesn’t give a little, it isn’t ripe enough for this salsa.

        How to Remove Avocado Pits

        Avocados have large pits that need to be removed. The most common method for removing the pit is to use a kitchen knife cut all the way around the avocado lengthwise then twist the two halves of the avocado until one side pops off. Then holding the side of the avocado with the pit in the palm of your hand with the pit facing up hit the pit with the sharp side of the knife blade to embed the knife in the pit. Twist the knife sideways and the pit will pop out.

        A word of warning: Avocado injuries are common when removing the pit. Use a great deal of caution to avoid cutting your hand.

        Provecho!

        Print Recipe
        3.86 from 42 votes

        Creamy Avocado Salsa Recipe

        Mild Mexican taquería style creamy avocado salsa which reminds me of the salsa that they serve with tostadas at La Siberia in Monterrey, Nuevo Leon. heavy Mexican cream cuts the burn from the serrano chile and softens the flavor. Tomatillos give it a pleasant tang. An easy to make kid-friendly salsa!
        Prep Time5 minutes mins
        Cook Time5 minutes mins
        Total Time10 minutes mins
        Course: Salsa
        Cuisine: Mexican
        Keyword: avocado, avocado salsa, dip, Easy
        Servings: 8 servings
        Calories: 86kcal
        Author: Douglas Cullen

        Ingredients

        • 3 ripe avocados
        • 3 tomatillos
        • 1 serrano chile
        • 1 clove garlic
        • 4 tbsp. Mexican cream or sour cream
        • 6 tbsp. water
        • 1 tsp. salt

        Instructions

        • Pit the avocados and remove the flesh
        • Peel and wash the tomatillos
        • Remove the stem from the serrano chile
        • Peel the garlic clove
        • Add all of the ingredients blender and blend until very smooth. If the salsa is too thick to blend add water 2 tbsp. at a time until the salsa blends smoothly
        • Chill the salsa for 1 hour to allow the flavors to meld
        • Add more salt if necessary

        Notes

        Substitutions
        • Add some lime juice if you want to keep the salsa from turning brown, but it’s best to cover it tightly with plastic wrap when you refrigerate it.
        • This salsa is mildly spicy. If you prefer a hotter salsa add 1 more serrano chile.
        • You can substitute jalapeño pepper for the serrano.
        • Sour cream works just as well as Mexican cream.
        Other Names
        • Guacamole salsa
        • Avocado sauce
        • Taquito sauce
        • Avocado salsa verde
        • Tomatillo avocado salsa
        • Green salsa
        • Green sauce

        Nutrition

        Serving: 1/4 cup | Calories: 86kcal | Carbohydrates: 6g | Protein: 2g | Fat: 7g | Cholesterol: 4mg | Sugar: 3g
        More Mexican Recipes with Avocado
        • Chicken Taquitos with Fresh Avocado Salsa
        • Chicken Tacos with Avocado Salsa
        • Fresh Guacamole
        • Black Bean Soup with Avocado
        • Cactus Fruit Pico de Gallo with Avocado

        Beef Tenderloin with a Three Chile Sauce

        Beef

        Beef Tenderloin Three Chile Goat Cheese Sauce

        Medallones de Res en una Salsa de Tres Chiles

        Beef tenderloin served with a rich three chile sauce and cactus on the side is popular in the state of Querétaro. The sauce is prepared ancho chile, pasilla chile, and chipotle chile with the addition of tangy goat cheese which makes the sauce even richer and more flavorful. 

        Beef Tenderloin Nopal Three Chile Suace

        It looks spectacular on the plate, green, white, and red just like the Mexican flag.

        How to Make

        Gather Your Ingredients

        Start by gathering everything you need to prepare the dish. The ingredients are beef tenderloin fillets, ancho chile, pasilla chile, chipotle in adobo, tomato, onion, garlic, heavy cream, sharp goats cheese and cactus pads.

        Ingredients Beef Tenderloin with 3 Chile Salsa

        How to Make the 3 Chile Sauce

        The recipe for the sauce makes about 4 cups which is enough for a very generous serving with each beef fillet or to save some to later use, and you will want some for later. It’s that good.

        Start by prepping the chiles. Remove the stems and seeds from the ancho and pasilla chiles. You do not need to remove the veins. Don’t worry if a few seeds remain stuck to the chiles. The seeds are edible.

        Chiles with Seeds and Stems Removed

        Fry the onion and garlic over medium heat for 5 minutes in 2 tablespoons of oil until the onion just starts to turn translucent.

        Frying White Onion and Garlic for Sauce

        Add the tomatoes and dried chiles to the pan. Continue to cook over medium heat for 5 minutes stirring periodically. Do not add the chipotle yet.

        Cooking Chiles and Tomatoes for Sauce

        Add just enough water to barely cover the tomatoes, onion, and chiles. Reduce the heat to low and simmer for 15 minutes to reconstitute the chiles.

        Soaking Chiles for Salsa

        Next, you will blend the base of the sauce until smooth. Add the tomatoes, onion, reconstituted chiles, and the chipotle in adobo to your blender. Blend in 2 batches.

        Straining 3 Chile Sauce

        Strain the chile base with a medium strainer to remove the chile skins from the sauce.

        Strained Three Chile Sauce

        Preheat a large pot over high heat. Add 3 tablespoons of cooking oil to the pot. Pour the blended and strained chile base into the hot to fry it. Yes, that’s correct, fry it. This step develops flavor and depth in the sauce. Be careful because the oil may spatter. Once all chile base is in the pot reduce the heat to low. Simmer for 20 minutes.

        Add the 3 ounces of goat cheese to the chile base and stir with a whisk until the cheese has fully incorporated.

        Adding Goat Cheese to Three Chile Sauce

        After the cheese is fully incorporated add the cream and stir with a whisk until the cream has fully incorporated. Simmer for 10 minutes stirring occasionally to thicken the sauce. After 10 minutes turn off the heat.

        Whisking in Heavy Cream to Sauce

        Cooking the Cactus

        While the sauce is simmering, cook the cactus pads which serve as a base for the beef when you plate the dish. Add 2 tablespoons of cooking oil to a medium-hot pan. Cook both sides of the cactus for 3 minutes. The cactus is cooked when it has turned a darker green color and is starting to brown.

        Pan Frying Cactus Pads (Nopal)

        Cooking the Beef

        Preheat your pan over high heat. Add 4 tablespoons of oil. Salt the meat well on both sides. Add all four fillets to the pan. When the fillets are nicely browned turn them over, about 3 minutes.

        Pan Frying Beef Tenderloins

        Nicely brown the fillets on both sides. The meat will still be pink in the middle.

        Pan Frying Beef Tenderloin

        Remove the tenderloin fillets from the pan and let them rest for 3 minutes.

        Pan Fried Beef Tenderloin

        Plating the Dish

        To each plate, add one cactus pad. Place 1 tenderloin fillet on the cactus pad. Pour about ½ cup of sauce over the fillet. Garnish with 1 teaspoon of crumbled goat cheese. Serve with a French roll. Serve with more salsa if you like so that you can sop up all of the wonderful flavors with chunks of the French roll.

        Beef Tenderloin with Three Chile Salsa on Cactus Pad

        Looks good, doesn’t it? Provecho!

        Beef Tenderloin Three Chile Goat Cheese Sauce
        Print Recipe
        5 from 4 votes

        Beef Tenderloin with a Three Chile Sauce with Goat Cheese

        Querétaro style beef tenderloin served with a rich three chile sauce and cactus on the side. The sauce is prepared ancho, pasilla, and chipotle chile with the addition of tangy goat cheese.
        Prep Time20 minutes mins
        Cook Time1 hour hr
        Total Time1 hour hr 20 minutes mins
        Course: Beef
        Cuisine: Mexican
        Keyword: beef, chili sauce, nopal, steak, tenderloin
        Servings: 4 servings
        Calories: 1245kcal
        Author: Douglas Cullen

        Ingredients

        • 1 ½ lbs. beef tenderloin 4 fillets
        • 4 ancho chiles
        • 4 pasilla chiles
        • 1 canned chipotle chile in adobo
        • 4 tomatoes
        • ½ white onion
        • 2 cloves garlic
        • 4 small cactus pads
        • ½ cup heavy cream
        • 5 ounces goat cheese
        • 9 tbsp. cooking oil
        • Salt
        • 4 French rolls

        Instructions

        • PREPARING THE SAUCE
        • Remove the stems and seeds from the ancho and pasilla chiles. Reserve the chipotle chile.
        • Roughly chop the onion.
        • Peel and crush the garlic.
        • Preheat 3 tablespoons of oil in a frying pan.
        • Fry the onion and garlic over medium heat for 2 minutes.
        • Add the tomatoes and dried chiles to the pan. Continue to cook over medium heat for 3 minutes. Do not add the chipotle yet.
        • Add just enough water to barely cover the tomatoes, onion, and chiles. Reduce the heat to low and simmer for 15 minutes to reconstitute the chiles.
        • Next, you will blend all of the base of the sauce until smooth. Add the tomatoes, onion, reconstituted chiles, and the chipotle in adobo to your blender. Blend in 2 batches.
        • Strain the chile base with a medium strainer to remove the chile skins from the sauce.
        • Preheat a large pot over high heat. Add 3 tablespoons of cooking oil to the pot. Pour the blended and strained chile base into the hot to fry it. Be careful because the oil may spatter.
        • Once you have poured all the chile base is in the pot reduce the heat to low. Simmer 20 minutes.
        • Add the goat cheese to the chile base and stir with a whisk until the cheese has fully incorporated.
        • After the cheese is fully incorporated add the cream and stir with a whisk until the cream has fully incorporated.
        • Simmer for 10 minutes stirring occasionally to thicken the sauce.
        • After 10 minutes turn off the heat.
        • COOKING THE CACTUS
        • Add 2 tablespoons of cooking oil to a medium-hot pan. Cook both sides of the cactus for 3 minutes. The cactus is cooked when it has turned a darker green color and is starting to brown.
        • COOKING THE BEEF
        • Salt the beef well on both sides.
        • Preheat your pan over high heat. Add 4 tablespoons of oil. Add all four fillets to the pan. When the fillets are nicely browned turn them over, about 3 minutes.
        • Nicely brown the fillets on both sides.
        • Remove the tenderloin fillets from the pan and let them rest for 3 minutes.
        • PLATING THE DISH
        • To each plate, add one cactus pad. Place 1 tenderloin fillet on the cactus pad.
        • Pour about ½ cup of sauce over the fillet. Garnish with 1 teaspoon of crumbled goat cheese.
        • Serve with a French roll.

        Notes

        Substitutions
        • If you don’t care for the taste of goat cheese you can replace it with cream cheese which will give the sauce a very smooth rich taste.
        • You can substitute corn tortillas for the French rolls.
        • An alternative sauce which will give excellent results, red enchilada sauce.

        Nutrition

        Calories: 1245kcal | Carbohydrates: 58g | Protein: 48g | Fat: 94g | Saturated Fat: 30g | Cholesterol: 176mg | Sodium: 565mg | Potassium: 1719mg | Fiber: 15g | Sugar: 19g | Vitamin A: 13790IU | Vitamin C: 29.8mg | Calcium: 161mg | Iron: 9.1mg

        More Mexican Beef Dishes

        • Picadillo (Mexican Style Ground Beef)
        • Bistec a la Mexicana (Spicy Beef)
        • Carne Asada (Grilled Beef)
        • Rib-Eye Tacos
        • Arrachera Steak Tacos
        • Shredded Beef Tacos

        Curried Rice with Shrimp

        Fish & Seafood

        Mexican Shrimp with Curry Rice

        Arroz al Curry con Camarones

        Are you interested in a fancy looking and fancy tasting dish without hours of fancy prep work? This Mexican curried rice and shrimp dish is what you are looking for. 

        Big flavor, great presentation, and easy enough for a weeknight meal. It will become one of your favorite go-to meals without a doubt.

        Mexican Curried Rice and Shrimp

        How to Make

        Gather Your Ingredients

        This dish is so simple to prepare. You really need very few ingredients: shrimp, rice, onion, garlic, curry, and salt.

        Ingredients for Curried Shrimp and Rice

        Devein the Shrimp

        For the best presentation, you will want to devein the shrimp before cooking. Rinse the shrimp well in cold water then devein the shrimp to get them ready for cooking. Use a sharp knife and split the shell down the back of the shrimp to expose the vein.

        How to Devein Shrimp

        With the tip of the knife gently remove the vein and discard. You’re done. That was the most difficult part of preparing this dish.

        Deveining Shrimp

        Cooking the Shrimp and Rice

        Let’s start building the flavor. In 3 tablespoons of cooking oil, fry the onion over medium heat for 1 minute.

        Sauteeing Diced Onion

        Add the rice and stir for 1 minute. The rice will just be starting to brown.

        Browning Rice an Onion

        Reduce the heat to low. Add the finely chopped garlic, shrimp, curry powder, and 1 tsp. of salt. The shrimp are cooked in their shells which adds a lot of flavor.

        Uncooked Shrimp and Rice

        Add 3 cups of water and stir gently to be sure the curry is evenly dispersed.

        Uncooked Shrimp and Rice in Pan

        Cover the pan with aluminum foil or its lid.

        Cover Pan with Lid or Foil

        Cook for 20 to 25 minutes until the rice has absorbed all of the cooking liquid. If the rice has absorbed all of the liquid but still isn’t fully cooked add water 4 tbsp. at a time as needed until the rice is fully cooked. Once the rice is cooked, take off the heat and let sit for 5 minutes.

        Easy Mexican Curry Rice an Shrimp

        What do you think? Looks good, doesn’t it?

        Serve and Enjoy

        Serve the shrimp family style directly from the pan you cooked it in which looks beautiful on the table and makes serving a breeze.

        Mexican Shrimp with Curry Rice

        Provecho!

        Easy Mexican Curry Rice an Shrimp
        Print Recipe
        4 from 4 votes

        Curried Rice with Shrimp

        Easy weeknight Mexican curried rice and shrimp dish. Big flavor and great presentation with very little prep work. This will become one of your go-to dishes. It's nearly foolproof.
        Prep Time15 minutes mins
        Cook Time30 minutes mins
        Total Time45 minutes mins
        Course: Seafood
        Cuisine: Mexican
        Keyword: curry, seafood, shrimp
        Servings: 4 servings
        Calories: 476kcal
        Author: Douglas Cullen

        Ingredients

        • 1 pound shrimp in shell
        • 1 ½ cups white rice
        • ½ white onion
        • 2 tbsp. yellow curry powder
        • 1 clove garlic
        • 3 tbsp. cooking oil
        • 3 cups water
        • 1 tsp. salt

        Instructions

        • DEVEINING THE SHRIMP
        • Rinse the shrimp well under cold water.
        • With a sharp knife, split the shell of each shrimp down the back.
        • With the tip of your knife, gently remove the black vein from the shrimp and discard.
        • COOKING
        • Chop the onion into small ¼ inch pieces.
        • Chop the onion finely.
        • Preheat the cooking oil in a wide pan over medium heat.
        • Add the onion to your pan and fry for 1 minute.
        • Add the rice and fry for 1 minute stirring continually.
        • Add the garlic, shrimp, yellow curry powder, and salt.
        • Add 3 cups of water.
        • Cover your pan and reduce the heat to low.
        • Cook for 20 to 25 minutes until the rice has absorbed all of the cooking liquid.
        • If the rice isn't fully cooked after absorbing all of the liquid add more water 4 tablespoons at a time until the rice is fully cooked.
        • Once the rice is fully cooked, allow the dish to rest covered for 5 minutes.
        • Gently fluff the rice with a fork and serve in the cooking pan.

        Notes

        Substitutions
        • You can use peeled shrimp for this dish if you don’t care for shrimp in their shells.
        • For even more flavor you can substitute the 3 cups of the cooking water for 3 cups of low salt chicken broth.

        Nutrition

        Calories: 476kcal | Carbohydrates: 59g | Protein: 29g | Fat: 13g | Saturated Fat: 1g | Cholesterol: 286mg | Sodium: 1374mg | Potassium: 239mg | Fiber: 2g | Sugar: 1g | Vitamin A: 30IU | Vitamin C: 6.3mg | Calcium: 208mg | Iron: 3.9mg

        More Fish and Seafood Recipes

        • Fried Fish Sandwich with Chipotle Mayo
        • Garlic Shrimp Tacos
        • Fish Tacos with Pico de Gallo
        • Veracruz Style Whitefish
        • Tuna Patties
        • Shrimp Ceviche Acapulco
        • Shrimp Skewers

        Cream of Tomato Soup

        Soups

        Mexican Cream of Tomato Soup

        Crema de Jitomate

        This is the luxury version of cream of tomato soup. It’s made with lots of Mexican cream which thickens the soup and adds richness. Enjoy it as a comforting treat.

        Mexican Cream of Tomato Soup

        If you enjoy a good cream soup you will love our cream of corn and cream of cilantro soups. These too are made with super-rich Mexican cream.

        Let’s Make Soup!

        Mexican cream of tomato soup is prepared with only a few ingredients: tomatoes, onion, garlic, Mexican cream, and chicken broth. The redder, riper your tomatoes are the better your soup will be. The typical hard semi-ripe tomatoes you find in the grocery store just won’t work well. If you can’t find the right tomatoes wait until you can before you prepare this soup.

        Ingredients Mexican Cream of Tomato Soup

        Start Cooking

        Roughly chop the tomatoes, onions, and garlic and fry in 2 tablespoons of oil.

        Frying Tomatoes and Onions

        Cook until the onions and tomatoes are starting to brown. Browning the tomatoes and onions builds flavor.

        Pan Fried Tomatoes, Onions and Garlic

        Blend and Strain

        Blend the tomatoes, onion, and garlic with 2 cups of water. It’s best to blend in 2 batches. Straining is an important step needed to get a silky smooth soup. If you don’t strain it your soup will have bits of tomato seed and pulp in it which isn’t all that pleasant.

        Straining Pureed Tomatoes

        When you are straining the mixture press down on the pulp with the back of a spoon to extract all of the good tomato flavor. Discard the pulp once you have extracted all of the liquid.

        Straining Tomato Soup Base

        Mix the Tomato Base Into the Cream

        You need to gently incorporate the blended and strained tomato base into the cream. Allow the cream to come to room temperature and allow the blended soup base to cool for 10 minutes before adding to the cream. You need to introduce the base very slowly into the cream so that it doesn’t form lumps. This step is important to get a really smooth soup.

        Put the cream into a large mixing bowl. Add a few tablespoons of the pureed tomato base. Stir to blend base into the cream.

        Blending Tomato Soup Base with Cream

        Add a few more tablespoons of soup base at a time and stir until all of the base has been incorporated into the cream. Now add 2 cups of room temperature water and stir for 30 seconds until the mixture is very smooth.

        Blending Tomato Soup Base with Cream

        Gently warm 1 cup of chicken broth and then slowly pour in the tomato soup mixture. Stir well until the chicken broth is fully mixed in.

        Incorporating Tomato Soup Base Into Chicken Broth

        Bring the soup to a gentle simmer and then simmer for 20 minutes until the soup has thickened. Do not allow the soup to boil or the cream will start to clump. Serve immediately.

        Simmering Cream of Tomato Soup

        Lumpy soup?

        If for some reason your soup has lumps in it, no worries. Strain just before serving and it will be perfect.

        Time to Eat!

        Serve each bowl with a crack of black pepper. This soup is best served in smaller portions. It’s very, very rich. You might think you can’t have too much of a good thing but in this case, you can. It’s better to finish your soup wanting more instead of thinking why did I do that. Eating too much of this soup will give you the same feeling as when you eat an entire carton of ice cream in one sitting.

        Mexican Cream of Tomato Soup

        Provecho!

        Mexican Cream of Tomato Soup
        Print Recipe
        3.80 from 5 votes

        Mexican Cream of Tomato Soup

        Mexican cream of tomato soup prepared with vine-ripened tomatoes and thickened with luxurious Mexican cream. This is a soup for a special meal.
        Prep Time10 minutes mins
        Cook Time30 minutes mins
        Total Time40 minutes mins
        Course: Soup
        Cuisine: Mexican
        Keyword: cream soup, soup, special occasion, tomatoes
        Servings: 4 servings
        Calories: 117kcal
        Author: Douglas Cullen

        Ingredients

        • 4 very ripe tomatoes
        • ½ white onion
        • 1 clove garlic
        • ¾ cup Mexican cream not sour cream
        • 1 cup low-sodium chicken broth
        • 4 cups water

        Instructions

        • Roughly chop the tomatoes, onions, and garlic and fry in 2 tablespoons of oil.
        • Cook until the onions and tomatoes are starting to brown.
        • Blend the tomatoes, onion, and garlic with 2 cups of water.
        • Strain the blended tomato mixture pressing well on the pulp to extract maximum flavor.
        • Put the cream into a large mixing bowl. Add a few tablespoons of the pureed tomato base. Stir to blend base into the cream.
        • Add a few more tablespoons of soup base at a time and stir until all of the base has been incorporated into the cream. Now add 2 cups of room temperature water and stir for 30 seconds until the mixture is very smooth.
        • Gently warm 1 cup of chicken broth and then slowly pour in the tomato soup mixture. Stir well until the chicken broth is fully mixed in.
        • Bring the soup to a gentle simmer and then simmer for 20 minutes until the soup has thickened. Do not allow the soup to boil or the cream will start to clump.
        • If needed strain your soup to remove any lumps that may have formed.
        • Serve each bowl with a crack of black pepper.

        Notes

        Substitutions
        • You can substitute the chicken broth for ½ teaspoon of powdered chicken bouillon dissolved in warm water.

        Nutrition

        Calories: 117kcal | Carbohydrates: 10g | Protein: 4g | Fat: 8g | Saturated Fat: 1g | Cholesterol: 23mg | Sodium: 220mg | Potassium: 362mg | Fiber: 2g | Sugar: 5g | Vitamin A: 1225IU | Vitamin C: 18.1mg | Calcium: 94mg | Iron: 0.5mg

        More Mexican Soup Recipes

        • Cream of Corn
        • Cream of Cilantro
        • Potato Soup
        • Mushroom Soup
        • Lentil Soup
        • Chicken Tortilla Soup

        Cream of Corn Soup

        Soups

        Mexican Cream of Corn Soup

        Crema de Elote

        Corn is the flavor of Mexico and this cream of corn soup highlights that earthy corn flavor. Ears of Mexican white corn are called elotes. If you have never tried elotes they are much tougher and earthier tasting than sweet corn that you are probably accustomed to. Fresh Elotes make a spectacular soup which transports you to Mexico with each bowl.

        Mexican Cream of Corn Soup

        In Spanish, this soup is called crema de elote.

        Time to Make Some Soup

        Gather all of your ingredients for your soup. We always make it a habit to get everything together before starting to cook to avoid kitchen drama that occurs when you are halfway through preparation and you realize you forgot to buy a key ingredient. If fresh elotes aren’t available buy two 16oz. cans of white corn. You will need 3 cups of corn. Be sure to use Mexican cream called crema not sour cream. If you use sour cream you won’t like the results.

        Ingredients for Mexican Cream of Corn Soup

        Remove the kernels from the uncooked ears of corn. White corn tends to be tough. Always cut away from your body. You will get approximately 1 cup of corn kernels per ear.

        Removing Kernals of Corn from the Ear

        Cook the Corn

        Start by frying the corn kernels in 2 tablespoons of butter for 5 minutes. Fry over low heat. You don’t want to brown the corn. Note: If you are using canned corn you can skip to the next step where you cook the onion. Canned corn is precooked.

        Sauteing White Corn Kernals

        Next, add the chopped onion and cook for 5 minutes more stirring a couple of times.

        Sauteing White Corn and Onion

        Add 2 cups of water and simmer for 20 minutes.

        Boiling White Corn Kernals

        Blend and Strain

        Blend the sauteed onions, garlic, corn, and cooking liquid with 2 cups of water until very smooth, about 2 minutes. White corn takes quite a while to break down in the blender.

        Strain the mixture into a mixing bowl. Press firmly on the pulp to extract as much flavor as possible. Would you like a rustic corn soup? Straining the corn mixture gives the soup a very smooth texture. Skip the straining step for a heartier rustic soup. The taste and presentation will be just as good.

        Straining Corn Soup Base

        Incorporate the Soup Base Into the Cream

        Incorporating the blended corn soup base into the cream is an important step. Allow the cream to come to room temperature and allow the blended soup base to cool for 10 minutes before adding to the cream. You need to introduce the base very slowly into the cream so that it doesn’t form lumps.

        Spoon the cream into a large mixing bowl then start adding a few tablespoons of soup base at a time into the cream and gently stir to incorporate.

        Continue adding a few tablespoons of base at a time while continually stirring.

        Once you have added all of the soup base add 2 cups of water and stir for 30 seconds to ensure that all of the soup base and water are incorporated into the cream and there are no lumps in the cream. If there are lumps you can use a wire whisk to break them up.

        Corn Soup Base

        The Final Steps

        Warm 1 cup of chicken broth in a pot but don’t bring the broth to a boil because if the broth is boiling the cream will clump when you pour the mixture into it. Slowly pour all soup base into the broth and then stir immediately.

        Pouring White Corn Soup Base Into Chicken Broth

        Simmer for 20 minutes until the soup has thickened and taken on a silky texture.

        Cream of Corn Soup in Clay Pot

        Serve and Enjoy

        This corn cream soup is best served immediately and we recommend serving it as an appetizer portion because it is quite rich. Sometimes more isn’t better. Add a crack of black pepper to each bowl you serve.

        One final note: If for some reason your soup has clumps in it even after following the directions to a T. Not a problem. Strain it one final time before serving and you will have a beautiful silky smooth soup and it will be perfect.

        Mexican Cream of Corn Soup

        Provecho!

        Mexican Cream of Corn Soup
        Print Recipe
        4.25 from 4 votes

        Mexican Cream of Corn Soup

        Corn is the flavor of Mexico and this cream of corn soup highlights the earthy corn flavor. This spectacular soup which transports you to Mexico with each bowl. It is earthy and silky at the same time.
        Prep Time20 minutes mins
        Cook Time40 minutes mins
        Total Time1 hour hr
        Course: Cream Soup
        Cuisine: Mexican
        Keyword: corn, cream soup, soup, white corn
        Servings: 4 servings
        Calories: 198kcal
        Author: Douglas Cullen

        Ingredients

        • 3 ears of white corn elotes kernels removed (about 3 cups of kernels)
        • ½ white onion
        • 1 clove garlic
        • ¾ cup Mexican cream not sour cream
        • 1 cup low-salt chicken broth
        • 4 cups water
        • ¼ tsp. black pepper
        • 1 tsp. salt
        • 2 tbsp. cooking oil

        Instructions

        • Over low heat, fry the corn kernels in 2 tablespoons of butter for 5 minutes.
        • Chop the onions and garlic and add them to the corn and cook for 5 more minutes.
        • Add 2 cups of water and black pepper to the pan and simmer for 20 minutes.
        • Blend the sauteed onions, garlic and corn, and cooking liquid with 2 cups of water until very smooth, about 2 minutes.
        • Strain the mixture into a mixing bowl. Press firmly on the pulp with the back of a spoon to extract as much flavor as possible from the corn.
        • Allow the cream to come to room temperature and allow the blended corn base to cool for 10 minutes before adding to the cream.
        • In a large mixing bowl, add a few tablespoons of soup base into the cream and gently stir to incorporate.
        • Continue adding a few tablespoons of base at a time while continually stirring.
        • Once you have added all of the soup base add 2 cups of water and stir for 30 seconds to ensure that all of the soup base and water are incorporated into the cream and there are no lumps in the cream.
        • Warm 1 cup of chicken broth in a pot but don’t bring the broth to a boil because if the broth is boiling the cream will clump when you pour the mixture into it. Slowly pour the soup base into the broth.
        • Very gently simmer the soup for about 20 minutes. Over this time the soup will thicken. Do not allow it to come to a boil or the soup may clump.
        • Serve immediately.

        Notes

        Substitutions
        • Use 2 16oz. cans of corn drained if you don’t have fresh elotes.
        • You can substitute ½ teaspoon of chicken bouillon dissolved in 1 cup of warm water for the chicken broth.
        Clumps in Your Soup?
        • If your soup clumps don’t worry. Strain it one final time before serving and you will have a silky smooth soup.
        Prefer a Rustic Soup?
        • Skip the straining step and prepare the rest of the recipe exactly the same and you will get a hearty rustic soup.

        Nutrition

        Calories: 198kcal | Carbohydrates: 17g | Protein: 5g | Fat: 14g | Sodium: 374mg | Sugar: 3g

        More Mexican Soup Recipes

        • Onion Soup
        • Black Bean and Avocado Soup
        • Tortilla Soup
        • Lentil Soup
        • Mushroom Soup
        • Chicken Tortilla Soup


        Cream of Cilantro Soup

        Soups

        cream of cilantro soup

        Crema de Cilantro

        This is a very rich yet delicately flavored cilantro cream soup. Why do we say it’s rich? Because, you use heavy Mexican cream not corn starch to thicken the soup.

        The texture is silky, not gummy like soups thickened with corn starch. Raw cilantro has a sharp herbal taste, which many people don’t care for, but when you simmer it the flavor softens and becomes more sophisticated. Serve this soup on a special occasion.

        cream of cilantro soup

        Cream soups show the influence of French cuisine on Mexican cooking. Throughout the mid to late 1800’s French cuisine and French cooking techniques were popular with the sophisticated elite. This popularity continued well into the late 1900’s. You can find out more about the French influence on Mexican cuisine here.

        Let’s Make Some Soup

        First, start by gathering all of the ingredients for your soup: cilantro, onion, garlic, cream, and low sodium chicken broth.

        ingredients-cream-of-cilantro-soup

        Time to Cook

        Roughly chop the onions and garlic and fry them in 2 tablespoons of cooking oil until they start to soften and turn translucent.

        frying-onion-and-garlic

        Add the bunch of cilantro and sauté over medium heat until the cilantro has wilted.

        sauteeing-cilantro

        Once the cilantro has wilted add 1 cup of water and the black pepper to the pan and simmer for 5 minutes.

        sauteeing-cilantro-2

        Blend and Strain

        Blend the sauteed onions, garlic, and cilantro and cooking liquid with 2 cups of water until smooth, about 1 minute.

        Strain the mixture into a mixing bowl. Press firmly on the pulp to extract as much flavor as possible.

        Do you prefer rustic style soups? Straining the mixture gives the soup a very smooth texture. Just omit the straining step if prefer rustic-style soup. The taste will be just as good.

        straining-cilantro-mixture

        Incorporate the Soup Base Into the Cream

        Incorporating the blended soup base into the cream is an important step. Allow the cream to come to room temperature and allow the blended soup base to cool for 10 minutes before adding to the cream. You need to introduce the base very slowly into the cream so that it doesn’t form lumps.

        Put the cream in a large mixing bowl then start adding a few tablespoons of soup base at a time into the cream and gently stir to incorporate.

        incorporating-strained-cilantro-into-cream

        Continue adding a few tablespoons of base at a time while continually stirring.

        incorporating-strained-cilantro-into-cream-2

        Once you have added all of the soup base add 2 cups of water and stir for 30 seconds to ensure that all of the soup base and water are incorporated into the cream and there are no lumps in the cream.

        incorporating-strained-cilantro-into-cream-3

        Finishing the Soup

        Warm 1 cup of chicken broth in a pot but don’t bring the broth to a boil because if the broth is boiling, the cream will clump when you pour the mixture into it. Slowly pour the soup base into the broth.

        pouring-cilantro-soup-base-into-chicken-broth

        Add all of the soup base to the broth and stir well.

        pouring-soup-base-into-broth

        Very gently simmer the soup for 15 minutes. Over this time the soup will thicken and become silky. Do not allow it to come to a boil or the soup may clump.

        cooking-cream-of-cilantro-soup

        Serve and Enjoy

        This cilantro cream soup is best served immediately and we recommend serving it as an appetizer because it is so rich. If you serve it as the main course it is just too much of a good thing. Sometimes you really can have too much of a good thing.

        One final note: If for some reason your soup has clumps in it even after following the directions to a T. Don’t worry. Strain it one final time before serving and you will have a beautiful silky smooth soup and no one will ever know.

        Cilantro Cream Soup

        Provecho!

        cream of cilantro soup
        Print Recipe
        3.25 from 20 votes

        Cream of Cilantro Soup

        A silky, very rich yet delicately flavored Mexican cilantro cream soup great served on a special occasion. Fresh cilantro gives flavor and heavy Mexican cream gives the soup body and richness.
        Prep Time10 minutes mins
        Cook Time40 minutes mins
        Total Time50 minutes mins
        Course: Soup
        Cuisine: Mexican
        Keyword: cilantro, cream soup, special occasion
        Servings: 4
        Calories: 157kcal
        Author: Douglas Cullen

        Ingredients

        • 1 large bunch cilantro
        • ½ white onion
        • 1 clove garlic
        • ¾ cup Mexican cream not sour cream
        • 1 cup low salt chicken broth
        • 4 cups water
        • ¼ tsp. black pepper
        • 1 tsp. salt
        • 2 tbsp. cooking oil

        Instructions

        • Roughly chop the onions and garlic and fry them in 2 tablespoons of cooking oil until they start to soften and turn translucent.
        • Add the bunch of cilantro and sauté over medium heat until the cilantro has wilted.
        • Add 2 cups of water and black pepper to the pan and simmer for 5 minutes.
        • Blend the sauteed onions, garlic, and cilantro and cooking liquid with 2 cups of water until smooth, about 1 minute.
        • Strain the mixture into a mixing bowl. Press firmly on the pulp to extract as much flavor as possible.
        • Allow the cream to come to room temperature and allow the blended cilantro base to cool for 10 minutes before adding to the cream.
        • Add a few tablespoons of soup base into the cream and gently stir to incorporate.
        • Continue adding a few tablespoons of base at a time while continually stirring.
        • Once you have added all of the soup base add 2 cups of water and stir for 30 seconds to ensure that all of the soup base and water are incorporated into the cream and there are no lumps in the cream.
        • Warm 1 cup of chicken broth in a pot but don't bring the broth to a boil because if the broth is boiling the cream will clump when you pour the mixture into it. Slowly pour the soup base into the broth.
        • Very gently simmer the soup for about 15 minutes. Over this time the soup will thicken. Do not allow it to come to a boil or the soup may clump.
        • Serve immediately.

        Notes

        Substitutions
        • You can substitute ½ teaspoon of chicken bouillon dissolved in 1 cup of warm water for the chicken broth.
        Clumpy Soup?
        • If your soup clumps don’t worry. Strain it one final time before serving and you will have a silky smooth soup.

        Nutrition

        Calories: 157kcal | Carbohydrates: 5g | Protein: 3g | Fat: 14g | Saturated Fat: 1g | Cholesterol: 23mg | Sodium: 795mg | Potassium: 71mg | Fiber: 1g | Sugar: 2g | Vitamin A: 235IU | Vitamin C: 1.2mg | Calcium: 81mg | Iron: 0.1mg

        More Mexican Soup Recipes

        • Tortilla Soup
        • Carrot and Zucchini Soup
        • Potato Soup
        • Black Bean Soup
        • Mushroom Soup
        • Chicken Tortilla Soup

        Chiles en Nogada

        Chiles

        Authentic Chile en Nogada on Plate

        A Festive Dish in the Colors of the Mexican Flag

        We make our chiles en nogada based on an old family recipe from Yuriria, Guanajuato that dates back at least until the 1950s. Chiles en nogada are meat stuffed poblano chiles bathed in nogada, a walnut cream sauce and garnished with pomegranate seeds and parsley.

        Chile en Nogada
        Chiles en Nogada

        It is a festive dish typically served in the month of September to celebrate Independence Day because the colors of the dish are said to resemble the colors of the Mexican flag, green, white and red.

        In Yuriria, the filling is prepared with beef, pork, and biznaga, candied cactus which adds a delicate sweetness. Biznaga will be almost impossible to find but you can replace it with the equivalent amount of any candied fruit or dried fruit with excellent results.

        Chile en Nogada Vertical

        How to Make Traditional Chiles en Nogada

        Chiles en nogada is not a difficult dish to prepare but it does require you to dedicate some time for preparation. Your time will be rewarded with a sophisticated, deeply satisfying dish with knockout presentation perfect for a special occasion.

        Love and attention to detail matter. For a truly special dish, you must make the effort to chop all of the ingredients into uniformly sized pieces which will give you the most beautiful presentation.

        STEP 1. – Gather all of the Ingredients

        Chiles en Nogada Ingredients

        Be sure to lay out all of your ingredients beforehand and double-check your ingredient list to make sure that you have all ingredients on hand. You don’t want to start cooking and then realize that you have forgotten a key ingredient. We speak from experience on this one. Double-checking avoids swearing loud enough for your neighbors to hear.


        STEP 2. – Prepare the Filling

        Precook the Beef and Pork

        Many chiles en nogada recipes call for ground beef or pork. This one calls for chopped beef and chopped pork. It is definitely more work to prepare chopped meat instead of ground but we feel that it gives the dish a much better texture and flavor. If you don’t want to prepare chopped meat ground meat will still taste great. It’s a matter of personal preference.

        Simmering Meat

        Place the meat in a pan and just cover with water. Bring to a simmer and cook the meat until just cooked through (about 20 minutes) turning once.

        Simmering Meat 2

        When the meat is cooked remove it from the pan and allow it to cool to the touch. Reserve the cooking liquid. You will use it to prepare the tomato puree.

        Cooked Meat

        Chop the meat into cubes.

        Cubed Meat

        Then chop it finely.

        Chopping Meat

        The meat should look like this. Be sure that the meat is chopped into evenly sized pieces.

        Finely Chopped Meat

        Chop the Remaining Ingredients

        Before you can cook the filling you need to chop the onion, carrot, zucchini, potato, and candied fruit into ¼″ cubes. The almond should be very finely chopped. Don’t chop the peas or raisins.

        Prepped Ingredients Chiles en Nogada

        Just as you laid out all of the ingredients before starting preparation lay out all of your chopped ingredients before starting to cook the filling.

        Prepare the Tomato Base for the Filling

        Slice the tomatoes in half and add them to your blender with ½ cup of the cooking liquid from the meat.

        Tomatoes in Blender

        Blend until smooth but not liquefied.

        Tomato Puree

        Cook the Filling

        Now comes the fun part, cooking the filling.

        Sauteeing Onions

        Start by frying the onions in 3 tablespoons of oil for 2 minutes.

        Adding Potato

        Then add the potatoes, stir and cook for 5 minutes.

        Adding the Meat

        Add the chopped meat and stir.

        Adding Tomato Puree

        Add the pureed tomato.

        Adding Remaining Ingredients

        Add the carrots, zucchini, and raisins and cook for 5 minutes until the tomato puree is starting to reduce.

        Adding Biznaga Raisins Peas

        Add the peas, biznaga or candied fruit, almonds, brown sugar, and cinnamon. Stir well.

        Cooking Chile en Nogada Filling

        Cook for 15 minutes until all of the vegetables are fully cooked and tender and the liquid is reduced. Don’t cook until dry. You want the filling to be moist but not wet.

        Filling for Chiles en Nogada

        Note: If the filling starts to get too dry before all of the ingredients are fully cooked add the cooking liquid from the meat a few tablespoons at a time as needed.


        STEP 3. – Roast and Clean the Poblano Chiles

        The poblano chiles must be roasted and cleaned before being stuffed. Choose chiles that are shiny with smooth skin and are firm to the touch. Wrinkled chiles mean that they are old and won’t hold their shape well when being stuffed.

        Roasting Poblano Chiles

        Place the chiles over the open flame on the burner on your stove. You do this to blister the skin so that you can peel them. Note: Do not leave the chiles unattended.

        Roasting Poblano Chiles 2

        Blacken the skin on all sides.

        Roasted Poblano Chiles

        Once you have blackened all of the chiles place them in a plastic bag to sweat them. This helps loosen the skin even more.

        Sweating Poblano Chiles

        Once the chiles have cooled enough that you can handle them it’s time to clean them.

        Removing the Skin from Poblano Chiles

        Very gently scrape the skin the chiles with the blade of a knife.

        Poblano Chile Skin Removed

        Remove as much skin as possible. You will probably have to use your fingers after using your knife to remove the remaining bits of skin.

        Opening Poblano Chile

        Using a small knife, gently split the chile down the side without cutting all the way through the tip of the chile.

        Opening Poblano Chile 2

        The chiles have a seed pod on the large end at the base of the stem.

        Removing Seeds Poblano Chile

        Carefully use your fingers to remove the seeds.

        Cleaned Deseeded Poblano Chile

        If you are unable to remove all of the little seeds with your fingers you can place the chile under running water to remove them. This chile is ready to be stuffed with the filling.

        More Info On Roasting and Cleaning Poblano Chiles (video)


        STEP 4. – Prepare the Nogada

        Once you have prepared the filling and cleaned the chiles it’s time to make the nogada, the creamy walnut sauce.

        Nogada Ingredients in Blender

        Place the cream, walnuts, cinnamon, and brown sugar in your blender. Note: You must use Mexican cream, not sour cream.

        Blended Nogada

        Blend until the walnuts are completely incorporated into the sauce. You don’t want chunks of walnut in the sauce. Smoothness counts for the sauce.


        STEP 5. – Serve the Chiles, Yeah!

        It’s now time to serve. Woohoo!

        Split Pomegranate

        With a small spoon or your fingers remove the seeds from the pomegranates into a bowl or onto a plate.

        Garnish for Chiles en Nogada

        Mince the parsley. Leave a few whole leaves for decoration.

        Stuffing Chile Poblano

        Fill each poblano chile with enough filling so that it will just close. You don’t want the filling to spill out the side of the chile onto the plate. If the chiles won’t stay closed you can use toothpicks to close them.

        Nogada

        Place 1 stuffed chile on each plate.

        Chile en Nogada 2

        Spoon enough nogada over each chile to completely cover it. Sprinkle with pomegranate seeds and minced parsley. Top with 1 or 2 parsley leaves. Chiles en nogada are served gently warmed with the sauce at room temperature.

        Chile en Nogada Vertical

        Looks delicious, doesn’t it? Provecho!

        Chile en Nogada
        Print Recipe
        3.27 from 80 votes

        Authentic Chiles en Nogada

        This recipe for authentic chiles en nogada based on an old family recipe from Yuriria, Guanajuato that dates back to the 1950's. Filling includes beef, pork and biznaga, candied cactus that gives the dish a delicate sweetness.
        Prep Time45 minutes mins
        Cook Time1 hour hr
        Total Time1 hour hr 45 minutes mins
        Course: Holiday, Stuffed Pepper
        Cuisine: Mexican
        Keyword: Chiles en Nogada, Chiles en Nogada Recipe, How to Make Chiles en Nogada
        Servings: 6
        Calories: 654kcal
        Author: Douglas Cullen

        Ingredients

        • 6 large poblano chiles about 6″ long
        • FILLING
        • 10 ozs. beef
        • 10 ozs. pork
        • 1 medium carrot
        • 1 medium white onion
        • 1 medium waxy potato
        • 1 medium zucchini squash
        • 3 plum tomatoes Roma tomatoes
        • ½ cup peas
        • 8 ozs. biznaga or candied fruit or dried fruit
        • ½ cup raisins
        • ½ cup almonds
        • ½ tsp. cinnamon
        • 1 tbsp  brown sugar
        • 1 tsp  salt + salt to taste
        • NOGADA
        • 1 ¼ cup Mexican cream do not use sour cream
        • ½ cup shelled walnuts
        • ½ teaspoon cinnamon
        • 1 tbsp  brown sugar
        • GARNISH
        • 2 small pomegranates or 1 large
        • 1 small bunch of parsley

        Instructions

        • PRECOOK THE MEAT
        • Place the meat in a pan and just cover with water. Bring to a simmer and cook the meat until just cooked through (about 20 minutes) turning once. When the meat is cooked remove it from the pan and allow it to cool to the touch. Reserve the cooking liquid.
        • CHOP THE INGREDIENTS
        • Chop the meat into cubes first then chop finely.
        • Chop the onion, carrot, zucchini, potato and candied fruit into ¼" cubes.
        • Chop the almond very fine.
        • PREPARE THE TOMATO BASE
        • Slice the tomatoes in half and add them to your blender with ½ cup of the cooking liquid from the meat.
        • Blend until smooth but not liquefied.
        • COOK THE FILLING
        • Fry the onions in 3 tablespoons of oil for 2 minutes.
        • Add the potatoes, stir and cook for 5 minutes.
        • Add the chopped meat and stir.
        • Add the pureed tomato.
        • Add the carrots, zucchini, and raisins and cook for 5 minutes until the tomato puree is starting to reduce.
        • Add the peas, biznaga or candied fruit and almonds. stir well.
        • Cook for 15 minutes until all of the vegetables are fully cooked and tender and the liquid is reduced.
        • Note: If the filling starts to get too dry before all of the ingredients are fully cooked add the cooking liquid from the meat a few tablespoons at a time as needed.
        • ROAST AND CLEAN THE POBLANO CHILES
        • Place the chiles over the open flame on the burner on your stove. Note: Do not leave chiles unattended.
        • Blacken and blister the skin on all sides.
        • When you have roasted all of the chiles place them in a plastic bag to sweat them.
        • Scrape the skin the chiles with the blade of a knife.
        • Using a small knife, gently split the chile down the side without cutting all the way through the tip of the chile.
        • Remove the seeds inside the chile with your fingers without tearing the chile.
        • PREPARE THE NOGADA
        • Place the cream, walnuts, and cinnamon in your blender.
        • Blend until the walnuts are completely incorporated into the sauce and the sauce is smooth.
        • PREPARE THE GARNISHES
        • Slice the pomegranates in half.
        • Remove the seeds from your pomegranates.
        • Chop the parsley very finely reserving a few leaves to use as decoration.
        • SERVE THE CHILES EN NOGADA
        • Fill each poblano chile with enough filling so that it will just close. Use toothpicks to keep each chile closed if needed.
        • Place 1 stuffed chile on each plate.
        • Spoon nogada over the stuffed chile until the chile is completely covered.
        • Sprinkle pomegranate seeds and chopped parsley over the chile covered in nogada.
        • Decorate with a 1 or 2 parsley leaves.

        Notes

        If you have time, allow the filling to rest for 2 hours so that the flavors can meld.

        Nutrition

        Serving: 1chile | Calories: 654kcal | Carbohydrates: 67g | Protein: 27g | Fat: 34g | Sodium: 606mg | Sugar: 47g

        More Stuffed Pepper Recipes

        • Authentic Chiles Rellenos

        More Mexican Holiday Recipes

        • Beef Tenderloin with a 3 Chile Sauce
        • Grilled Sirloin Cap – Picaña
        • Vegan Strawberry Tamales
        • Hot Chocolate
        • Kahlua Hot Chocolate
        • Strawberry Chipotle Cream Cheese Dip
        • Homemade Tortilla Chips

        Talking Mexican Food with Susan Ripley

        People and Businesses

        Walking around the grounds at Monte Alban Oaxaca

        Owner of Brooklyn Tropicali, Latin American Adventures

        This is the fourth in a series of posts based on interviews with people and companies which are passionate about Mexican food.

        Eating Tacos Carnitas at El Destilado OaxacaSusan Ripley is the owner of Brooklyn Tropicali, a travel company that designs inspirational and rejuvenating adventures in Latin America for burned out creative professionals.

        I had the chance to speak with her about travelling Mexico and her experiences with Mexican food. She is a fan.

        Adventures in Food

        Her travels have taken her to Oaxaca, the Yucatán, Mexico City, Jalisco and Nayarit. She has found that each region has it’s own character and incredible cuisine. The proof is in the pictures below. Even more proof on her Instagram.

        See Susan’s restaurant and market recommendations at the end of the post!

        Walking around the grounds at Monte Alban Oaxaca

        What does she say about travelling Mexico?

        Her Favorite Thing

        Visiting local markets is one of my favorite things to do while traveling. I think it’s the quickest way to understand the local culture – how they eat, how they shop, how they interact with each other. It’s fascinating to experience. I also love to eat in markets. Along with street food, it’s one of my favorite and most trusted places to experience local food. We visited the Tlacolula market just outside of Oaxaca on a Sunday. It’s one of the best markets in the area and it didn’t disappoint. The food section was a maze of crowded vendors, each with wood burning stoves, steaming vats of sopas, tacos, grilled meats, and more.

        Market in Guadalajara
        Mercado Libertad in Guadalajara

        Mercado Libertad in Guadalajara

        We visited the biggest market in all of Latin America – Mercado Libertad in Guadalajara. It was amazing and overwhelming – 2980 stalls over 3 levels. The middle area is open so you can peek down from the top floor to the vendors below. We were able to watch the comedor kitchens cooking up the daily specials. It was a really interesting sight.

        Be Adventurous

        Susan recommends being adventurous while travelling Mexico. Food is biggest part of the culture. Don’t be intimidated. Don’t worry about being embarrassed because you have no idea what is being served. Learn some simple words so that you can ask about what is good. And most importantly be flexible. After you seeing all of her amazing pictures how could you not want to try it all?

        Tlayuda in Puerto Escondido Oaxaca
        Tlayuda in Puerto Escondido Oaxaca.

        Eat Street Food

        Typically, travellers are warned not eat street food when they visit Mexico because all sorts of gastrointestinal calamities will befall them. Susan recommends the opposite. She says to eat the street food. Invariably, it’s the tastiest food and most representative of the region.

        Blue Corn tortilla Tacos and Tascalate at Itanoni Oaxaca
        Blue Corn tortilla tacos and Tascalate at Itanoni Oaxaca.

        How to Choose Street Food

        Susan says to look for places that are crowded with locals. They don’t eat in places that will make them sick. When you eat at a street stall you are able to see how the food is prepared and their food handling practices. In a restaurant you have no idea how the kitchen is run.

        Tacos in a comedor in Oaxaca
        Tacos in a comedor in Oaxaca.

        Chilaquiles in Las Flores Market Oaxaca
        Chilaquiles in Las Flores Market Oaxaca

        Check out our recipe for chicken chilaquiles in salsa verde.

        Every Region of Mexico has Different Food

        Enjoy the regional differences in food. Some of Susan’s favorite foods are mole negro from Oaxaca, pozole and esquites as they serve them Mexico city and carne en su jugo in Guadalajara.

        Mole Negro con Pollo
        Chicken in mole negro in Oaxaca.

        Pozole with Fixings in Mexico City
        Pozole with all the fixings in Mexico City.

        Torta ahogada in Mexico City at a market
        Torta ahogada in Mexico City at a market.

        Chile en Nogada in Oaxaca
        Chile en Nogada in Oaxaca.

        We have a great recipe for chiles en nogada.

        Beverages Vary Regionally Too

        Tejuino, a fermented corn corn drink is popular in Jalisco. Tejate, prepared with roasted maíz, chocolate, cinnamon nuts white foam on top. Tascalate which is popular in Chiapas is prepared with achiote and maíz.

        Tejuino cart in Nayarit - local fermented corn drink
        Tejuino cart in Nayarit – Tejuino is local fermented corn drink.

        Local woman serving Tejate - the most popular local drink in Oaxaca
        Local woman serving tejate – the most popular local drink in Oaxaca.

        Alcoholic Beverages

        In Jalisco, the alcoholic beverage of choice is tequila and in Oaxaca it’s mezcal but don’t think that the mezcal is like the cheap stuff that comes with a worm in it. A well made mezcal is closer to a fine Scotch, smoky and complex. Pulque, a beverage made from the fermented sap of the maguey is popular in Mexico City and Oaxaca.

        Specialty tequila shop in Tequila Jalisco
        Specialty tequila shop in Tequila Jalisco.

        Mezcal seller off the beaten path.
        Mezcal seller off the beaten path in Oaxaca.

        A pulque shop in Santiago Matitlan Oaxaca
        A pulque shop in Santiago Matitlan Oaxaca

        Susan’s Restaurant Recommendations

        Take advantage of some of Susan’s no miss recommendations when you want to experience authentic Mexican food.

        Oaxaca

        • Itanoni -all dishes and all drinks are corn based.
        • Biche Pobre – a casual family restaurant with incredible mole.
        • Doña Flavia – outside of the Centro, but the best Tlayudas in the city.
        • Azucena Zapoteca – delicious Chiles en Nogada, great atmosphere.
        • El Destilado – a little more upscale and trendy, great small plates, traditional food with a twist.

        Mexico City

        • Cochinita Power – great slightly trendy restaurant serving spicy, flavorful cochinita (spicy stewed slow roasted pork,
          traditional dish from the Yucatan) on everything – tacos, tortas, chilaquiles, etc
        • Alpozole – no frills lunch spot for pozole – but super delicious! My favorite pozole so far…
        • Casa de Toño – another pozole restaurant – been around for many years.
        • El Vilsito – a casual taqueria in Narvarte with the best tacos al pastor I have ever had!
        • La Costilla – another casual taqueria in Narvarte – great tacos
        • Tacos Hola – a simple and busy taco stand in Condesa.
        • Taco Stands almost anywhere! There are usually a concentration of them near metro stops. Have definitely had some of my favorite tacos, tortas, and esquites at these street stands.

        Nayarit 

        • If you find Pollo al Carbon – stop and get some! It’s the tastiest chicken I’ve ever had. Typically served whole, chopped up roughly with a stack of tortillas, rice, and fresh salsa

        Guanajuato

        • Esquites woman outside of the Scotia Bank Atm at 5 de Mayo/Benito Juarez – the best esquites I have ever had. So amazing I tried to go back every day!

        Playa del Carmen

        • La Floresta – Incredible fish and shrimp tacos. A little outside the tourist area, but well worth the walk.
        • La Cueva del Chango – delicious brunch – very fresh and flavorful

        Susan’s Favorite Markets

        A market highlights the personality of a city. These are great markets to visit.

        • Mercado Libertad – in Guadalajara, it’s the biggest market in Latin America! Fun to wander and get lost.
        • Lagunilla – a fun weekend market in Mexico City. You can find antiques, vintage clothing, get a haircut, and drink micheladas.
        • Mercado de Sonora – traditional market in Mexico City, you can also find ingredients for witchcraft and spiritual cleansing. Very interesting!
        • Tlacolula market – one of my favorite markets in Oaxaca. It’s about 45 minutes from the centro and open on Sundays. It’s huge with a great mix of food and beautiful artisan crafts like clothing, bags, blankets, etc.
        • Central de Abastos – this is the biggest an craziest market in Oaxaca. It’s just south of the centro and has everything you could ever want to find. It’s giant and you will most likely get lost, but that’s some of the fun!
        • Lucas de Galvez – central market in Merida. Great for a stroll to see some local culture and women dressed in traditional Mayan clothing.

        When You Need a Mexican Food and Travel Adventure

        When you are in need of a Mexican food adventure and travel adventure let Susan set up a unique experience for you. She has a love for the food and culture and she will guide you to the best Mexican experiences that most travellers will never get to enjoy.

        Enjoying the view on top of the tallest pyramid at Coba in the Yucatan
        Enjoying the view on top of the tallest pyramid at Coba in the Yucatan.

        A Final Recommendation – House Sit for the Best Food Experiences

        For the very best for food experiences when you travel Susan recommends that you house sit. You will have a kitchen so you can go to the markets and buy local produce and products and learn to create the local dishes.

        More People Passionate About Mexican Food
        • Enrique Chavelas – Cookin Vallarta
        • Lorena Jakubczak – Azteca Gourmet

        Chicken Fajitas in Adobo

        Chicken

        Authentic Chicken Fajitas

        Fajitas de Pollo en Adobo

        A little sweet, a little smoky and with just a hint of spice. Our flavor-packed authentic chicken fajitas prepared with a guajillo chile adobo rub is the perfect dish for a weekend crowd. Three colors of bell peppers give it some visual pop.

        Authentic Chicken Fajitas
        Authentic Chicken Fajitas

        Stuff some flour tortillas for the best chicken fajitas tacos ever!

        Chicken Fajitas Tacos Flour Tortillas
        Chicken Fajitas Tacos Flour Tortillas

        The dish requires some work, but it’s worth it

        This isn’t a dish that you can whip up in 30 minutes for an easy weeknight dinner. It’s not a difficult dish but you need some time to prep all of the different parts plus you need to allow time for the chicken to marinate. The effort you put into it is well worth it. Don’t be put off by the work required. Trust us!


        How to Make Chicken Fajitas in Adobo

        Preparation is divided into 4 main steps:

        Step 1 – Prepare the Adobo Paste

        Step 2 – Prepare the Chicken

        Step 3 – Prepare the Vegetables

        Step 4 – Serve the Fajitas and Enjoy!

        Chicken Fajitas Ingredients
        Chicken Fajitas Ingredients

        1. Prepare the Guajillo Adobo Paste

        This adobo is a wet rub prepared mild fruity tasting guajillo chile, tomato, onion, garlic, brown sugar, salt and, vinegar. The rub is what gives the chicken it’s rich taste.

        Adobo Paste
        Homemade adobo paste.


        Guajillo Adobo Ingredients
        Guajillo adobo ingredients.
        Toast and Soak the Chiles

        Toast the chiles for about 30 seconds per side. Just until they become fragrant and pliable.

        Toasting Guajillo Chiles
        Toast the chiles.

        After you have toasted the chiles and they have cooled to the touch use your fingers break them apart and remove the seeds and stems.

        Remove Seeds and Stems from Guajillo Chiles
        Remove seeds and stems from the guajillo chiles. Discard stems and seeds.
        Soak the Chiles

        Place the chiles in a pan and then add just enough water to cover. Bring the water to a boil and then turn off the heat. Allow the chiles to soak for 15 minutes until they have reconstituted and become soft and pliable.

        Soaking Guajillo Chiles
        Soak the chiles for 15 minutes.

        Cut the onion and tomato into large pieces. Add them to a pan with 4 tablespoons of preheated oil. Cook the vegetables until they begin to char.

        Charred Tomatoes and Onions
        Char the tomato, onion, and, garlic.
        Blend the Chiles and Vegetables

        Add the charred tomato, onion, garlic and soaked chiles to your blender with ¼ cup of the soaking liquid.

        Adobo Ingredients in Blender
        Add chiles, tomato, onion, garlic and soaking liquid to blender.

        Blend for 1 minute until the mixture is smooth but not liquified.

        Blended Adobo
        Blend until smooth.

        Cook the Adobo

        After you have blended the adobo you must fry it. Preheat 4 tablespoons of cooking oil medium hot. Pour the adobo into the hot oil. Add the vinegar, sugar and, salt and stir.

        Frying the Adobo
        Fry the adobo in 4 tbsp. of oil.

        Cook the adobo until most of the liquid has evaporated and peaks form when you pass a spoon through it and it has the consistency of a paste. Rest the paste for 2 hours while the chicken is marinating in the refrigerator.

        Guajillo Adobo Paste
        Cook until the adobo forms a paste. You know this is going to be good!

        2. Prepare the Chicken

        Slice Chicken for Uniform Thickness

        Slice the Chicken so that it is a uniform ½″ thick. This ensures that the chicken will cook evenly and some parts won’t be overcooked while other parts are undercooked. The presentation of the dish is also better because each slice of meat will be the same thickness.

        Slicing Chicken Breasts
        Slice the chicken breasts lengthwise.


        Sliced Chicken Breast
        Aim for a uniform thickness.
        Rub the Chicken with Adobo

        Salt the chicken breasts on both sides then rub both sides of the chicken breasts with the adobo paste.

        Rubbing Chicken Breasts with Adobo
        Rub the chicken breasts with adobo.

        Be sure each chicken breast is covered with a good amount of paste. It’s what gives the dish its flavor.

        Chicken Breasts Rubbed with Adobo
        Cover well on both sides.
        Marinate the Chicken

        In the refrigerator, allow the chicken breasts that have been covered in adobo rest for 2 hours to allow the chicken to absorb the adobo flavor.

        Pan Cook the Chicken

        Bring the chicken breast to room temperature before cooking. Preheat 4 tablespoons of olive oil. Place the chicken breasts into the hot oil. Don’t crowd the chicken breasts. Cook the chicken breasts in 2 batches.

        Cooking Chicken Breast in Adobo
        Cook the chicken in 4 tbsp. of oil.

        Cook the chicken breasts on each side until a nice adobo crust has formed. Hungry yet?

        Cooking Chicken Breasts in Guajillo Adobo
        Cook until a crust forms on both sides.
        Slice the Chicken

        Allow the chicken to rest for 5 minutes after cooking then slice the chicken into uniform ¼″ slices.

         
        Sliced Chicken Breast on Cutting Board
        Allow to rest then slice into ¼″ strip. Looking good!
        Variation – Grill the Chicken

        Follow the same steps to prep the chicken then cook it on the grill over medium heat. Grilled it will be incredible. Allow it to rest 5 minutes before slicing.


        3. Prepare the Vegetables

        Slice the Vegetables

        Cut the bell peppers and onions into ¼″ strips. The more evenly you slice the vegetables the better your dish will be. All of the vegetables will be cooked evenly and will look great.

        Sliced Bell Peppers and Onions
        Slice the bell peppers and onion into ¼″ strips.

        Stir fry the vegetables in 3 tablespoons of oil in a medium hot pan.

        Stir Frying Bell Peppers and Onions
        Stir Frying Bell Peppers and Onions

        Cook the vegetables until they are just cooked through and are starting to blacken. Don’t cook them so long that they become mushy.

        Stir Frying Bell Peppers and Onions 2
        Cook until the vegetables start to brown and are just cooked.

        4. Serve and Enjoy!

        Warm the fajitas just before serving. To serve, pile the chicken fajitas and vegetables on a platter. Serve with a stack of hot flour tortillas and your favorite salsas on the side.

        Chicken Fajitas en Adobo
        Ready to serve. Chicken fajitas in adobo with green, yellow and red bell peppers.

        We’re not fussy about plating them perfectly. This is a homestyle dish.

        Chicken Fajitas Tacos
        Some good looking chicken fajitas tacos just waiting to be eaten.
        Guajillo Adobo Paste
        Print Recipe
        4.41 from 5 votes

        Guajillo Chile Adobo

        Guajillo chile adobo (wet rub) used to season chicken fajitas.
        Prep Time20 minutes mins
        Cook Time30 minutes mins
        Total Time50 minutes mins
        Course: Marinade
        Cuisine: Mexican
        Keyword: adobo, marinade, Sauce
        Servings: 6
        Calories: 119kcal
        Author: Douglas Cullen

        Ingredients

        • 4 roma tomatoes
        • 4 guajillo chiles also known as chile cascabel ancho
        • ½ medium white onion
        • 2 cloves of garlic
        • 1 tbsp. brown sugar
        • ¼ cup white vinegar
        • 4. tbsp. cooking oil
        • 1 tsp. salt

        Instructions

        • Toast the chiles in a dry medium hot pan for about 30 seconds per side until they are fragrant and pliable.
        • When the chiles are cool to the touch, remove the seeds and stems and discard.
        • Place the toasted chiles in a pan and just barely cover with water.
        • Bring to a boil the turn off the heat. Allow the chiles to soak for 15 minutes.
        • Roughly chop the tomatoes and onion.
        • In a preheated skillet with 3 tbsp. of cooking oil blacken the tomato, onion and garlic.
        • To the blender add the reconstituted chiles, tomato, onion garlic and ¼ cup of the soaking liquid.
        • Blend until smooth, about 1 minute.
        • Preheat a skillet with 4 tbsp. cooking oil then pour the blended mixture into the skillet.
        • Add the vinegar and the sugar. Stir to incorporate.
        • Cook until most of the liquid has evaporated from the adobo and it forms peaks when you pass a spoon through it.
        • Allow it to rest for 2 hours while the chicken is marinating.

        Nutrition

        Calories: 119kcal | Carbohydrates: 7g | Protein: 1g | Fat: 10g | Saturated Fat: 1g | Sodium: 324mg | Potassium: 155mg | Fiber: 1g | Sugar: 5g | Vitamin A: 960IU | Vitamin C: 7.4mg | Calcium: 10mg | Iron: 0.3mg
        Authentic Chicken Fajitas
        Print Recipe
        5 from 2 votes

        Chicken Fajitas in Adobo

        Flavor packed authentic chicken fajitas prepared with a guajillo chile adobo rub, a little sweet, a little smoky and with just a hint of spice. Great on the weekend for a crowd.
        Prep Time20 minutes mins
        Cook Time20 minutes mins
        Total Time40 minutes mins
        Course: Chicken, Dinner
        Cuisine: Mexican
        Keyword: adobo, chicken fajitas, fajitas
        Servings: 4 to 6
        Calories: 457kcal
        Author: Douglas Cullen

        Ingredients

        • 1 ½ lbs. of chicken boneless chicken breast
        • 1 Large white onion
        • 1 large green bell pepper
        • 1 large yellow bell pepper
        • 1 large red bell pepper
        • 7 tbsp. cooking oil
        • Adobo paste see recipe above

        Instructions

        • PREPARING THE CHICKEN
        • Slice the Chicken so that it it a uniform ½″ thick.
        • Season both sides of the chicken breasts with salt.
        • Rub both side of the chicken breasts generously with the adobo.
        • Refrigerate the marinated chicken breast for 2 hours to allow the flavor to penetrate.
        • Remove the chicken from the refrigerator and allow to come to room temperature before cooking.
        • Preheat 4 tbsp. of cooking oil to medium hot in a wide skillet.
        • Cook the chicken until a nice crust has formed on both sides. Don’t crowd the chicken in the skillet. It’s best to cook it in 2 batches.
        • Once the chicken is cooked, remove it from the skillet and allow it to rest for 5 minutes.
        • Slice into even ¼″ strips.
        • PREPARING THE VEGETABLES
        • Slice the onion and bell peppers into even ¼″ strips.
        • Preheat a wide skillet to medium hot with 3 tbsp. of oil.
        • Add all of the sliced vegetable.
        • Cook until the vegetables are just starting to blacken and are just cooked through. Don’t cook them until they are mushy. Cook them to “al dente.”
        • Mix with a pinch of salt.
        • SERVING
        • Put the vegetables and chicken fajitas on a large serving platter. Serve with hot flour tortillas on the side.

        Nutrition

        Calories: 457kcal | Carbohydrates: 8g | Protein: 37g | Fat: 31g | Saturated Fat: 3g | Cholesterol: 109mg | Sodium: 201mg | Potassium: 847mg | Fiber: 2g | Sugar: 3g | Vitamin A: 1150IU | Vitamin C: 120.6mg | Calcium: 21mg | Iron: 1mg

        More Mexican Chicken Dishes

        • Chicken Tostadas
        • Chicken Taquitos
        • Chicken Tinga
        • Tomatillo Chicken

        Cookin Vallarta

        People and Businesses

        Cookin Vallarta Cooking Class Puerto Vallarta

        Mexican Cooking Classes in Puerto Vallarta with Enrique Chavelas

        Enrique Chavelas Cookin Vallarta

        This is the third in a series of posts based on interviews with people and companies which are passionate about Mexican food.

        Enrique is Your Guy

        If you are interested in learning to cook authentic Mexican dishes Enrique Chavelas owner of Cookin Vallarta in Puerto Vallarta is your guy.

        Cookin Vallarta is active on social media and I had been following them for a while. I reached out to Enrique after reading his Tripadvisor reviews.  I knew I had to interview him for the blog. The reviews for Cookin Vallarta on Tripadvsior are off the charts. Out of 341 reviews, 323 are 5 stars and 11 are four stars. It’s nearly impossible to get higher scores than that. Proof that Enrique has the passion.

        Combined Passions

        Cookin Vallarta combines two of Enrique’s passions, cooking and sharing his culture. Before starting his cooking school he owned a catering business and also worked in the tourism industry. His classes incorporate both the technical aspects of cooking Mexican dishes and also include cultural lessons. Mexico has a very strong food culture. Enrique shares the history of the dishes and their importance.

        A New Menu Every Day

        Cookin Vallarta Dishes

        Cookin Vallarta Cooking Class Puerto Vallarta

        Students cook a new menu every day and everything is prepared from scratch. Everyone participates in the preparation. Some of his favorite dishes to cook are different moles, green, poblano and amarillo. Moles are elaborate sauces prepared many different ingredients. Mole poblano is the best known. It is the one prepared with chocolate. There is a good chance that you will be learning one of his family’s special recipes.

        A Market Visit

        Enrique Chavelas at the Mercado Puerto Vallarta

        Each class includes a market tour so that participants can experience how locals shop and learn how to choose the best ingredients. A trip to a Mexican market is a far more personal experience than visiting a large modern grocery store. Invariably, you end up talking to the owner or one of the clerks about the day’s events and what is especially good.

        Adaptable Menus

        Menus can be adapted to specific for specific dietary restrictions, food allergies or preferences. If you are vegan or vegetarian there are an infinite number of Mexican dishes to cook. People have the misconception that all Mexican food is loaded with lard and smothered in cheese and cream. Enrique will show you how to cook Mexican food perfectly suited to your needs and tastes.

        Family Friendly Classes

        Enrique loves teaching young people and all of his classes are family friendly. He really gets a kick out of getting picky young eaters to try new foods they would have never tried at home. One of his young clients has returned 4 years in a row and insists that all of the family, including mom and dad, brothers and sisters, cousins and aunts and uncles participate. She is now planning to be a chef one day.

        A Food Family

        Acapulco is Enrique’s hometown and he grew up around food and restaurants. His parents owned a restaurant in Acapulco when he spent much time. Family meals were important. Food was to be respected and enjoyed and everyone sat down at the table together. His grandmother always told him that tamales have a personality. You have to be in a good mood for them to turn out well. They know your moods and respond accordingly. (Check out our recipe for Acapulco style shrimp ceviche.)

        What Makes Him Proud

        Enrique is most proud that his business now supports 7 families and has grown to include Juan More Taco Food Tours in Puerto Vallarta, Cabo San Lucas and Playa del Carmen. His business operates as a cooperative where he handles the marketing and other talented cooks and guides provide the classes and tours.

        Find Out More About Enrique and Cookin Vallarta

        Enrique and Cookin Vallarta have been featured on Super Chef’s of the Universe, Prudence Sloane’s Cooking School on Better Connecticut, and Travel Basecamp.

        If you are planning a trip to Puerto Vallarta be sure to book a class with Enrique.

        More Interview Posts You Might Enjoy

        • Chef Juan Antonio Hussong – Mastering Mexican Cooking
        • Azteca Gourmet Tamales
        • El Norteño Foods
        • Mexican Cooks and Chefs

        Mango Salsa

        Salsas & Sauces

        Easy Raw Mango Salsa

        Summer Salsa Simplicity

        Looking for a simple refreshing summer salsa? This is it! Take advantage of mango season and prepare this raw mango salsa. We like to serve it with a vegetable platter or cocktail shrimp.

        It’s really great with crunchy jicama. We recommend it for cold dishes that need some kick. Sharp serrano chile and the tangy lime provide a counterbalance for the sweet mango.

        An uncooked salsa that couldn’t be easier to prepare.

        Raw Mango Salsa
        Raw Mango Salsa

        Look for Ripe Mangos

        Choose just ripe mangos for this salsa. Give them a gentle squeeze and if they give a little they are ripe. If they are hard when you give them a squeeze they are not ripe and if they are mushy they are too ripe.

        Any variety of mango works well for this recipe. We used the Tommy Atkins variety which is common in Mexico.

        Raw Mango Salsa Ingredients
        Ingredients for your raw mango salsa.

        Adjust the Heat of the Salsa

        We prepare this salsa with 1 whole serrano chile, seeds, and all which gives it a nice kick. You can reduce the heat by removing the seeds. If you only want a hint of chile heat remove the seeds and use only ½ of the chile.

        Make it Kid Friendly

        You can easily turn this into a kid-friendly salsa by omitting the chile. The lime juice gives the mango just enough tang. Kids love dipping vegetables into the sweet salsa. It’s like you magically changed veggie sticks into candy, except this is guilt-free “candy.”

        Easy Raw Mango Salsa
        Print Recipe
        4.50 from 8 votes

        Mango Salsa Recipe

        Simple, refreshing raw mango salsa that is great as a vegetable dip or with cocktail shrimp. Sharp serrano chile and the tangy lime provide a counterbalance for the sweet mango.
        Prep Time10 minutes mins
        Total Time10 minutes mins
        Course: Salsa
        Cuisine: Mexican
        Keyword: dip, fruit salsa, mango
        Servings: 8 servings
        Calories: 54kcal
        Author: Douglas Cullen

        Ingredients

        • 2 mangos
        • 1 serrano chile remove the seeds if you want a milder salsa
        • 1 Mexican lime Key lime
        • ¼ cup water
        • 1 teaspoon salt

        Instructions

        • Wash the mangos well.
        • Remove the meat of the mango (see tutorial below). Discard the pit and skin.
        • Add the mango, serrano chile, salt, water, and the juice from the lime to your blender.
        • Blend until smooth. If the salsa is too thick add 1 tablespoon of water at a time until you reach the desired consistency.

        Notes

        How to Serve
        • This salsa is best served immediately. It will keep in the refrigerator for two days but the flavors and texture are best when it is served fresh.
        • Serve with a veggie platter or cocktail shrimp.
        • It is also great on spring rolls.
        • It’s great dip for serving at parties.
        • Kids love it too.
        Substitutions
        • You can substitute jalapeños for the serrano chile. Jalapeños are milder.
        Variation
        • Add a couple of strawberries when you blend to make strawberry mango salsa.

        Nutrition

        Calories: 54kcal | Carbohydrates: 14g | Protein: 1g | Sodium: 487mg | Sugar: 12g

        Let us know what you think of this recipe in the comments below. Provecho!

        How to Cut a Mango

        Mangos are not the easiest fruit to get the meat from. They have a large pit in the middle that’s difficult to cut around. This isn’t the prettiest way to cut up a mango but it is the way that allows you to get the most fruit. Since the mango will be blended we don’t need to worry about pretty.

        Lengthwise, cut off 1 side of the mango. Scoop the flesh out of the skin with a tablespoon. Do the same to the other side of the mango. Be careful when you cut. Mangos tend to be slippery.

        How to Cut a Mango

        After you have cut off both sides of the mango you are left with the pit that still has some meat on it. Use a paring knife the cut the remaining fruit off of the pit. Discard the skin and the pit.

        How to Cut a Mango 2

        Enjoy Your Salsa

        Raw Mango Salsa 2
        Looks good, doesn’t it?

        More Salsa Recipes

        • Tomatillo Salsa Verde
        • Mexican Restaurant Salsa
        • Cascabel Chile Salsa
        • Salsa Verde
        • Creamy Avocado Salsa


        How to Use a Tortilla Press

        Cooking Techniques, Tortillas

        How to Use a Tortilla Press

        Como Usar la Prensa Para Hacer Tortillas de Maíz

        Nothing beats a homemade corn tortilla. If you have never used a tortilla press (tortilla maker) before they’re simple to use and inexpensive. They are a great addition to your Mexican kitchen.

        How to Use a Tortilla Press

        Get a Tortilla Press

        Time to make some tortillas! Yeah…!

        First, You need some dough

        Obviously, you are going to need some tortilla dough called masa to make tortillas. The first option, make the dough. You can prepare it using corn flour for tortillas which you should be able to get at almost every supermarket. 

        Follow the directions on the package to prepare the dough. The second option, buy the dough. You can buy prepared dough at a local Mexican market. If you are really lucky, you might find masa prepared from ground corn, not corn flour.

        If you do have the opportunity to buy ground corn masa buy it. Your tortillas will have a hearty more traditional taste.

        Now you have some dough, Let’s get started

        Besides the dough and press, you will need 2 squares of waxed paper or plastic to keep your tortillas from sticking to the press.

        Most cooks in Mexico cut up plastic grocery bags for the plastic squares although I generally use waxed paper. 

        Cut 2 squares of waxed paper just large enough to cover the base plate of the press.

        Place 1 square of butcher paper on the base plate. On top of the butcher paper place one ball of dough the size of a golf ball.

        How to Use a Tortilla Press 1

        Place the other square of butcher paper over the dough.

        How to Use a Tortilla Press 2

        Lower the top plate onto the dough.

        How to Use a Tortilla Press 3

        Get a Tortilla Press

        Firmly press down on the handle.

        How to Use a Tortilla Press 4

        The tortilla after the first press.

        How to Use a Tortilla Press 5

        Grab both sheets of butcher paper with the tortilla in between and flip it over.

        How to Use a Tortilla Press 6

        Press the tortilla a second time. Notice how the tortilla has extended and is more evenly shaped.

        How to Use a Tortilla Press 8

        Gently peel the tortilla away from the waxed paper. Your tortilla is now ready to cook.

        How to Use a Tortilla Press 9

        Get a Tortilla Press

        Cooking the Tortillas

        heat a comal or griddle to medium-hot. Place a tortilla on it and cook until it starts to lift.

        Corn Tortilla on Comal 1

        Flip the tortilla until it starts to lightly puff which indicates that it is fully cooked.

        Corn Tortilla on Comal 2

        The finished product. Keep fresh tortillas warm by wrapping them in a cloth towel or tortilla warmer.

        Homemade Corn Tortillas

        Provecho!

        More Mexican Cooking Techniques

        • How to Use a Molcajete
        • How to Roast and Clean Poblano Chiles
        • How to Use Mole Paste
        • How to Peel Jicama
        • How to Clean Cactus Fruit

        El Norteño Meat Snacks

        People and Businesses

        El Norteño Meat Snacks

        People with a Passion for Sharing the Flavors of Mexico

        This is the second of a series of articles based on interviews with people and companies passionate about sharing the authentic flavors of Mexico. I had a long talk, nearly 2 hours with Justin Jahnke the head of marketing for El Norteño who explained how the company developed, where it is now and its plans for the future. His enthusiasm for the product and company was contagious.

        Como Hecho en Casa – El Norteño Meat Snacks

        El Norteño Meat Snacks

        The El Norteño Brand was born during a dinner Scott Hare, the owner of Monet Foods had with some Mexican friends in 2012 in which they were discussing the “taste of home” or “como hecho en casa” in Spanish. His friends recommended that he create a snack that captured the authentic flavor and texture of Jalisco style cecina, a type of dried beef. They promised him that there would be a market in the U.S. for it.

        18 Months to a Perfect Recipe

        El Norteno Cecina and Tira de Carne

        El Norteño meat snacks capture the authentic flavor of Jalisco. Over 18 months, Scott worked with a team from Guadalajara, Mexico and Los Angeles perfecting the recipe to make sure El Norteño cecina was in their words, “ the real deal – a True Mexican Meat Snack.” “This is cecina. This is Mexican.” – Alejandro Crespo, Crespo Sales, and Marketing, Guadalajara, Mexico.

        Quality Ingredients

        El Norteño’s meat snacks are made with quality ingredients: 100% American beef and pork, natural wood smoke with no fillers or msg added. Their snacks are USDA approved so they are able to sell nationally.

        El Norteño Tira de Carne Habanero

        800 Stores and Growing

        El Norteño Demo

        El Norteño’s snacks have proven to be very popular since their launch in early 2016. In less than a year, their snacks are sold in more than 800 stores in California, Colorado, Texas, Florida, Georgia Illinois, New Jersey, and Wisconsin. You may be able to find their snacks in your hometown.

        Meet Some of the First Vendors

        Berto at Don Betos El Norteno

        Berto was one of the first grocers who took El Norteño into his store back in January or February 2016. Justin says he’s a cool guy. He runs the Don Beto market in Madison, Wisconsin with his family. Monet Foods and El Norteño are family businesses and work a lot with family-owned and operated markets.

        Zeus at Madison Bazaar

        Zeus is from Guadalajara. He manages two bodegas in Madison, Wisconsin, the Madison Bazaar, and W. Badger Road Food and Liquor. He’s really into music, mostly heavy metal, and eats a ton of cecina himself. According to Justin, Zeus is the man.


        First Product Ambassador – Rodeo Champ Dimitri Alarcon

        Two-Time World Champion Rodeo rider, Dimitri Alarcon, out of Fort Lupton, Colorado is El Norteños first product ambassador. Dimitri is only 10 years old, a great kid, very humble, very talented, and very generous with his spirit. Watch Dimitri in action, here and here.

        Dimitri Alarcon and Scott Hare

        Dimitri, who is diabetic, uses El Norteño products to train. He is also a National Champion wrestler. El Norteño provides him with product and would like at some point to set-up a scholarship for his future.

        Dimitri Alarcon and El Norteno Tira de Carne

        Give Them a Try

        If you see El Norteño products in your local market be sure to give them a try. Contact them through their website and they may be able to ship their products to you.

        More People with a Passion for Sharing the Flavors of Mexico

        • Azteca Gourmet Tamales
        • Molé Mama
        • Pass the Chipotle Podcast
        • SABOR! Mexican Food Magazine

        Azteca Gourmet Tamales

        People and Businesses

        Azteca Gourmet - Oaxacan Tamales

        People With a Passion for Sharing the Flavors of Mexico

        This is the first of a series of articles based on interviews with people who are passionate about sharing the authentic flavors of Mexico.

        Lorena Jakubczak Azteca Gourmet

        Lorena Jakubczak, owner and chef of Azteca Gourmet based in Colorado Springs, Colorado specializes in vegan Oaxacan style tamales. Her business grew out of her desire to recreate the flavors of home. She is from the state of Oaxaca in Southern Mexico. Oaxaca has deep traditions and a unique cuisine.

        The Flavors of Oaxaca

        Flavors for Azteca Gourmet’s tamales are inspired by the traditional flavors from her mother’s hometown Juchitán (Spanish) and Lorena’s hometown of Oaxaca City. For many of her products, she uses chiles and seasonings only available in Oaxaca that she personally brings back.

        Beginnings and Growth of a Business

        In 2011, she started making Oaxacan style tamales because she missed the flavors of home and the special flavor of the tamales that her mother made. The tamales she shared were so popular with friends and family that she decided to try selling them at the local farmer’s markets. Her tamales received the same great response at the farmer’s markets. What started as a home-based business has expanded into her own commercial kitchen in order to keep up with demand. She sells at regional farmers’ markets and caters events. Her business continues to grow as the word spreads.

        Oaxacan Style Tamales

        Typical tamales that most people know are small and wrapped in corn husks. Traditional Oaxacan tamales are square in shape, wrapped in banana leaves, and much larger. Each Oaxacan tamale that Lorena makes weighs 8 to 10 ozs. which means each tamale is a meal.

        Azteca Gourmet - Oaxacan Tamales

        Traditional and Modern Tamales

        Lorena produces traditional tamales and modern variations. Both types are prepared with top quality ingredients and traditional techniques.

        Handmade and of the Highest Quality

        Lorena’s tamales are made the traditional way, by hand. They are not machine produced.

        Many people worry about eating tamales because they know that traditionally tamales are made with lard. Instead of lard, all of Lorena’s tamales are prepared with olive oil, avocado oil, and rice bran oil.

        Her vegan tamales are gluten, GMO, lard, and preservative-free. Her meat tamales are made with meat provided exclusively by Ranch Food’s Direct which only sells meat from sustainable, humanely raised animals that are free of chemicals and artificial preservatives.

        Savory Tamales

        To give the savory tamales a boost in flavor the masa, the dough used to make the tamales is prepared with a purée of up to five different vegetables which may include: celery, leeks, jalapeño, Thai basil, kale, and broccoli.

        Some of the savory flavors are: red roasted mix, butternut squash mix, apple kale mix, red beef cheguiña, and pork pipian mixed with roasted tomatillo. Coloradito mole is the most popular and is made with the distinct Oaxacan chiles she brings back.

        Dessert Tamales

        She produces an extensive line of dessert tamales too:  blueberry basil, chipotle strawberry and chocolate, apple pie and pecans, and pumpkin pie.

        Azteca Gourmet - Piña Colada Tamales

        Where to Buy

        If you are are in Colorado Springs and the surrounding area you kind find her selling her tamales at the following locations:

        • Highlands Ranch, CO Farmers Market every Sunday starting May 8-Oct 30, 10am-2pm
        • Colorado Art and Farm Market, every Saturday, Margarita at Pine Creek, June 11-Oct 8, 9 am-1pm
        • Colorado Springs Pioneers Museum, Wednesdays, 215 S. Tejon, June 15- Oct 12, 3-7pm
        • Manitou Springs, soon to be announced time and location, starts in July.

        Not in Colorado Springs? Have Your tamales Shipped.

        Azteca Gourmet ships. They pack them on dry ice so that they arrive in perfect condition. Just get in touch.

        We Want to Support Quality Mexican Food Businesses

        Lorena loves sharing the authentic Mexican food that she prepares and we want to help her expand her reach so that more people have the opportunity to enjoy the true flavors of Mexico. Please consider ordering some tamales or salsa if you enjoy great Mexican food.

        Azteca Gourmet - Dessert Tamales

        More Tamale Recipes

        • Chicken Tamales with Salsa Verde (Tamales Verdes)
        • Vegan Strawberry Tamales

        More People with a Passion for Sharing the Flavors of Mexico

        • El Norteño
        • Diana Silva – Mole Mama
        • Enrique Chavelas – Cookin Vallarta
        • Rocio Carvajal – Pass the Chipotle

        Whole Wheat Tortillas

        Tortillas

        whole-wheat-tortillas-12

        Grandma Lolita’s Recipe

        Dora Stone, from Dora’s Table and Mi Mero Mole shares her grandmother Lolita’s recipe for Coahuila style handmade whole wheat flour tortillas.

        Dora is a graduate of the Culinary Institute of America and she creates vegan recipes with a Mexican touch which appeal to the heart and stomach.

        whole-wheat-tortillas-12

        You can also find Dora on her Instagram and Twitter. Enjoy her recipe and be sure to visit her blog!

        The Real Tortilla Deal

        These are not your flimsy, tasteless, gummy grocery store whole wheat flour tortillas. They are a completely different animal altogether. They are hearty, hand-rolled, tender pockets of wheat, perfect for sopping up stews and lots of salsa.

        I don’t want to be cliché, and name my grandmother to evoke all sorts of feelings, but I have no other choice. This is my abuelita Lolita’s recipe.

        She would make them for us every time we would visit. Skillfully rolling out each tortilla and placing them on the comal one after the other. Then she would take a warm tortilla, slather it with the “good” butter and sprinkle some salt on them, and give it to us with a nice bottle of Coca-Cola to wash it down.

        I can’t even describe how much of a special treat this was for us!

        Coahuila Style Flour Tortillas

        These tortillas are typical of the states of Coahuila and Nuevo Leon. They are not really meant for burritos, but you can use them to make all sorts of delicious tacos. You might be under the impression that flour tortillas are not authentic Mexican food, but this is so not true.

        Northern Mexico, especially the border states use flour tortillas for everyday meals, almost as much or maybe more than corn. It is thought that corn was harder to cultivate in the northern states, but wheat grew abundantly. Thus, flour tortillas were born.

        I am from one of those border states, Coahuila, from a small city called Acuña, which borders the Rio Grande and the city of Del Rio, TX. I grew up eating flour tortillas, and my grandma’s are definitely the best.

        whole-wheat-tortillas-10

        How to Make Whole Wheat Tortillas: Step-By-Step Guide

        The secret to really tender flour tortillas is how long you let the dough rest. Let it rest for at least an hour and up to 24. Try to roll them out as thin as possible, and be careful not to overcook them or they will become dry and hard. Enjoy!

        whole-wheat-tortillas-dry-ingredients
        Start with the dry ingredients.
        whole-wheat-tortillas-Ingredients
        Mix the dry ingredients, then add the shortening.
        whole-wheat-tortilla-dough
        Work the shortening in with your hands.
        whole-wheat-tortilla-mixture
        This is how the mixture should look after incorporating the shortening.
        whole-wheat-tortilla-mixture-wet
        Add the water and incorporate with a fork.
        whole-wheat-tortilla-dough-ball
        Form the dough into a ball.
        check-consistency-of-tortilla-dough
        Check the consistency of dough. It should be soft and stretchy.
        whole-wheat-tortilla-dough-balls
        Divide the dough into 12 pieces and form each piece into a ball.
        rolling-whole-wheat-tortillas
        Roll each dough ball thinly.
        whole-wheat-tortillas-12
        Print Recipe
        3.50 from 18 votes

        Whole Wheat Tortillas

        Grandma Lolita's recipe for Coahuila style whole wheat tortillas provided by Dora Stone of Dora's Table and Mi Mero Mole. A true homestyle recipe.
        Prep Time10 minutes mins
        Cook Time10 minutes mins
        Total Time20 minutes mins
        Course: Tortilla
        Cuisine: Mexican
        Keyword: Coahuila, flour tortillas, Tortillas, whole wheat
        Servings: 12 tortillas
        Calories: 124kcal
        Author: Dora Stone

        Ingredients

        • 1 ½ cups flour all-purpose
        • ¼ cup wheat germ
        • ¾ cup wheat bran
        • 1 ½ tsp. baking powder
        • 1 tsp. salt
        • ⅓ cup vegetable shortening
        • ¾ cup water warm

        Instructions

        • In a large bowl combine the flour, wheat bran, wheat germ, baking powder, salt, and mix well. Add vegetable shortening and use your fingers to rub the shortening into the flour mixture until completely incorporated.
        • Pour water in and mix with a fork until. If the dough is too dry, add a bit more water.
        • Scoop mixture out into a cutting board and knead until smooth (about 3-4 minutes). The dough should be soft and stretchy, but not as soft as bread dough.
        • Cover the dough with plastic wrap and let rest for at least 1 hour. (The longer the dough rests the softer your tortillas will be.)
        • Divide the dough into 12 equal pieces and roll into balls. Heat a cast-iron skillet or comal to medium-high heat.
        • Sprinkle flour on your work surface, flatten the ball of dough with your hand. Using a rolling pin, begin to roll back and forth across the ball, rotating it slightly each time, and sprinkling more flour as necessary, until the dough has stretched out to make a large thin circle. Try to roll it as thin as you possibly can.
        • Lay the tortilla on the comal and flip after 30 to 40 seconds The tortilla should bubble up almost immediately. Cook 30 more seconds on the other side and remove from pan. Be careful not to overcook the tortillas or they will become crisp. Remove tortillas from pan and place in a tortilla warmer or kitchen towel.
        • Repeat this process with the rest of the dough.

        Notes

        • For really tender tortillas let the dough rest overnight in the refrigerator.

        Nutrition

        Calories: 124kcal | Carbohydrates: 16g | Protein: 3g | Fat: 6g | Saturated Fat: 2g | Sodium: 161mg | Potassium: 143mg | Fiber: 2g | Sugar: 1g | Calcium: 33mg | Iron: 1.3mg

        More Recipes From Dora Stone

        • Vegan Strawberry Tamales

        More Tortilla Recipes

        • Homemade Tortilla Chips
        • Chicken Tortilla Soup
        • How to Use a Tortilla Press
        • How to Roll a Tortilla

        Chicken Tostadas

        Chicken

        Chicken Tostada Salsa Roja and Queso Ranchero

        Tostadas de Pollo

        Tostadas are crunchy tortillas like hard taco shells but flat. Tostadas also refer to a prepared dish in which the crunchy tostadas are topped with refried beans, shredded chicken, shredded iceberg lettuce, thinly sliced white onion, Mexican cream, crumbly cheese, and your favorite salsa.

        We prepared these with our homemade salsa roja. Tostadas are so good and so easy to prepare!

        Chicken Tostada Salsa Roja and Queso Ranchero
        A chicken tostada, yum, yum, yum…

        A Party Favorite

        Tostadas are great for parties and get-togethers. Everything is prepped in advance so that everyone can prepare their tostadas to their liking. Don’t like cream? Want extra chicken? Extra salsa? Make em however you want.

        Tostada Making Station

        Set up your tostada making station for quick and easy preparation. Tostadas are great with any type of salsa. If you are serving them for a party put out a variety of salsas.

        Consider any of these: salsa verde, cascabel salsa, or restaurant salsa. The beans are served warm and the rest of the ingredients at room temperature.

        Chicken Tostada Ingredients
        Ready to prepare some tostadas.

        How to Make Tostadas Step-by-Step

        I guess you don’t really make chicken tostadas you build them. Stack the ingredients and build flavor. Just follow the steps and then enjoy. Kids love making their own tostadas.

        Making Chicken Tostadas 1
        Start by spreading refried beans on a tostada.
        Making Chicken Tostadas 2
        Then add shredded chicken.
        Making Chicken Tostadas 5
        Add shredded iceberg lettuce.
        Making Chicken Tostadas 6
        Add thinly sliced white onion.
        Making Chicken Tostadas 3
        Add a few dollops of Mexican cream.
        Making Chicken Tostadas 4
        Sprinkle with some crumbly cheese, queso ranchero, or queso fresco.
        Chicken Tostada Topped With Salsa Roja
        Finally, top with your favorite salsa.
        Chicken Tostada Topped With Salsa Roja
        Looks tasty! Provecho!

        Preparing the Chicken

        You want the chicken to be really tender. To cook the chicken perfectly, start by adding the chicken breasts to cold water and then bring the water to a gentle boil.

        Cooking Chicken Breasts 1
        Add chicken breasts to cold water.

        Cook for about 20 minutes until fully cooked. Remove them from the water and allow them to cool.

        Cooking Chicken Breasts 2
        Bring to a gentle simmer and cook for 20 minutes.

        Shred by hand. Cut each chicken breast into thirds and then tear off thin strips of chicken with your fingers.

        If you have never shredded chicken before at first it is really slow and tedious. After a few minutes, you will get the hang of it and be able to work must faster.

        TIP: Make a double batch of shredded chicken and freeze half to use later.

        Chicken Tostada Salsa Roja and Queso Ranchero
        Print Recipe
        3.34 from 3 votes

        Chicken Tostadas

        Mexican chicken tostadas, crunchy corn tortillas topped with refried beans, shredded chicken, shredded iceberg lettuce, thinly sliced white onion, Mexican cream, crumbly cheese, and your favorite salsa.
        Prep Time30 minutes mins
        Cook Time30 minutes mins
        Total Time1 hour hr
        Course: Chicken Tostadas
        Cuisine: Mexican
        Keyword: avocado salsa, chicken, refried beans, tostadas
        Servings: 8 tostadas
        Calories: 398kcal
        Author: Douglas Cullen

        Ingredients

        • 1 lb. chicken breast cooked and shredded and lightly salted
        • 1 16 oz. can refried beans / 2 cups homemade
        • ½ head iceberg lettuce shredded
        • 1 medium white onion very thinly sliced
        • ½ cup Mexican cream crema or sour cream
        • 4 oz. queso ranchero a white crumbly Mexican cheese
        • 2 cups of your favorite salsa: restaurant salsa salsa verde
        • 8 to 12 tostadas

        Instructions

        • ASSEMBLING TOSTADAS
        • Start by gathering all your ingredients.
        • Heat the refried beans.
        • Spread about 1 tablespoon of beans on each tostada.
        • Add shredded chicken.
        • Add shredded lettuce.
        • Add sliced onion.
        • Add 1 tsp. of cream.
        • Add ½ oz. crumbled or grated cheese.
        • Top with salsa to taste.

        Notes

        Substitutions
        • Any of these cheeses are good for preparing tostadas: queso ranchero, queso panela, queso fresco or grated mozzarella.
        • Red onions add a colorful touch.

        Nutrition

        Calories: 398kcal | Carbohydrates: 41g | Protein: 22g | Fat: 17g | Saturated Fat: 5g | Cholesterol: 54mg | Sodium: 1313mg | Potassium: 579mg | Fiber: 7g | Sugar: 6g | Vitamin A: 730IU | Vitamin C: 3.9mg | Calcium: 187mg | Iron: 1.8mg

        More Chicken Recipes

        • Chicken Fajitas in Adobo
        • Chicken Tinga
        • Tomatillo Chicken
        • Chicken Tacos with Avocado Salsa
        • Chicken Taquitos
        • Easy Chicken Fajitas

        Queso con Carne Dip

        Cheese Recipes

        Queso con Carne Dip

        Tex-Mex Chorizo and Cheese Dip

        We are thrilled with our first Tex-Mex recipe on the Mexican Food Journal, Queso con Carne provided by Mary The Cake Chica, a Houston native. Queso was a delicious and fun part of her Friday nights when she was growing up. Here she shares the recipe with you. Enjoy!

        Queso con Carne Dip
        Tex-Mex Style Queso con Carne Dip

        Friday Night Favorite

        Growing up as a kid in my house, Friday nights were all about simple and easy dinners.

        That meant, my mom would make some queso, or cheese dip as she would call it, get a table cloth and lay it out in front of the TV while we watched T.G.I.F. (Am I showing my age?) and we would all have a little bit of a Tex-Mex picnic right there.

        That was Friday night dinner and it was perfect!

        Queso Dip

        Queso is a warm dip you can find at any Tex-Mex restaurant around Houston and other areas of Texas, usually for an additional charge served as an appetizer, with complimentary chips and salsa.

        If the chips and salsa are not free, I suggest eating at another restaurant. In my experience that is never a good sign. Moving forward, there are several ways to enjoy your queso other than just a dip.

        You can use it as a condiment for many Tex-Mex dishes, such as tacos, nachos, fajitas, and enchiladas just to name a few.

        Mom’s Queso

        My mom’s version of queso was made with Velveeta and a can of Rotel. Velveeta is a type of processed cheese and Rotel is canned tomatoes with chilies.

        I am one who likes to keep things real in the kitchen as much as possible, however sometimes real food just doesn’t work out for certain things, like queso.

        I’ve tried a mix of cheddar and Monterey jack cheese, and while good, the texture was just off. Nothing comes close to the creaminess of Velveeta cheese and is what is most commonly used here for queso in Texas.

        I did however use fresh chilies for this recipe. I have to add some freshness in somewhere.

        A Favorite at Every Gathering

        Queso or Queso con Carne always makes an appearance at my family get-togethers no matter if we are making Tex-Mex food or not. It’s just what we do here in Texas. Queso should be served warm.

        The best way to do this is by pouring the dip into a slow cooker to keep warm for your guests. Serve with tortilla chips.

        How to Make Queso con Carne

        Chorizo, Potato and Green Pepper
        Sauté the chiles, onions, and chorizo.
        Melting Velvet Cheese
        Add the cubed Velveeta cheese.
        Melting Velveeta with Chorizo
        Mix in the Velveeta and stir as cheese melts.
        Adding Milk to Melted Cheese
        When cheese is fully melted add milk to get the desired consistency.
        Adding Tomatoes and Cilantro to Melted Cheese
        Add the tomatoes and cilantro and mix into your queso.
        Queso con Carne in Cast Iron Pan
        Queso con carne ready to serve.
        Queso con Carne with Tortilla Chips
        Garnish with sliced jalapeño and cilantro. Serve with tortilla chips.
        Queso con Carne Dip
        Print Recipe
        4.41 from 5 votes

        Queso con Carne Cheese Dip

        Texas queso dip from Mary The Cake Chica – Velveeta cheese with chorizo, onion, tomato, cilantro and jalapeño peppers. Guaranteed to be a favorite at every family gathering.
        Prep Time15 minutes mins
        Cook Time30 minutes mins
        Total Time45 minutes mins
        Course: Appetizer
        Cuisine: Mexican, Tex-Mex
        Keyword: chorizo, dip, queso, queso dip, Texas queso
        Servings: 8
        Calories: 667kcal
        Author: Mary The Cake Chica

        Ingredients

        • 1 teaspoon vegetable oil
        • 3 jalapenos seeded and chopped
        • 3 serranos seeded and chopped
        • 1 small yellow onion chopped, about ½ cup
        • 12 ounces Mexican chorizo
        • 2 pounds Velveeta cut into 1-inch cubes
        • ½ -¾ cup whole milk
        • 1 14- ounce can diced tomatoes drained
        • ¼ cup fresh chopped cilantro
        • 16 ounces Tortilla chips for serving

        Instructions

        • In a 12-inch cast-iron skillet or non-stick skillet, heat oil over medium-high heat and saute the chiles and onion with the chorizo, until vegetables are soft and chorizo is cooked, about 5 minutes.
        • Reduce the heat to low and add Velveeta cubes and stir until Velveeta has melted and is smooth and creamy. Slowly add milk if the queso is too thick. Add as much or as little as you like to achieve your perfect consistency.
        • Add canned tomatoes and cilantro and stir to combine. Serve with tortillas chips.

        Notes

        Party Tip: Queso con Carne is best served warm. To do this, simply transfer the queso to a slow cooker to keep warm. This also works great as a way to transport it to your next family gathering.

        Nutrition

        Calories: 667kcal | Carbohydrates: 54g | Protein: 34g | Fat: 36g | Saturated Fat: 14g | Cholesterol: 73mg | Sodium: 2620mg | Potassium: 653mg | Fiber: 4g | Sugar: 12g | Vitamin A: 1440IU | Vitamin C: 13.4mg | Calcium: 769mg | Iron: 2.8mg

        Provecho!

        More Cheesy Recipes

        • Quesadillas
        • Asadero Cheese Tacos
        • Cheese Enchiladas with Mole Sauce
        • Cream Cheese Dip

        Snack Recipes

        • Street Corn – Esquites
        • Spicy Popcorn
        • Guacamole
        • « Previous Page
        • 1
        • 2
        • 3
        • 4
        • 5
        • 6
        • Next Page »

        I'm Douglas

        I spent 25 years living across Mexico, from Durango and Monterrey to Puerto Vallarta and San Miguel de Allende. Since 2014, we have published nearly 200 of our own Mexican recipes and we have collaborated with professional chefs, established food bloggers, and writers to bring you even more. 

        About me

        Most Popular Mexican Recipes

        • Classic Salsa Verde
        • Bowl of Mexican Restaurant Style Salsa
          Restaurant Style Salsa
        • Bowl of Traditional Mexican Sopa de Fideo
          Traditional Sopa de Fideo
        • Bowl of Authentic Red Pozole
          Red Pork Pozole
        • Bowl of Chicken Tinga
          Chicken Tinga
        • Agua de Jamaica
        • Tres Leches Cake with Berries
          Tres Leches Cake
        • Beet Salad Citrus Balsamic Vinaigrette Recipe
          Beet Salad with Feta Cheese and Citrus Balsamic Viniagrette
        • Cheese Enchiladas with Red Enchilada Sauce
          Red Enchilada Sauce
        • Authentic Mole Poblano
          Mole Poblano

        Footer

        ↑ back to top

        About

        • Privacy Policy
        • Terms & Conditions

        Newsletter

        • Sign Up! for emails and updates

        Contact

        • Contact

        As an Amazon Associate we earn from qualifying purchases.

        Copyright © 2025 Mexico Publishing LLC

        Rate This Recipe

        Your vote:


        A rating is required
        A name is required
        An email is required